8‑bit

So ear­li­er in the sum­mer I start­ed writ­ing a num­ber of cro­chet pat­terns that I was hop­ing to com­pile into an e‑book for sale. But the sum­mer is quick­ly going by, and I’ve had more free­lance work than expect­ed (which is a good thing). So then I real­ize I don’t real­is­ti­cal­ly have the capac­i­ty to pat­tern-test, cal­cu­late for dif­fer­ent sizes, etc. in order to make the pat­terns sell-able. So! I’m just going to con­tin­ue in this blog’s tra­di­tion in shar­ing pat­terns for free! :D It’s just that it will require some creative/math work if you’re not mak­ing the exact same size I’m wear­ing. But that also means lots of rooms for cus­tomiza­tion! This is the first of the few pat­terns I was work­ing on :)

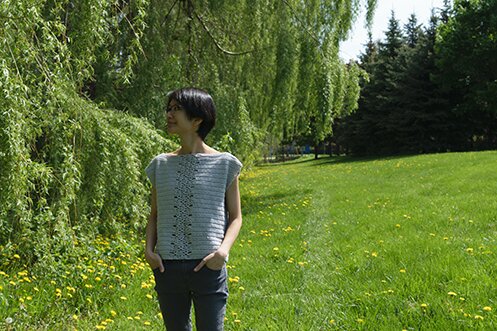
I’ve always want­ed to try using cor­ner-to-cor­ner (c2c) cro­chet to make a top. My first idea was a cozy sweater with a dinosaur on it (I might still do that, we’ll see!), but all these heat waves we’ve been hav­ing are not con­ducive to cozy sweater-mak­ing, so I thought I’d try with a lace weight yarn for a breezy sum­mer top. 

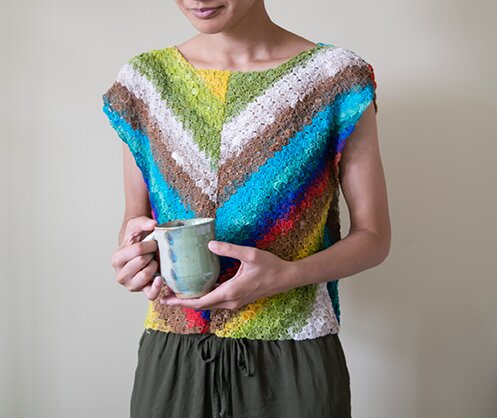
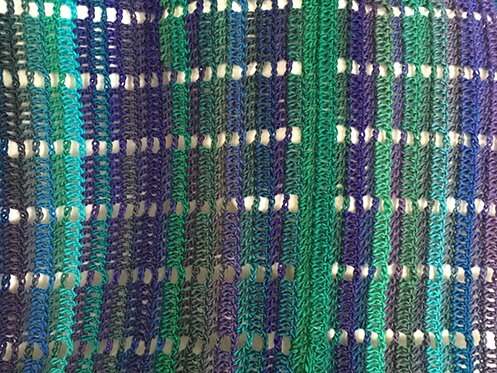
The “tiles” made in c2c cro­chet reminds me of colour­ful pix­els, and Nin­ten­do video games of my child­hood, and sum­mer vaca­tion spent play­ing these games. So I called it “8‑bit”.

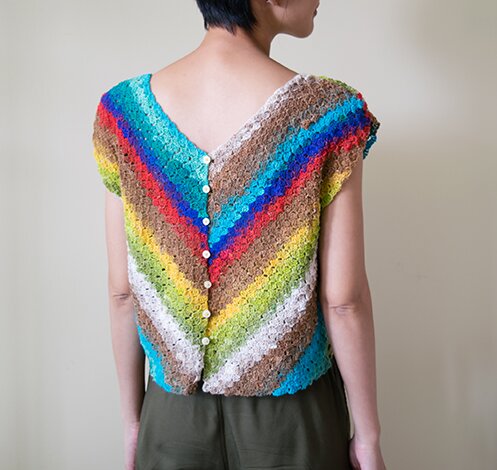
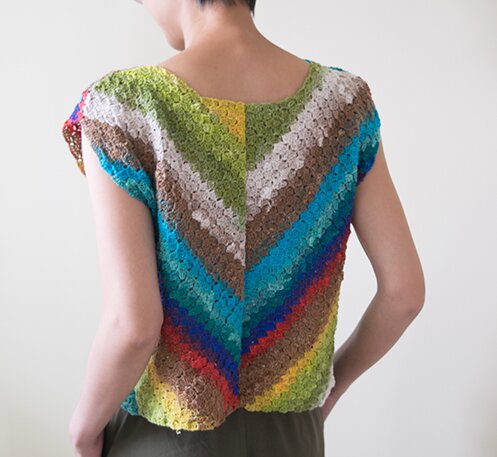
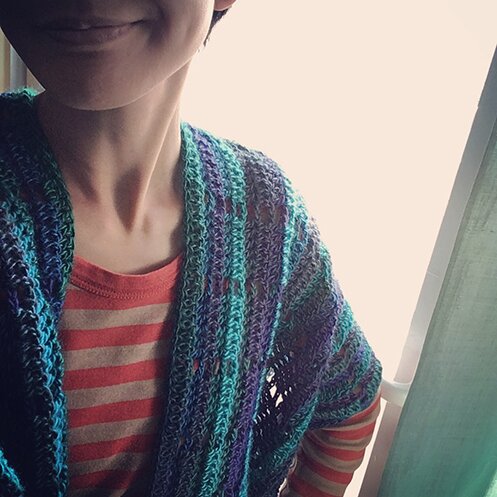
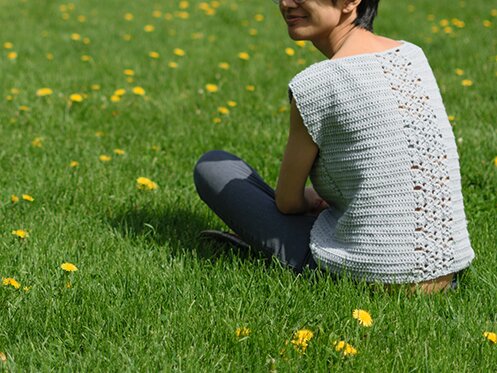
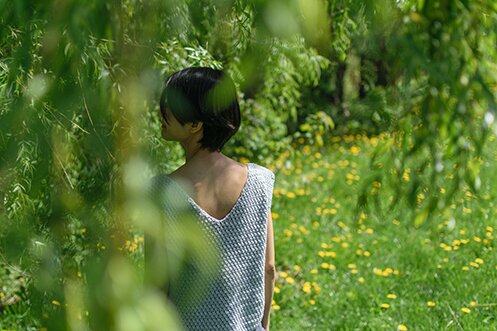
It can be worn both ways, either with the but­tons on the front, or on the back!

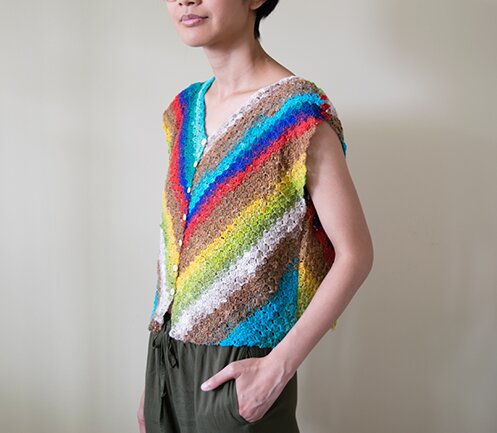
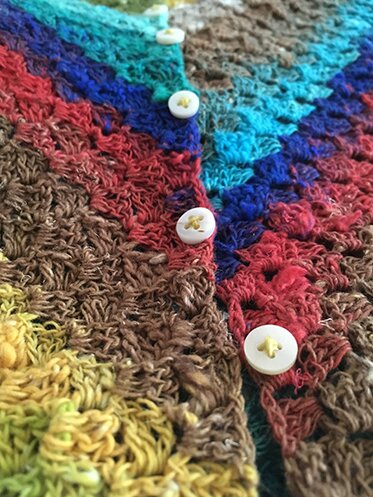
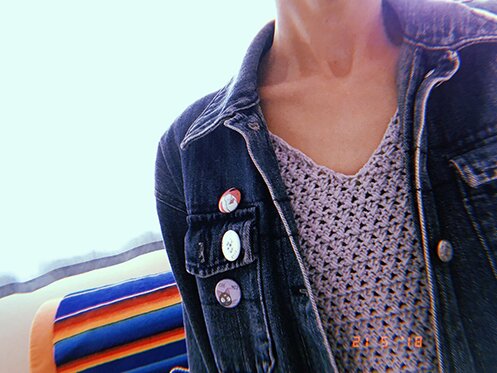
But­tons in the front makes it a cardi­gan, which can be paired with a spaghet­ti strap sum­mer dress!

The top is made in 4 pieces then sewn togeth­er. So you can also sew the v‑neck pieces togeth­er and place the but­tons on the round-neck side.

There is also some shoul­der shap­ing so that the cap sleeves will fol­low the shoul­ders rather than stick out. I thought that goes bet­ter with the gen­tle, del­i­cate feel of the lace weight Noro Taiyo.

Size: Bust 36″, arm­hole depth 7″, neck open­ing width 8″, total length 17″

Size is easy to adjust as you go with the c2c cro­chet stitch. There will be tips for adjust­ment through­out in ital­ics.

Gauge: 5x5 “tiles” = 2“x2”

Mate­r­i­al: 

3.5 mm hook, and the small­est hook you have for weav­ing in ends (mine is 1.5 mm)

Lace weight yarn about 1100 yards (I only used a bit of the sec­ond skein of Noro Taiyo Lace, one skein of this is over 900 yards), larg­er sizes will require more yarn

Sev­en 1/2″ buttons

Sewing nee­dle

Cor­ner-to-cor­ner cro­chet: this pat­tern requires famil­iar­i­ty with c2c cro­chet. If you’ve nev­er used this stitch before, no wor­ries! It’s quite easy and I find it rather med­i­ta­tive too. There are tons of very detailed tuto­ri­als out there. I learned from the pho­to tuto­r­i­al by One Dog Woof, take a look and use some scrap yarn to prac­tice, and I’m sure you’ll be ready in no time!

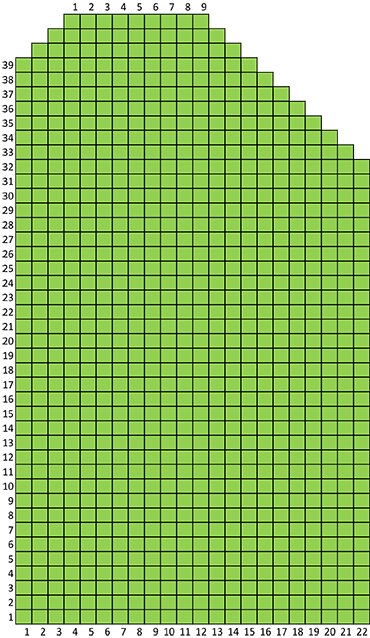
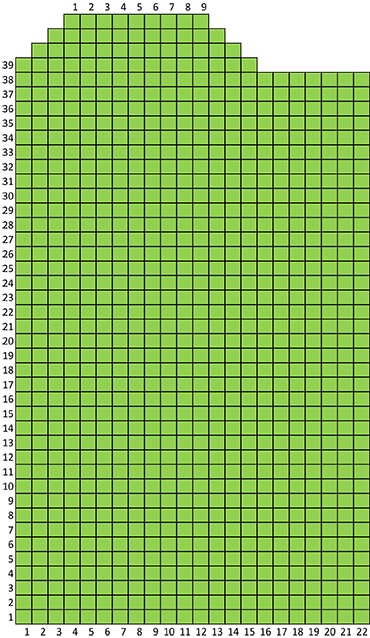
Charts:


Pattern/recipe:

V‑neck piece (make 2):

Start from the low­er left cor­ner, tile 1. Con­tin­ue through chart. Chart is read diag­o­nal­ly. Fol­low this excel­lent pho­to tuto­r­i­al by One Dog Woof if you need some help!

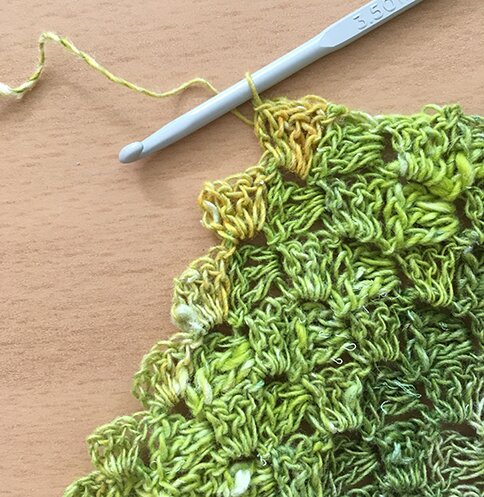
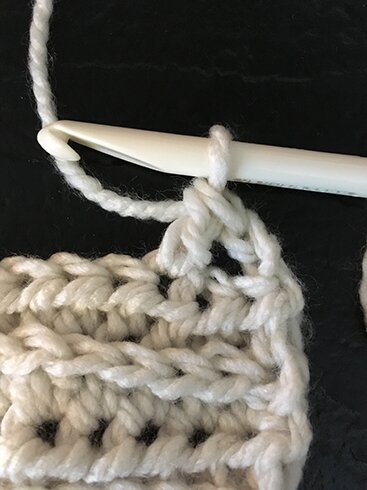
When there are 22 tiles on both edges, begin decreas­ing on the right edge by work­ing 1 sl st through each dc just made, and sl st in turn­ing ch, then ch 3, 3 dc in turn­ing ch, and con­tin­u­ing on.

For a larg­er gar­ment, con­tin­ue work­ing more tiles until desired width before decreas­ing. To deter­mine “desired width”, decide on fin­ished bust mea­sure­ment you’d like for the top. Say 40″. Divide it by 4, which is 10″. Then con­tin­ue c2c cro­chet until both edges are 10″ long before decreas­ing on the right edge. Note the num­ber of tiles you have at the bot­tom edge when you reach desired width. You will need to have the same num­ber of tiles on the bot­tom edge of each of the pieces.

Con­tin­ue increas­ing on the left edge but decreas­ing on the right edge until the left edge has 37 tiles. 

For a longer gar­ment, con­tin­ue increas­ing on the left edge until desired length. Note the num­ber of tiles when you reach desired length.

Shape shoul­der:

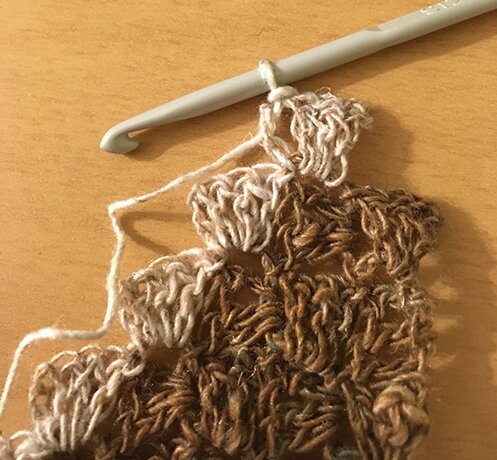
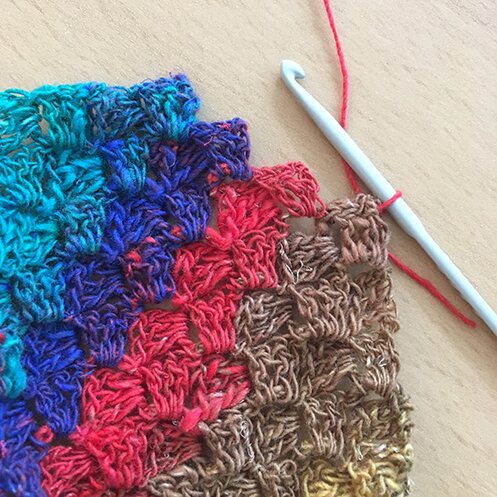
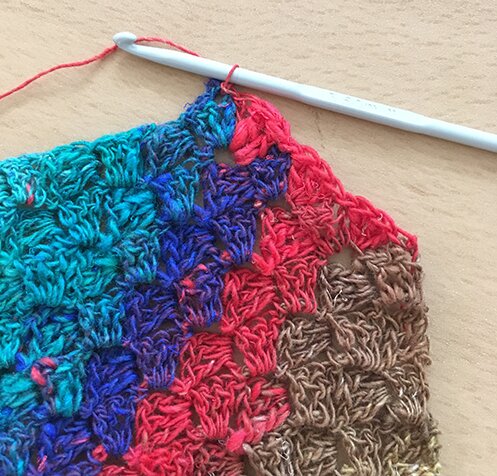
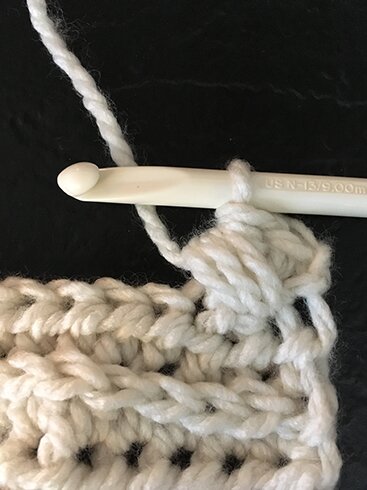
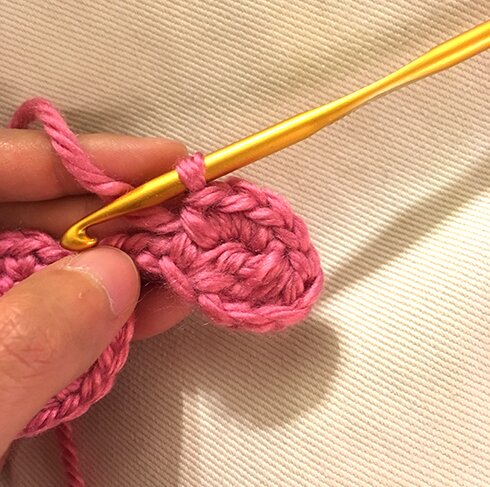
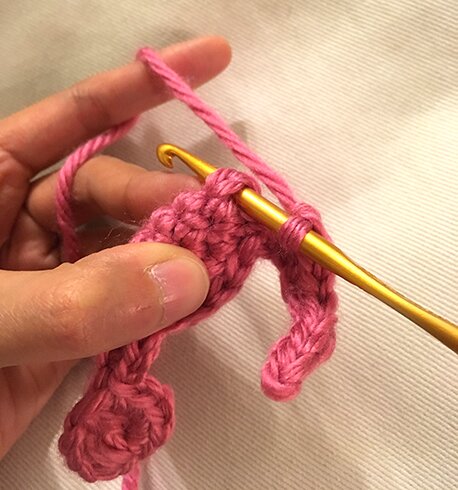
Begin decreas­ing on the left edge after the 37th tile (or desired length). Work one row towards the right edge, then one row towards the left edge. After cro­chet­ing the last tile on the top edge, work anoth­er tile on top of the pre­vi­ous row (I placed an addi­tion­al white tile on top of the brown tile of the pre­vi­ous row).

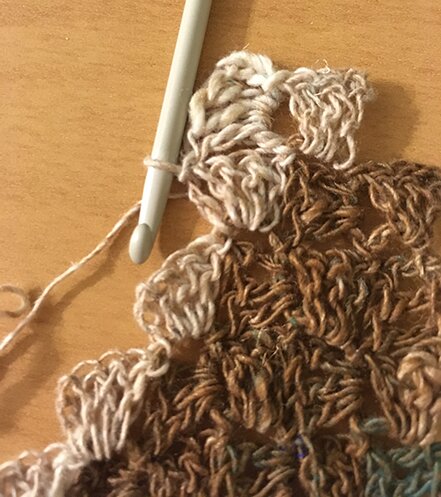
Then, as usu­al, turn, sl st in next 3 dc, sl st in turn­ing ch.

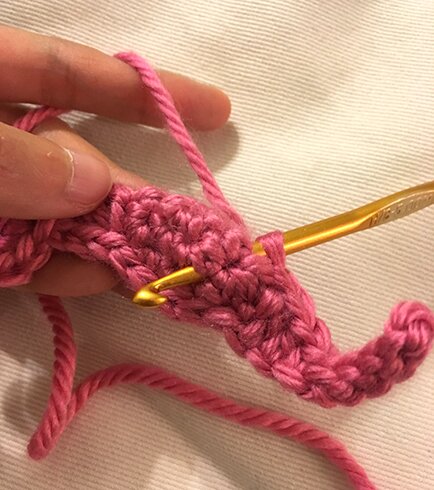
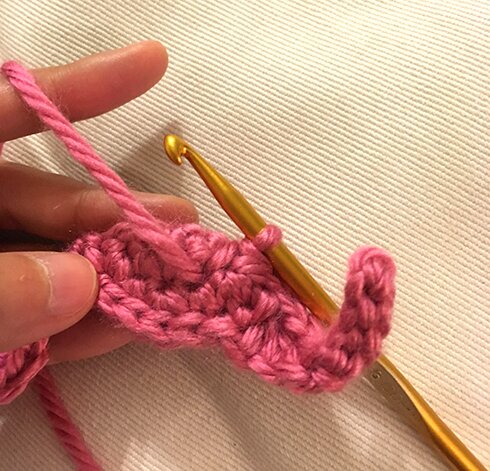
And con­tin­ue down the row.

Repeat the above steps for shoul­der shap­ing until shoul­der resem­bles the chart. 

(We’re of course not going to leave the shoul­ders jagged! We’ll fill in the cor­ners as we sew them togeth­er later.)

Then, decrease on both the top edge and the right edge until there are 9 tiles at top edge. End with work­ing loop on the top edge, don’t fas­ten off.

If you have increased in the bot­tom edge, increase the same num­ber of tiles at the top edge.

Neck edge:

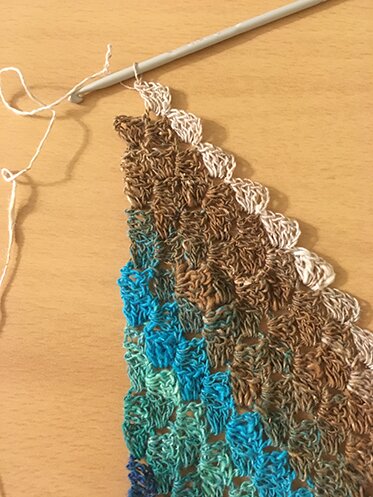
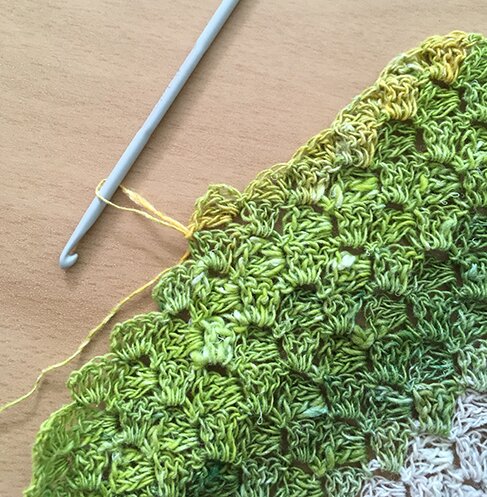
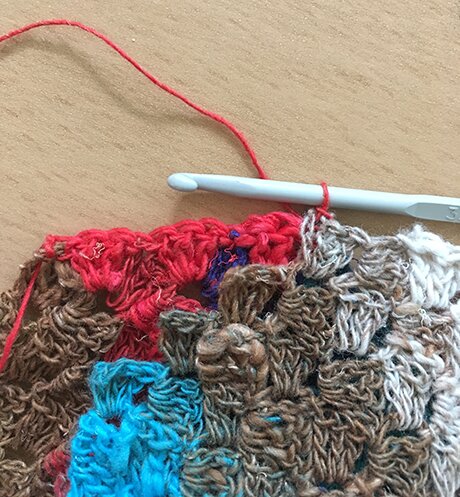
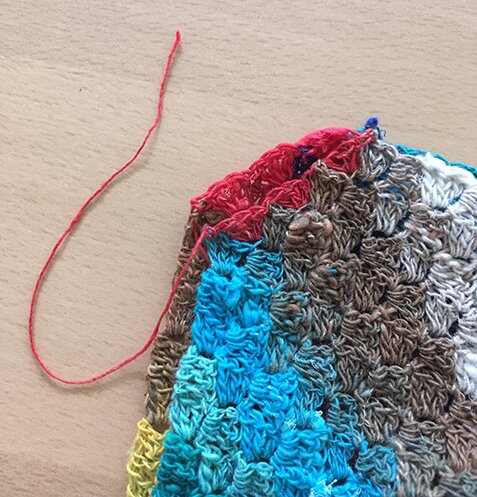
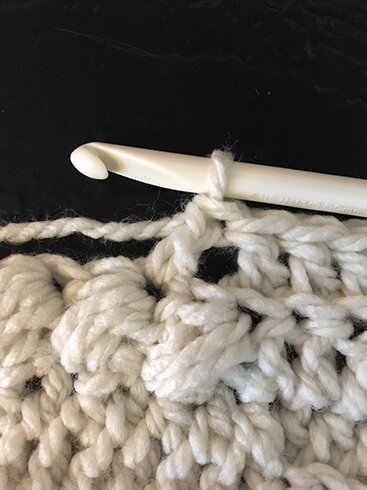
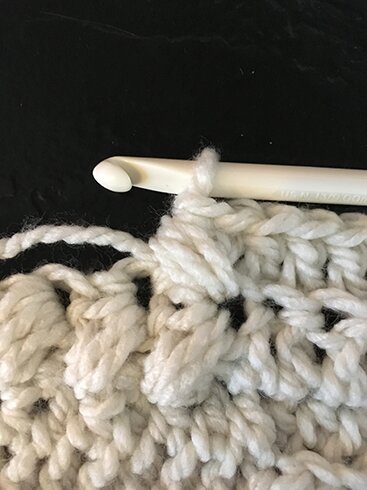
*Work 3 dc in the cor­ner between first two tiles (where the low­er left cor­ner of the tile the work­ing loop is on meets the top right of the next tile), sl st in next turn­ing ch* repeat from * to * until end of row (the neck edge is shown in the next pho­to). Fas­ten off.

Round-neck piece (make 2):

Fol­low pattern/recipe until neck edge. (mak­ing the same increas­es if you’ve made them in the v‑neck pieces.)

*Work 3 dc in the cor­ner between first two tiles, sl st in next turn­ing ch* repeat from * to * 3 more times, ch 3, 3 dc in turn­ing ch.

Con­tin­ue in c2c stitch pat­tern, decreas­ing on both edges until there final tile is made, fas­ten off.

Sew halves together:

Sew togeth­er the cen­tre seams of the two round-neck pieces.

Seam­ing shoulders:

With wrong side fac­ing, attach yarn to low­er edge of shoul­der on one piece.

*Work 3 dc in cor­ner between the first two tiles, sl st in next turn­ing ch* repeat from * to * until end of row, don’t fas­ten off.

With right sides togeth­er, place shoul­der of v‑neck piece to the shoul­der of the round-neck piece just com­plet­ed, match­ing both pieces. With work­ing loop still attached to the round-neck piece, sl st in top of shoul­der of v‑neck piece.

*Work 3 dc in cor­ner between the first two tiles, sl st in next turn­ing ch* repeat from * to * until end of row, leave a long tail for sewing, fas­ten off. 

Sew entire shoul­ders togeth­er (the slopes we just worked on and the top edges). Repeat on the oth­er shoulder.

The rest of assembly:

With wrong sides fac­ing, sew side seams togeth­er. For my top I count­ed 17 tiles down from shoul­der for 7″ in arm­hole depth, then start­ed sewing to the bot­tom edge. If mak­ing a deep­er arm­hole, mea­sure the desired depth and count the num­ber of tiles with­in the measurement.

But­tons:

Sew but­tons on one edge where the turn­ing ch on the edge will form nat­ur­al but­ton holes, which is every 4th tile.

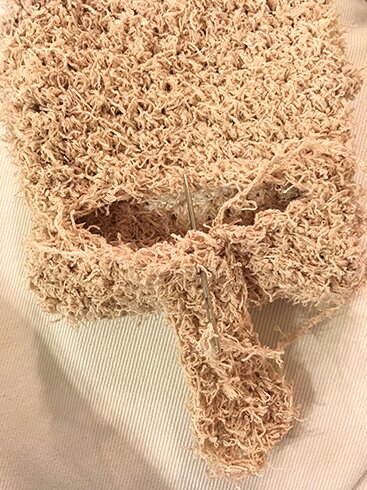
Weave in all the ends with a tiny hook, and we’re done! :D

Leave a com­ment if you have any ques­tions or need clar­i­fi­ca­tions! Hap­py crocheting!


Lately

After a bit of fren­zy gear­ing up for the Yarn Hop, I’ve been qui­et on the blog late­ly, catch­ing up on oth­er things…

My niece and nephews have birth­days rel­a­tive­ly close to each oth­er, so every sum­mer we give them all their gifts at the same time — that way every­one gets to open a gift! :D

One of the gifts was a loom knit­ted dinosaur — when I first stum­bled upon it on the web I thought I had to make this! The pat­tern is by The Loom Muse

(The wood­en dinosaur is a gift from a dear friend :D) I find that with the extra small 12-peg loom the gauge is very loose, and I end­ed up hav­ing to weave a strand of yarn through all the stitch­es in every col­umn of knit­ting to pre­vent the stuff­ing from being vis­i­ble. Per­haps I will have to try using an even heav­ier yarn next time (I used extra bulky for this one). I’m still quite hap­py with how it turned out!

Anoth­er gift was an owl pup­pet, pat­tern also by The Loom Muse but only avail­able as a video. The pat­tern is for a stuffed owl but I ran out of yarn, so I left the bot­tom open and a pup­pet it is!

I love that it also has a tail! :D

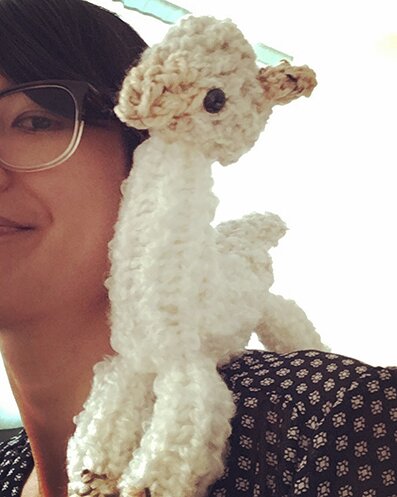
And we’ve all met the alpaca! The mas­cot I loom-knit­ted for the Yarn Hop (because we were team alpaca). The pat­tern is also by the Loom Muse (it is a trea­sure trove of stuffed ani­mal pat­terns!). Here’s our fab­u­lous team in front of the won­der­ful Pur­ple Purl! (You can also kind of see the makeshift alpaca car­ri­er on my tote.)

Through­out the day alpaca got named Albert, inspired by Lam­bert at Spin Me a Yarn, anoth­er local yarn shop :D (you’ll find Lam­bert and his yarn adven­tures on this Ins­ta feed)

Here’s Albert at Yarn­som­ni­acs enjoy­ing the very soft yarn made by his friends.

As you can see we also made an alpaca sign to keep us humans from wan­der­ing off. The super cute tem­plate is from Picot Pals. Here he is at Knit-O-Mat­ic with every­one busy look­ing and crafting! 
And here we are at Pas­sionknit — note the beau­ti­ful wall of Cana­di­an hand dyed yarn on the right!

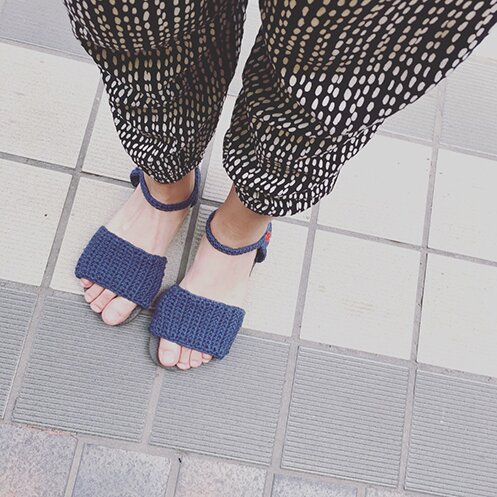
In oth­er news, I wore my cro­cheted san­dals out­side for the first time since mak­ing them last year (or even the year before?). I don’t know why I haven’t worn them. Wor­ried they’ll break I sup­pose. But it’s been so warm late­ly, I decid­ed to give them a go. It’s real­ly dif­fi­cult for me to find san­dals that don’t hurt my feet, so I haven’t bought or worn san­dals for like the past ten years, and always suf­fered from socks and sneak­ers no mat­ter the heat wave >_< 

So I wore these out on the street, walked around, took the sub­way and street­car, walked on the grass… and they’re real­ly com­fort­able! My sum­mer shoes prob­lem is solved! :D 

In case any­one’s inter­est­ed, they’re made with flip flop soles and worsted weight cot­ton, pat­tern is here.

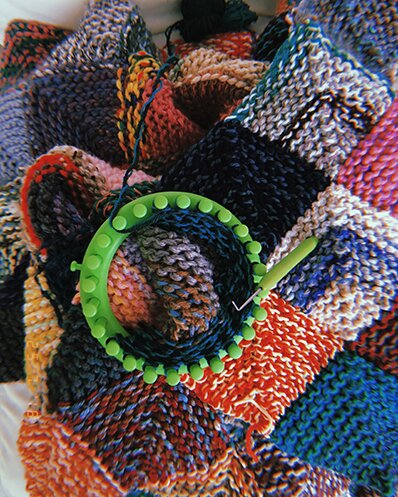
And final­ly, I’m down to my last row of the mitered square blan­ket!! 

There will be 150 squares in total! And about 4 feet by 5.5 feet! I have been slow­ing down with mak­ing this though because inevitably I have to put it on my lap to knit and it’s been real­ly warm >_< def­i­nite­ly a win­ter project, for next time. But soon I’ll be able to show you the blan­ket with all 150 squares in all its glory! 

Until next time, keep on crafting!
 

today is the day! =(^・x・^)=

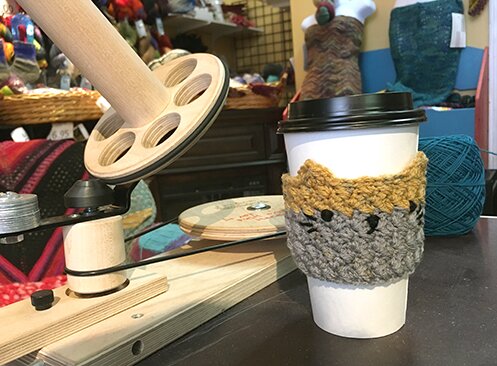
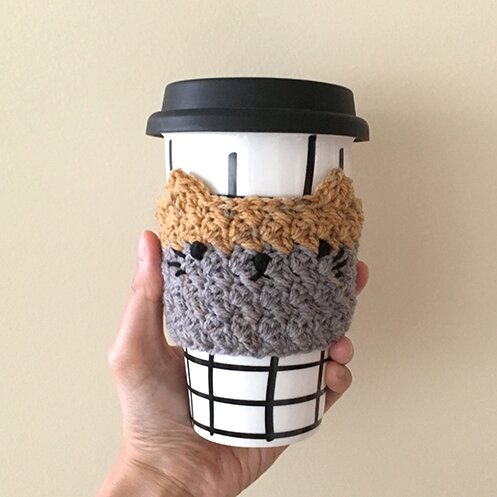
Today IS the day! The annu­al Toron­to Yarn Hop! Catur­day the cup cozy is chill­ing out at my neigh­bour­hood LYS Yarn­som­ni­acs, one of the many excit­ing stops on our grand tour of Toron­to LYS’s today!

A bunch of us (over 120 peo­ple, to be more pre­cise! :D) are yarn-craft­ing in pub­lic tran­sit and going around to dif­fer­ent inde­pen­dent yarn shops today while rais­ing funds for Sis­ter­ing, a 24/7 drop-in/­sup­port cen­tre for women who are home­less or pre­car­i­ous­ly housed. Last year we raised around $2700, which went toward much need­ed ser­vices such as pri­ma­ry health­care, coun­selling, sup­port groups and meal pro­gram (learn more about the event by read­ing my pre­vi­ous post here).

If you’re not able to phys­i­cal­ly come to the yarn hop this year, you can still join us (and help us reach our fundrais­ing goal of $3000!) by donat­ing to Sis­ter­ing through this link here, and in return I will send you the pat­tern for the Catur­day cup cozy (more pho­tos here), which is a pat­tern that I wrote for yarn hop par­tic­i­pants to cro­chet along. You can donate any amount and you don’t have to tell me how much or send me proof, just sim­ply make a dona­tion then email me at genuinemudpie@gmail.com to let me know, and I will send you the pat­tern in appreciation :)

Hap­py weekend!


Caturday… and count down to YARN HOP!


The Great Toron­to Yarn Hop is com­ing up in exact­ly a week, on July 14! :D

All of us vol­un­teers are get­ting super excit­ed and busy orga­niz­ing for a fun day knit­ting/cro­chet­ing/­yarn-craft­ing in pub­lic with oth­er yarn enthu­si­asts. It’s a great event for peo­ple to get to know each oth­er, make a state­ment about the impor­tance of craft and cre­ativ­i­ty by craft­ing in pub­lic, and sup­port inde­pen­dent yarn-craft businesses.

So how does it work, you ask? Yarn-hop­pers buy tick­ets and get orga­nized into teams that take dif­fer­ent pub­lic tran­sit routes through­out the city to vis­it dif­fer­ent inde­pen­dent yarn shops. At the end of the day we recon­vene at a resto-pub for food, drinks and raf­fles. Pro­ceeds from tick­ets and raf­fles go to Sis­ter­ing, a 24/7 wom­en’s sup­port and drop-in cen­tre that offers much need­ed ser­vices like pri­ma­ry health­care, sup­port groups, coun­selling and meal pro­gram to women who are expe­ri­enc­ing homelessness/precarious hous­ing, social mar­gin­al­iza­tion and oth­er chal­leng­ing circumstances.

Sis­ter­ing has a spe­cial place in my heart because that was where I trained as a social work­er. The par­tic­i­pants, vol­un­teers and staff were the most valu­able, knowl­edge­able teach­ers and I would­n’t know what I know now and be where I am today with­out them.

There are still tick­ets left on a few of the routes, you can find out more details and buy tick­ets here

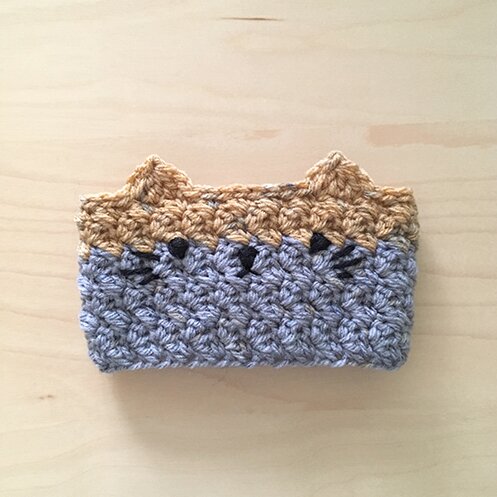
If you can’t phys­i­cal­ly come to the Yarn Hop, you can still join us! I wrote a cro­chet cup cozy pat­tern as part of the gifts for the Yarn Hop par­tic­i­pants, called Catur­day (because, you know, the Yarn Hop is on a Sat­ur­day). You can donate to Sis­ter­ing through this Yarn Hop link, and I will send you the pattern! 

You can donate any amount, and you don’t have to let me know how much you donat­ed or send me any proof, I trust that we all want to make a dif­fer­ence in some­one’s life when we have the oppor­tu­ni­ty to. Sim­ply send me an email at genuinemudpie@gmail.com let­ting me know that you have donat­ed, and I will send you a pdf file of the pat­tern in reply :)

The cup cozy uses a small amount of DK yarn and 4 mm hook. It has a dense, tex­tured fab­ric that will keep your fin­gers safe from hot bev­er­ages. If you’re not into cats, sim­ply omit the last row and the embroi­dery, and you’ll have a sim­ple yet not-so-plain cup cozy to show off a beau­ti­ful yarn. Great for using up scraps!

Want to know more about how your dona­tions will make a dif­fer­ence? Vis­it Sis­ter­ing’s web­site for infor­ma­tion and inspir­ing sto­ries from the most resilient women. 

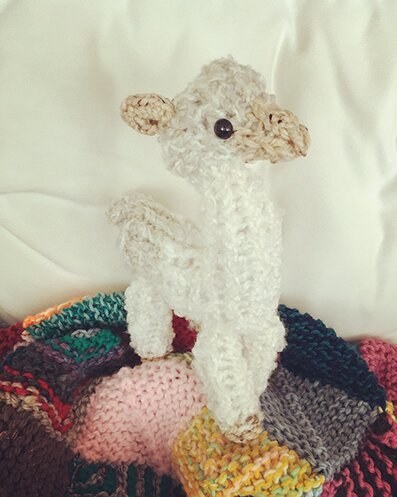
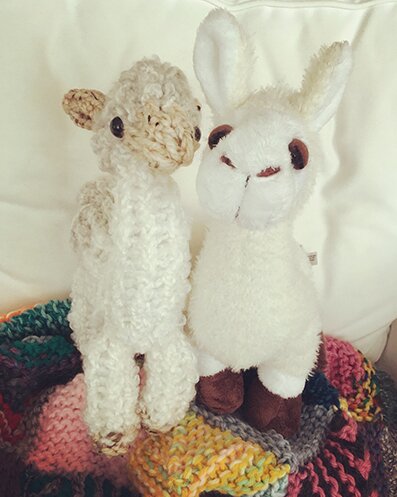
In the mean­while, I was also busy loom knit­ting a mas­cot for the team that Mike and I are co-lead­ing — Team Alpaca! Look how cuu­uute… (if I do say so myself, haha)

I’ve named him Cousin Alpaca, because I have a plush lla­ma, who is per­haps like a cousin to alpaca…? Any­way, I thought Cousin Alpaca is a good name :D

If you loom knit and want to make your own alpaca, the pat­tern is by the Loom Muse and can be found here

If you’re in or near Toron­to, come hang out with us and Cousin Alpaca next Sat­ur­day! :D Hope your week­end is full of crafty goodness!


sneak peeks!

It’s been qui­et on the blog for a while, and that’s because I’ve been busy work­ing on a mul­ti-pat­tern project!

I’m going to put out an e‑book!

Yes!

I thought I’ve been writ­ing up pat­terns for a while, per­haps it’s time to put togeth­er some­thing more “offi­cial”, with dif­fer­ent siz­ing options, etc.

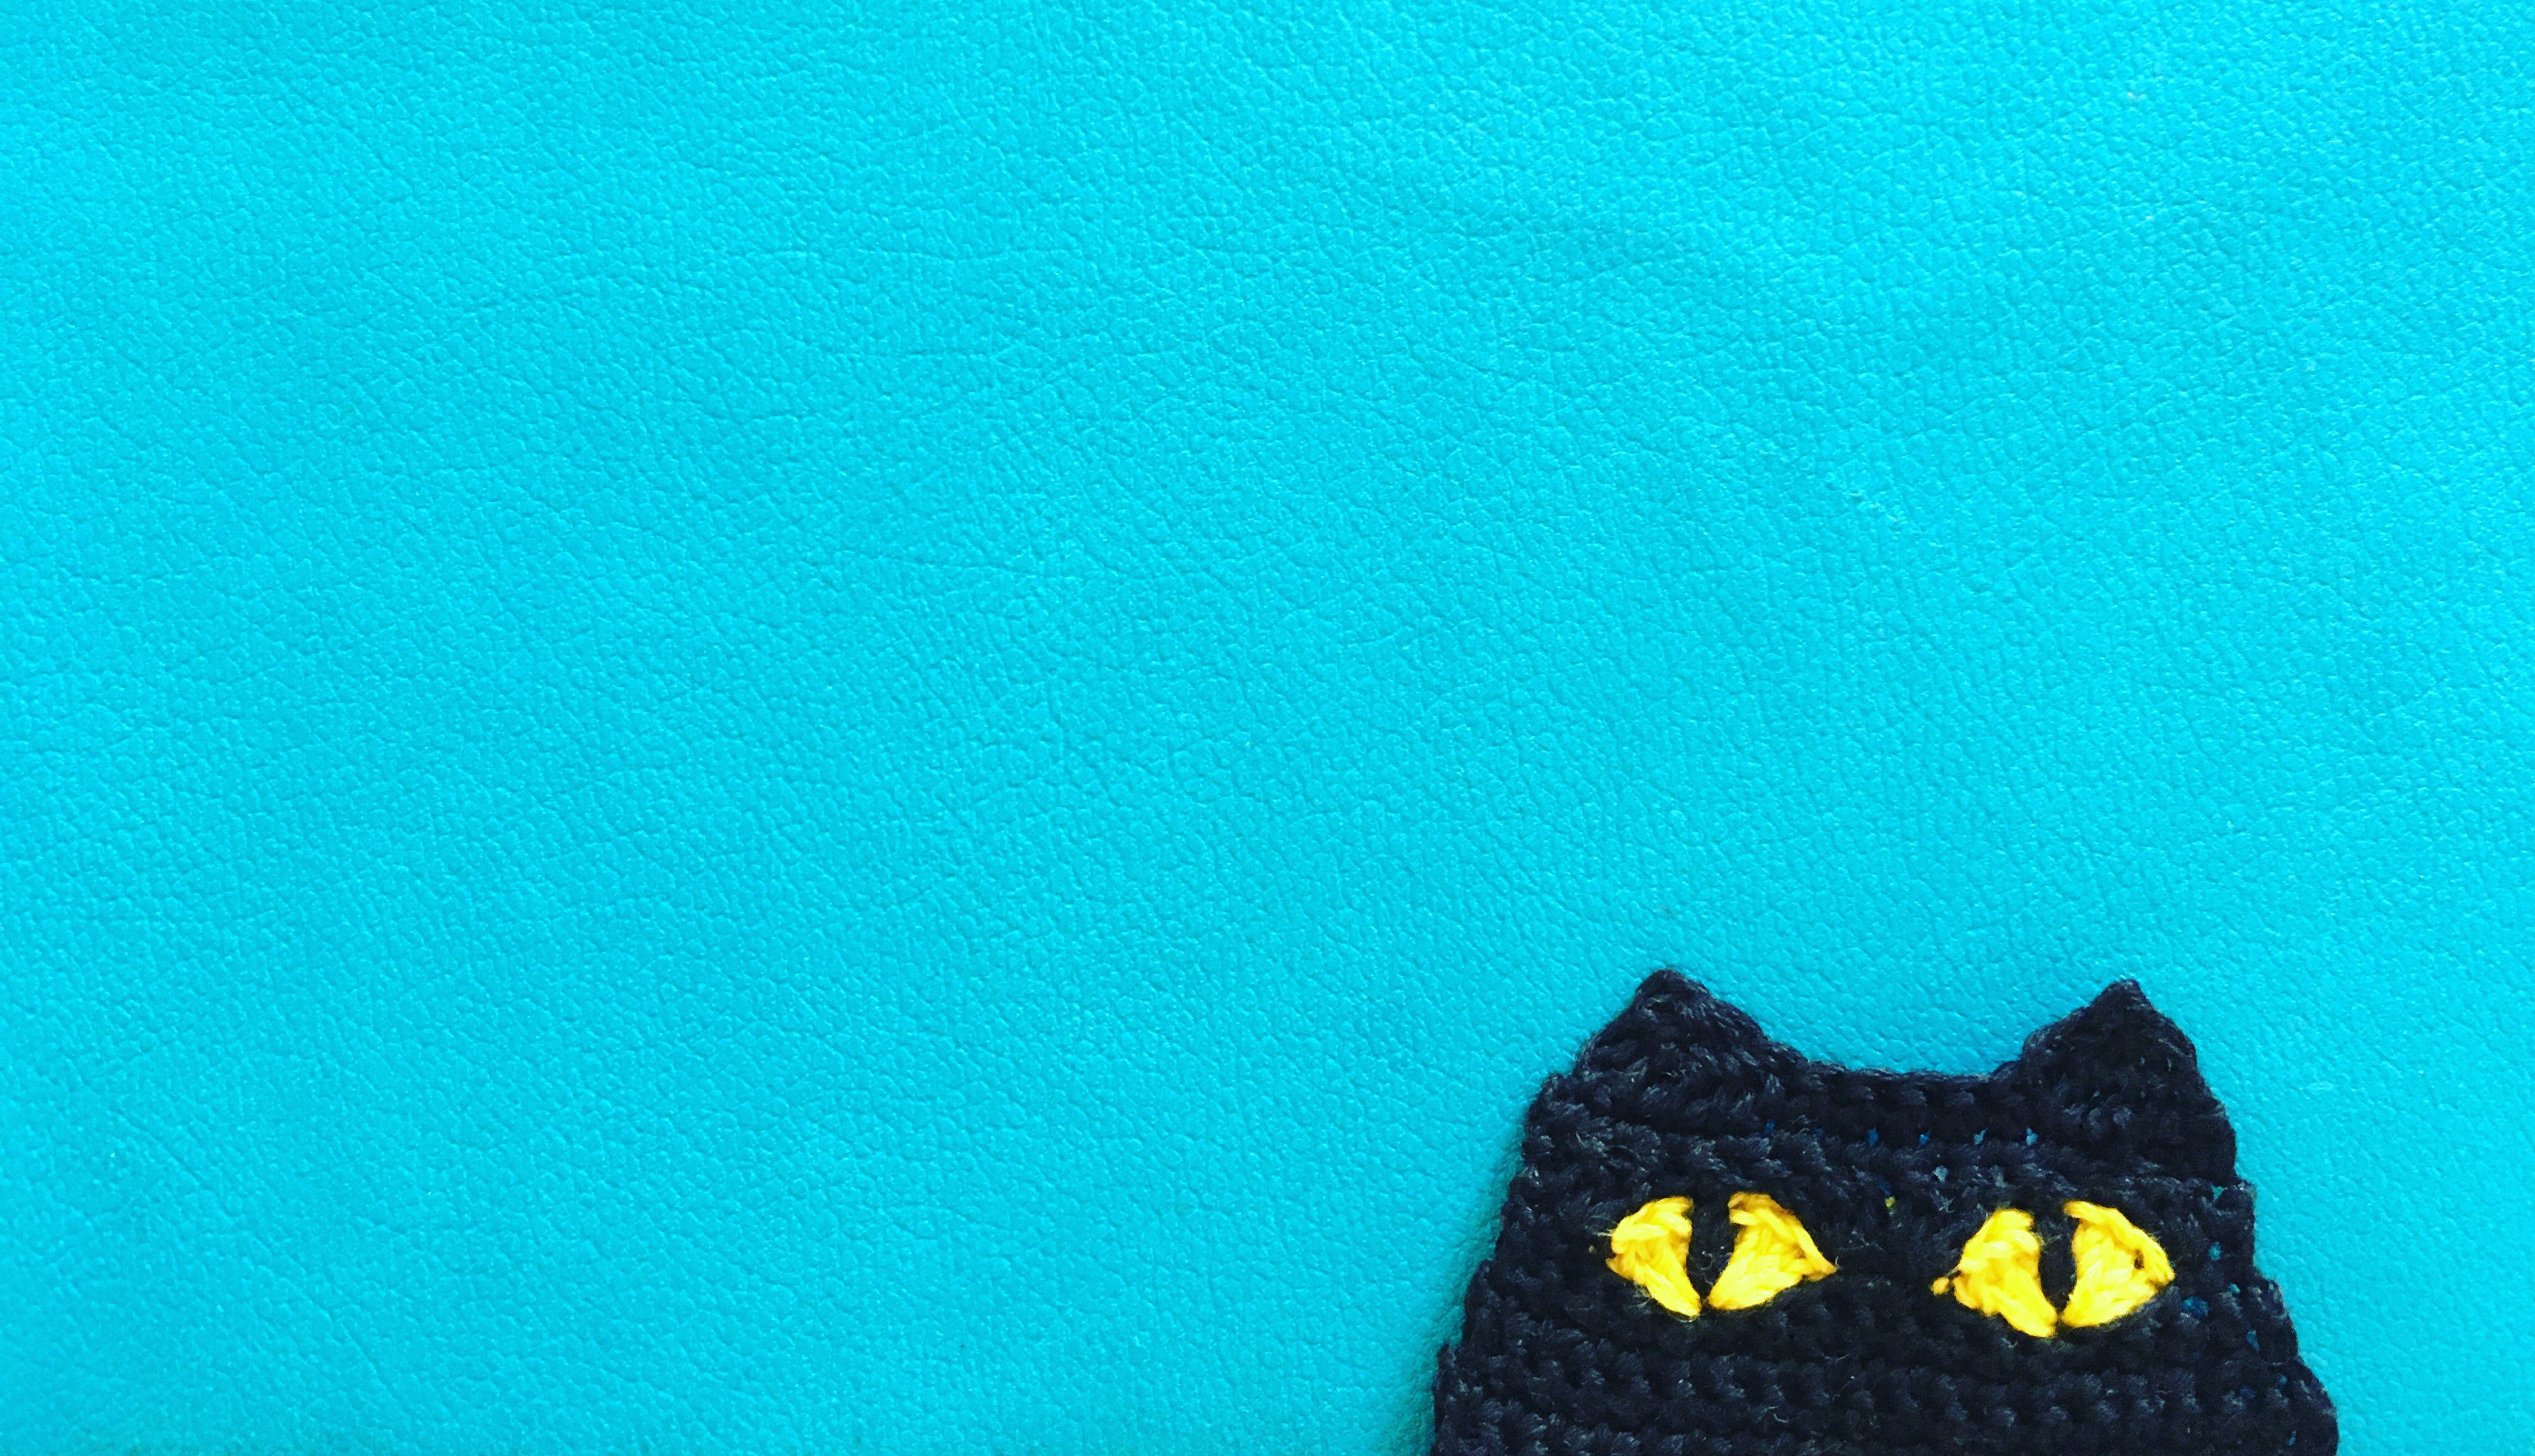
One of the projects does involve the above black cat, and to join in the fun you can down­load the peek­ing cat pic­ture above as a desk­top wall­pa­per! Get the full size pic­ture here and then right-click it to set it as a back­ground, so you too can have those glow­ing eyes peer­ing at you every time you turn on your computer ;)

Here are a few sneak peeks of some of the pat­terns in the book! I’m still work­ing on one oth­er, hop­ing to put this out some­times in July :) 

Yes, this top can be worn with either side in front — it’s like two tops in one! :D

And this one def­i­nite­ly needs a bet­ter pho­to shoot than stripes-on-stripes — but I was feel­ing hap­py that the drape worked out as the way I imagined.

So, stay tuned! :D And hope every­one’s enjoy­ing some sun this week!


the sharing hat

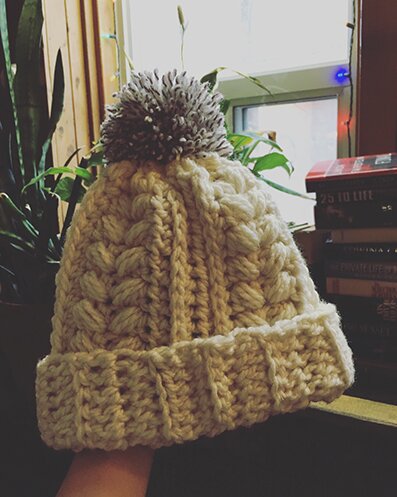
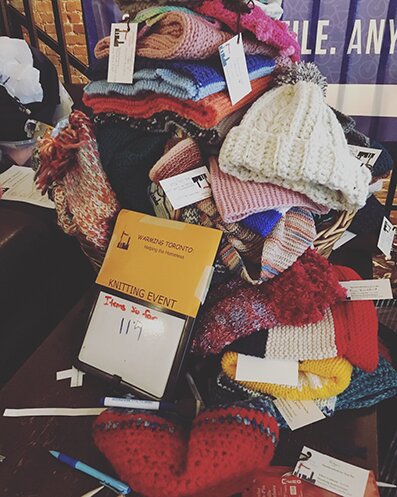
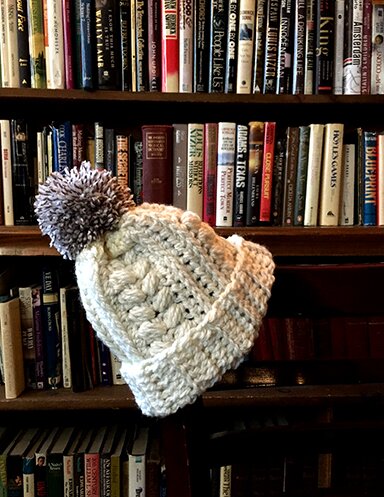
This hat was made and the pat­tern writ­ten while Mike and I par­tic­i­pat­ed at the Warm­ing Toron­to event at the end of Feb­ru­ary, which was an event in which peo­ple gath­er togeth­er and make hats and scarves for shel­ters and out­reach pro­grams in the city. So I’m shar­ing this pat­tern with these intentions:

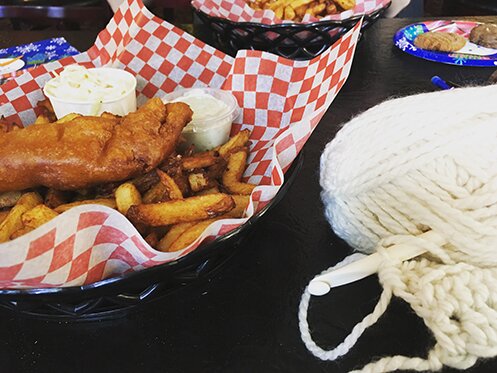
1) The hat is quick to make. I had to restart sev­er­al times while I was fig­ur­ing out a pat­tern, and I was also eat­ing a very deli­cious plate of fish and chips (AWAY from the yarn — this set­up was only for Insta­gram!), but I made the hat from start to fin­ish with­in 4 hours, so mak­ing it from the pat­tern should take much less time!

2) Since it’s such a quick make, I’m hop­ing that this will encour­age you to make one for your­self and make anoth­er to pass it on to some­one who can real­ly use a thick and warm hat!

Behold the cozy yarn pile — by the time I fin­ished the hat we’ve col­lect­ed 114 fin­ished items! :D

The event took place at a pub, which has an upstairs library with couch­es and fire­place, per­fect for yarn-craft­ing and pro­vid­ed back­grounds for my pho­to shoot that are much more inter­est­ing than what I usu­al­ly have :D

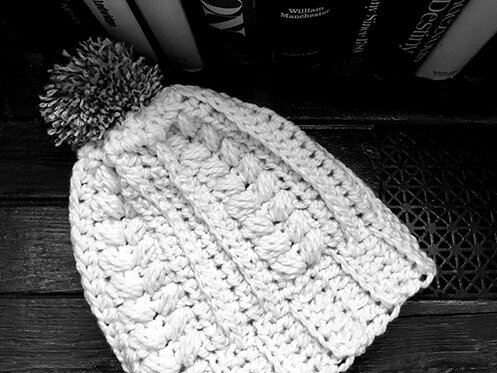
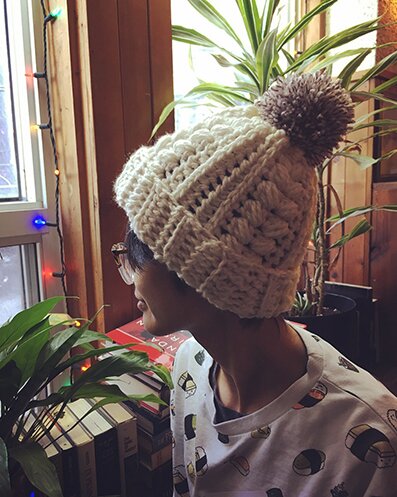
The hat is worked side­ways then seamed togeth­er. It has rows of braid­ed puff stitch and tex­ture cre­at­ed by cro­chet­ing into the 3rd loop on the back of a half-dou­ble cro­chet stitch. If you haven’t tried nei­ther of those stitch­es, don’t wor­ry, I took plen­ty of process pho­tos to show how it’s done :)

The hat mea­sures about 9″ tall (brim fold­ed) and 20″ around. 

Mate­r­i­al:

Two skeins of Bernat Sof­t­ee Chunky, or oth­er super bulky weight yarn (the hat uses about 150 yards, so 3 skeins would make 2 hats! :D)

Con­trast­ing colour yarn for pom pom.

9 mm hook, and a small­er hook for weav­ing in ends.

Yarn nee­dle.

Pat­tern:

*Note: begin­ning ch does not count as a stitch through­out the pattern.

Row 1 (RS): ch 26, hdc in 3rd ch from hook, hdc in each ch to end. (24 hdc’s)

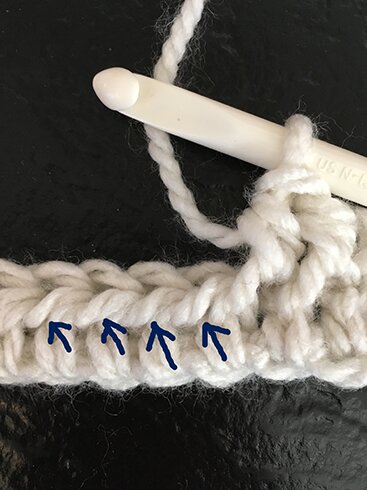
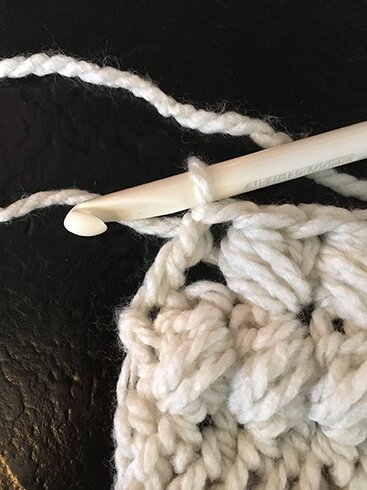
Row 2 (WS): ch 1, hdc in back loop only (BLO) in the first 6 hdc’s, then hdc in the 3rd loop in each of the remain­der of the hdc’s, like so…

You would insert the hook into the strands of yarn in the direc­tion of the arrows. This cre­ates a nice raised braid on the right side :)

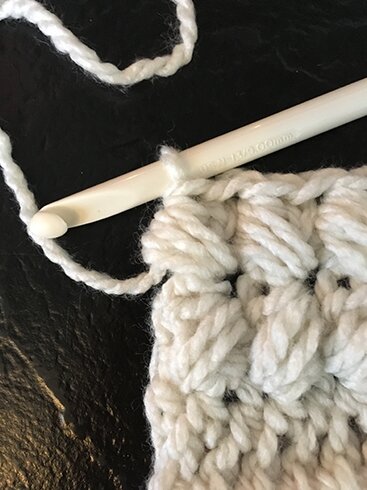
Row 3: (puff braid row) ch 3, skip first 2 hdc, dc in next hdc…

[yo and pull up a loop] three times in the first hdc of the row, then pull through all loops on hook (puff stitch made)…

*skip next hdc, dc in next hdc, puff st in the same hdc as last dc made* rep from * to * till there are 7 hdc’s left in row, dc BLO in each hdc to end.

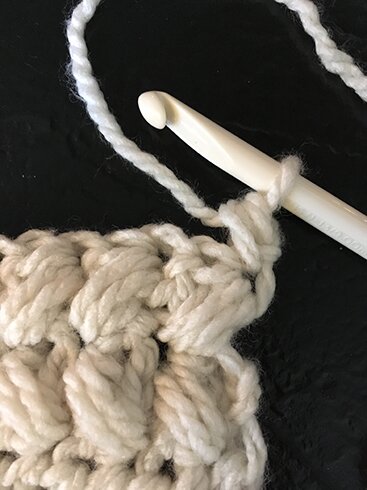
Row 4: (puff stitch row) ch 1, dc BLO in next 7 dc, sk next st, dc in next dc (between 2 puff st’s)…

puff st in the st before the skipped st…

*skip next st, dc in next st, puff st in st before skipped st* rep from * to * till end of row. When arriv­ing at the end of row, work last dc in the very last st…

Then end with a puff st.

Row 5: ch 1, make sure the first hdc is made in the very first st…

Then hdc in next 17 st’s, hdc BLO in last 6 st’s.

Row 6: ch 1, hdc BLO in first 6 hdc’s, hdc in the 3rd loop in the remain­ing 18 hdc’s.

Row 7: ch 1, hdc in first 18 hdc’s, hdc BLO in remain­ing 6 hdc’s.

Repeat rows 2–7 three more times, except in the last repeat, omit row 7 and end with row 6.

Decrease row at top: ch 1, 2 dc tog even­ly across the top of the hat.

Cut yarn and leave a long tail for sewing. Thread yarn tail in yarn nee­dle, weave yarn tail through the stitch­es at the top of hat, cinch close and tie to secure. Turn hat inside out, sew seam. Make and attach pom pom. Fold up the brim for extra warmth!

I hope you enjoy mak­ing the hat! Leave a com­ment if you have any ques­tions or need clar­i­fi­ca­tions. And if you’re look­ing for places to send your yarn-craft items… 

Here’s a list by the Toron­to Knit­ters Guild of places that accept yarn-craft­ed good­ness in Toronto.

Warm Hands Net­work col­lects and sends hand­made items nation­al­ly and inter­na­tion­al­ly, espe­cial­ly to north­ern locations.

For friends in the USA, the lists on Men­tal Floss and Red Heart may be good places to start :)

With glow­ing heart and busy hands — hap­py yarn-crafting!


may the porg be with you

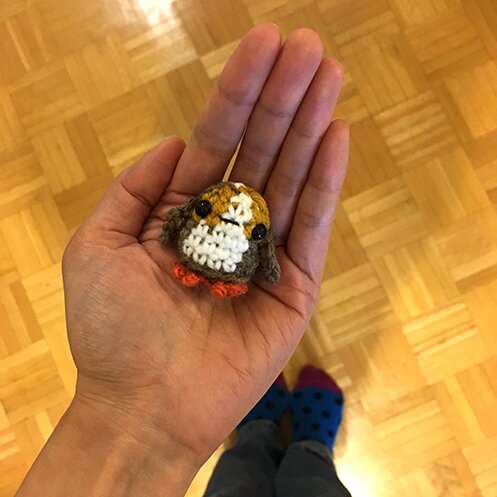
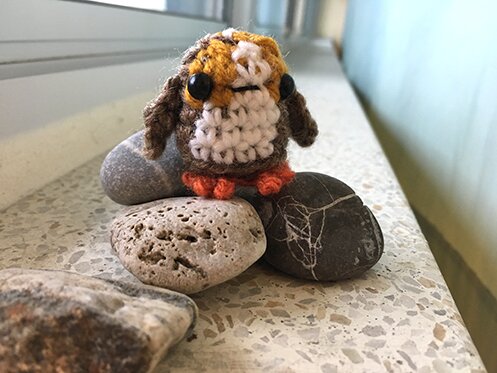
I made a tiny porg!
Fan opin­ions about them seem to polar­ize. I hap­pen to love them like I love all fuzzy round-shaped crea­tures. Its shape is so amigu­ru­mi-ready, and it remind­ed me of my pen­guin tots. I could­n’t help but had to make one. 

If you’ve made the pen­guin tots before, the porg is not dif­fer­ent struc­tural­ly but a bit more com­pli­cat­ed with the colour changes.

It’s very car­ry-able and rides well in pock­et, so it can always be with you :)

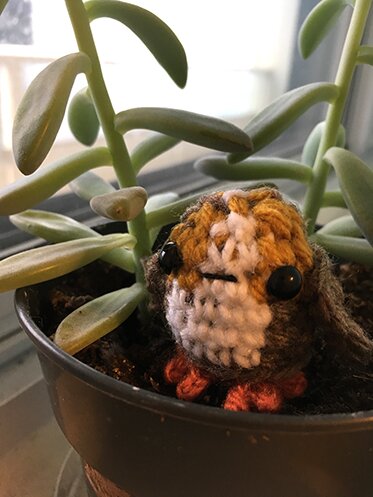
The upturned mouth of the actu­al porg makes my tiny ver­sion look sad, so I opt­ed for a reg­u­lar mouth instead. 

Here it is con­tem­plat­ing life, or decid­ing what to eat for lunch, by the jade plant.

To make your own tiny porg, you’ll need:

Small amount of mus­tard, white, brown and orange yarn in worsted weight

3.5 mm hook 

2.5 mm hook (for feet and weav­ing in ends)

2 black safe­ty eyes (3mm), or round black beads

Black thread and sewing needle

Yarn nee­dle

Yarn ends (for stuff­ing), or poly­ester stuffing

Pat­tern:

Body:

Note: begin­ning ch 1 does not count as a stitch throughout.

Round 1: With brown, ch 4, 2 sc in 2nd ch from hook, sc in next ch, 3 sc in last ch, sc in the remain­ing loop of the next ch (the ch that has only 1 sc in it), sc in the next ch (the ch with the begin­ning 2 sc in it), sl st in first sc of round.

Round 2: ch 1, 2 sc in first sc, sc in next 3 sc, 3 sc in next sc, sc in next 3 sc, sc in next sc (the sc with the begin­ning 2 sc in it), sl st in first sc of round.

In the next round we begin to incor­po­rate oth­er colours. Here’s a tuto­r­i­al on how to change colours seam­less­ly, in case it’s helpful.

Round 3: ch 1, in back loop only, sc in next 7 sc. When com­plet­ing the 7th sc, attach and change to white. Car­ry­ing the brown yarn (i.e. wrap it in your stitch) as you cro­chet with white, sc in the next 4 sc. When com­plet­ing the 4th sc, change back to brown, sc in last sc, sl st in first sc.

Round 4: With brown, ch 1, sc in next 7 sc, change to white, car­ry­ing the brown as you go, sc in next 4 sc, change to brown, sc in last sc, sl st in first sc.

Round 5: Repeat round 4.

Round 6: With brown, ch 1, sc in next 6 sc. Change to yel­low and car­ry­ing brown as you go, sc in next 2 sc, change to white and car­ry the brown and yel­low as you go, sc in next 2 sc, change to yel­low and car­ry the brown as you go, sc in next 2 sc, change to brown, sl st in first sc.

Round 7: Repeat around 6.

After round 7, install safe­ty eyes (or sew on beads for eyes) in between the 2 yel­low stitch­es between rounds 6 and 7. Sew on mouth. Stuff with yarn ends or stuffing.

Round 8: With brown, ch 1, 2 sc tog three times, change to yel­low and fas­ten off brown, 2 sc tog with yel­low, change to white and car­ry the yel­low as you go, 2 sc tog with white, change to yel­low and fas­ten off white, 2 sc tog with yel­low, sl st in first sc of round, fas­ten off, leave a long tail. Weave the tail in the remain­ing stitch­es around and cinch the open­ing close, secure and fas­ten off, weave in ends.

Wings (make 2): With brown, ch 2, 5 sc in 2nd ch from hook, ch 2, sl st in 2nd ch from hook (form­ing a point), sc in ch with the 5 sc in it, sl st in first sc of round, leave a tail for sewing, fas­ten off. (I only leave a tail for sewing on one wing, not both.

Sew on wings: Posi­tion the wing with the yarn tail for sewing on the side of the body, thread the yarn nee­dle in the yarn tail, insert nee­dle where you want the first wing, pull the nee­dle through the body so the nee­dle comes out on the oth­er side where you want the oth­er wing to be. Thread the oth­er wing through the nee­dle, and sew back and forth through the body to secure both wings at the same time. Fas­ten off, weave in ends.

Feet:

Feet are made linked togeth­er with a few ch in between.

With orange, *ch 3, sl st in 2nd ch from hook, sl st in next ch, ch 2, sl st in 2nd ch from hook, sl st in very first ch made, ch 3, sl st in 2nd ch from hook, sl st in next ch, sl st in very first ch made*, ch 2 (link between feet), then repeat from * to * once more. Fas­ten off and leave a long tail for sewing.

Posi­tion feet under body and sew on with yarn tail, fas­ten off and weave in ends.

The porg is ready for adventures!
Tiny porg wish­es every­one an awe­some week!


holiday makes

‘Tis the time of year for the hol­i­day craft­ing post, after all the gifts are gift­ed :D But I always lose track of what I made… here are some highlights!

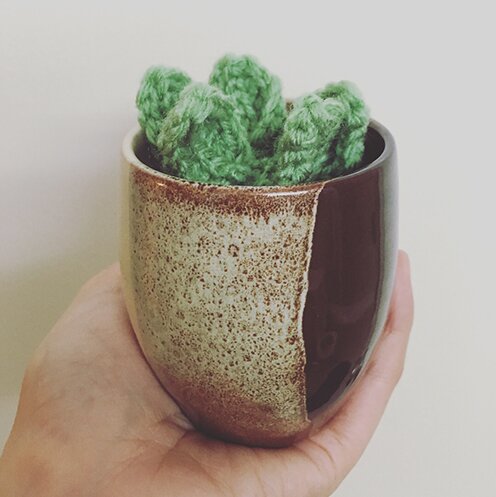
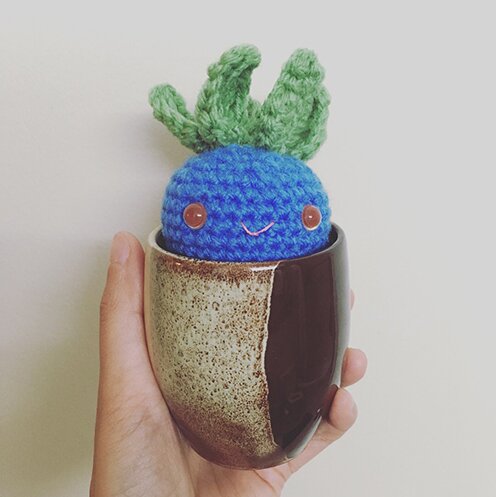
The plant above is for a dear friend who said she can’t keep plants alive. But wait for it…

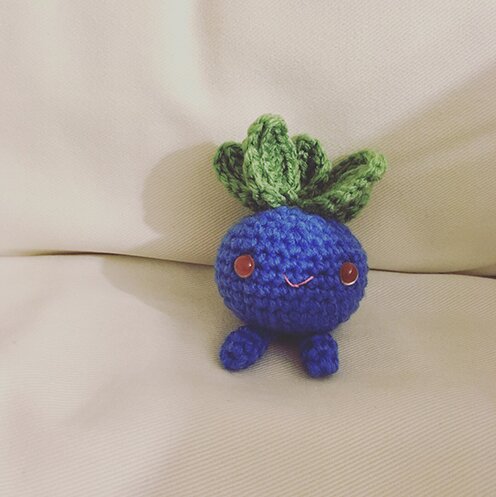
It’s a hid­den Odd­ish!! Yes, she is also a big Poke­mon fan :D

Here’s Odd­ish chill­ing on the couch.

I’m real­ly hap­py with how Odd­ish turned out. There are a few good Odd­ish pat­terns out there but I end­ed up mak­ing it up as I cro­cheted because of the size of the plant pot. I also got a pair of red­dish brown safe­ty eyes as part of a free gift one time from a cro­chet mag­a­zine sub­scrip­tion :D They worked per­fect­ly on Oddish.

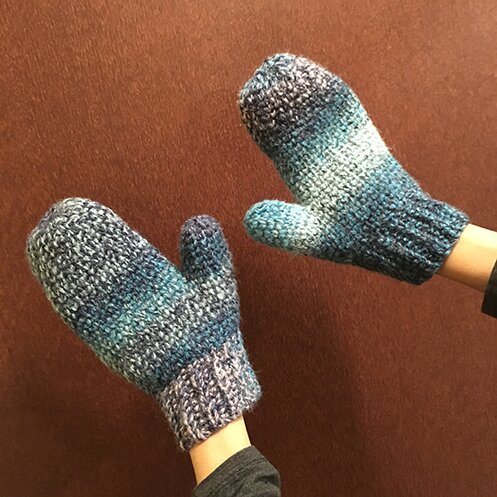
And then there’s this cozy pair of cro­chet mit­tens, for a friend who recent­ly relo­cat­ed to cold­er cli­mates. But wait…

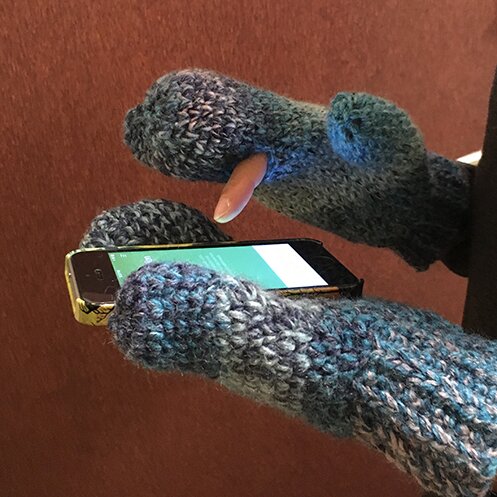
It has fin­ger open­ings for tex­ting and tak­ing pic­tures! :D I made them from this love­ly pat­tern.

This one took me quite a while…

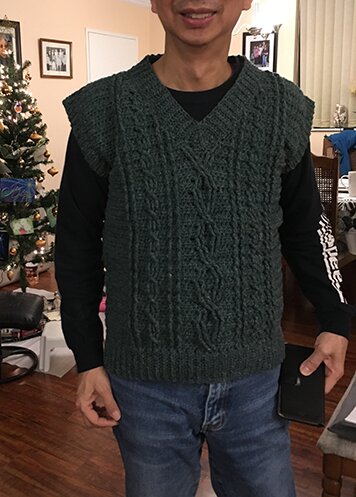
But well worth the time! Look how hap­py my dad is! :D And it fits per­fect­ly! Always tricky mak­ing gar­ments for my par­ents, nev­er know if it’s going to fit and I can’t get Mike to test try it because he’s much taller… but it worked out this time :D The cable pat­tern is actu­al­ly tak­en from this sweater pat­tern

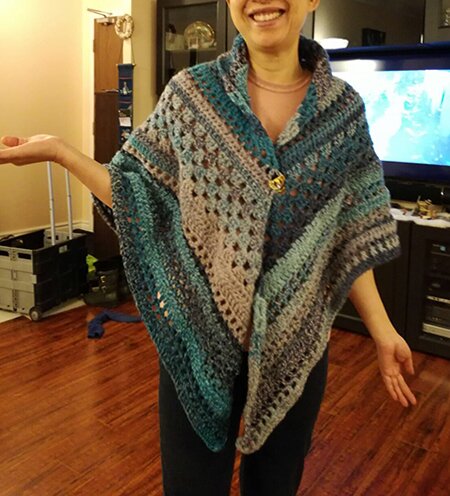
This is my mom doing a dance with the cro­chet shawl, prob­a­bly to the music on TV (my sis­ter sent me the pho­to :D).

I thought it would be good for when she stud­ies and writes in her office at home, which she spends quite a bit of time doing. It’s mod­i­fied from this gor­geous pat­tern, because I was using a much heav­ier yarn. I skipped over quite a bit of the granny stitch sec­tions. It’s a fun pat­tern to make with var­ie­gat­ed yarn with long colour changes.

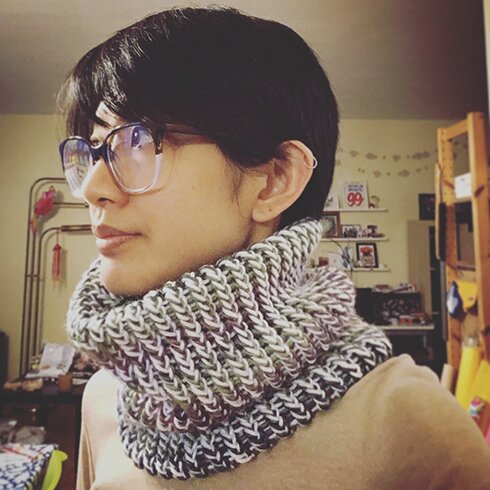
This is the warmest neck­warmer I’ve nev­er made, prob­a­bly Lap­land-ready! :D Loom knit­ted (on a 41-peg round loom) a very long tube (about 20″) with two strands of worsted weight yarn held togeth­er, then the ends of tube are sewn togeth­er to make a dou­ble-thick tube! I took a pho­to before wrap­ping it for my mother-in-law :)

And now, things oth­ers made that I can’t make…

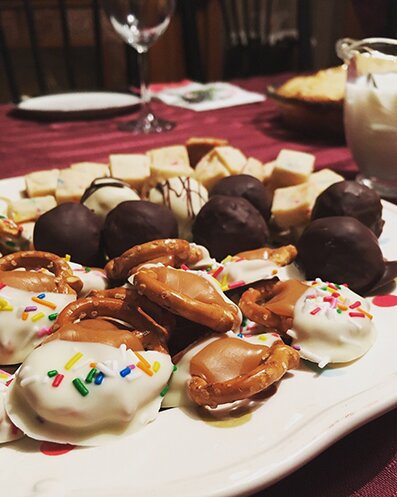
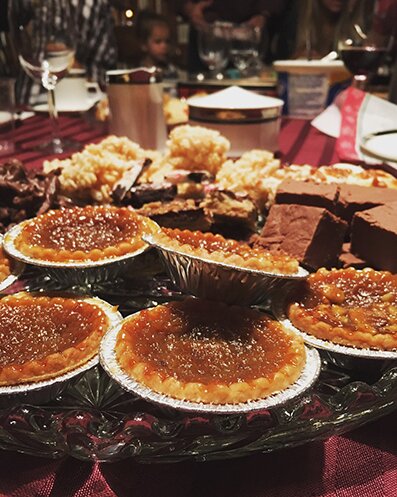
Isn’t it mag­nif­i­cent? :D Very grate­ful heart and stomach.

And for a year of more making…

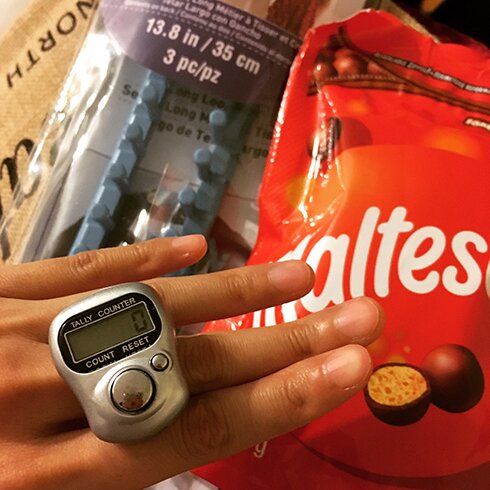
Mike got me a long loom, a stitch counter, and the per­fect yarn-craft­ing snack! :D :D :D

Here’s to a year of new ideas and more crafting!
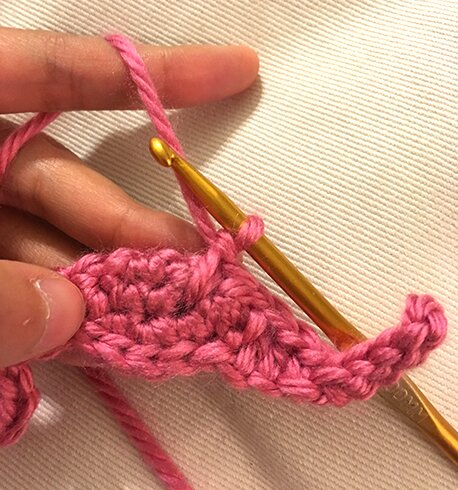
 

make a bath otter!

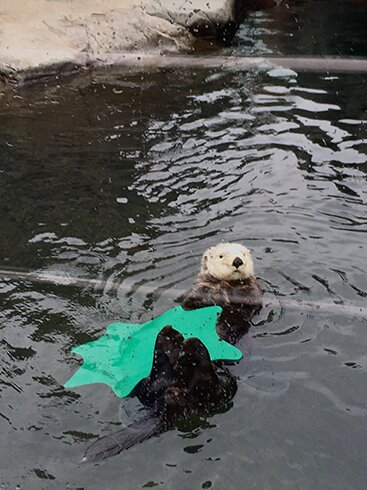
When we went to Van­cou­ver a cou­ple of months ago one of the most mem­o­rable things was see­ing the adorable sea otters.

*heart eyes x1000*

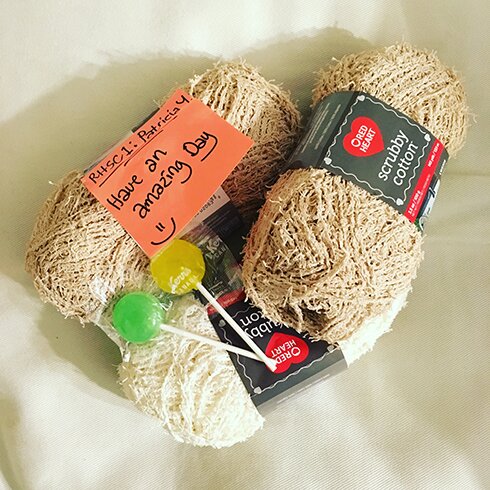
So when the nice folks at Yarn Cana­da sent me some Red Heart Scrub­by Cot­ton to try out and write a blog post about (they even sent can­dy and a nice note, aren’t they awe­some?), I knew exact­ly what to make :)

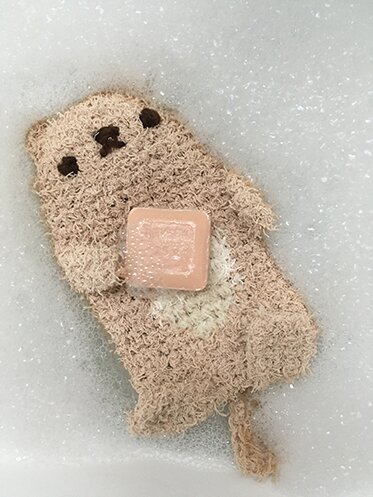
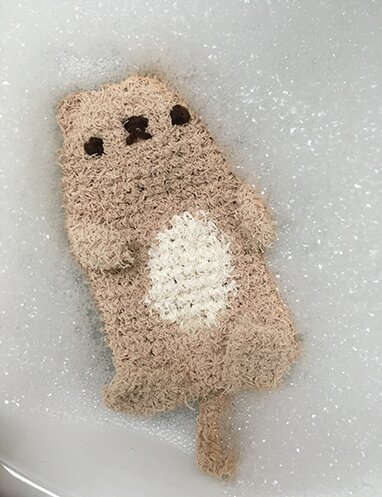
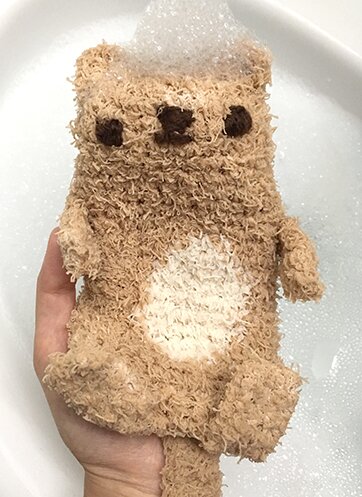
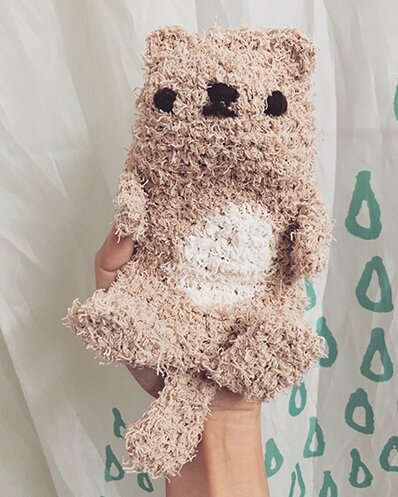
A bath otter, float­ing on its back, hold­ing your soap! XD

Actu­al­ly, our test shows that the otter sinks after the hold­ing the soap for a while… but still, it’s fun to see it float­ing on its back.

It makes a great bath toy, and a soap saver. If you have a tiny bit of soap left just stick it in it’s back pock­et and scrub away :D

This cot­ton yarn is super absorbent and soft­er than reg­u­lar poly­ester scrub­by yarn, so it makes a great wash cloth. 


One skein of scrub­by makes 2 otters with plen­ty left­over for a knit wash cloth, which is quite eco­nom­i­cal for hol­i­day gift-making. 

If you make it with reg­u­lar wool or acrylic, the pat­tern would also make a cute hand pup­pet! :D

I used:

One skein each of Red Heart Scrub­by Cot­ton in tan and loofa

A bit of brown acrylic yarn for embroi­der­ing facial features

5.5 mm hook

Tapes­try needle

Note:

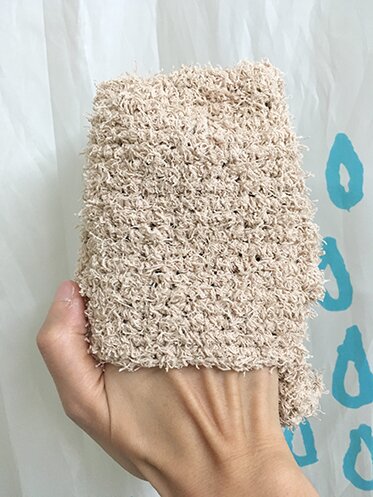
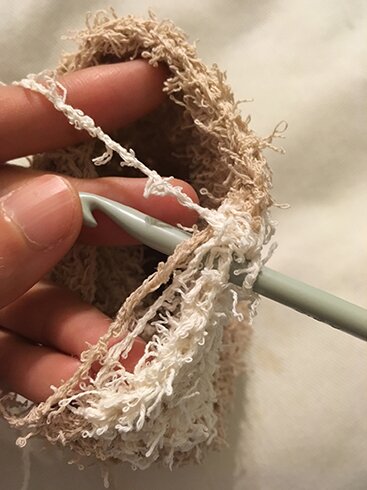
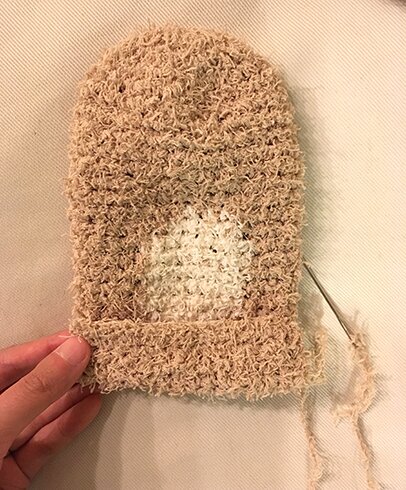
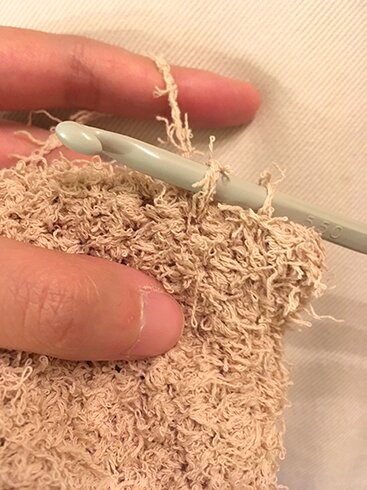
The otter is worked from top down in the round in the top part, then worked back and forth in the low­er part and seamed at the sides in order to cre­ate an open­ing in the back. Then arms and legs are cro­cheted sep­a­rate­ly and sewn on. Ears are cro­cheted direct­ly onto the head. The tex­ture of the yarn makes it a bit chal­leng­ing to see the stitch­es, and it is some­times a bit dif­fi­cult to undo stitch­es, but it’s great for blend­ing in yarn ends and sewn seams. This pat­tern is writ­ten with this in mind and the struc­ture is made as sim­ple as possible. 

This pat­tern requires know­ing how to do colour change in mid row. If you’re not famil­iar, please check out this handy tuto­r­i­al by Moo­gly :) 

Pat­tern:

Head & upper body:

Round 1: with tan, 10 sc in mag­ic ring, don’t join in the round.

Round 2: 2 sc in each sc (20 sc).

Round 3: [1 sc in next sc, 2 sc in next sc] around (30 sc).

Round 4: 1 sc in each sc around.

Repeat round 4 until piece is 3.5″ tall.

Mid-sec­tion area:

6 sc, attach loofa (white), 3 sc in white, switch back to tan.

sc in each sc around using tan, until the sc before the first white stitch in the row below, switch to white, sc in the next 5 sc using white, wrap the white strand and the work­ing tan yarn in the stitch­es as you go, like so…

Switch back to tan and 1 sc in each sc using tan, until the stitch before the first white stitch in the row below, switch to white, sc in next 7 sc using white, switch back to tan.

Con­tin­ue cro­chet­ing in the round, using tan in tan stitch­es and white in white stitch­es until there are 4 more rows with white stitches.

Then, sc in each sc around using tan until the first white stitch in the row below, sc with tan in first white stitch, switch to white, sc with white in next 5 sc, switch back to tan.

sc in each sc around around using tan until first white stitch in the row below, sc with tan in the first white stitch, switch to white, sc with white in the next 3 sc, switch back to tan, fas­ten off white. sc in next 6 sc using tan, turn, leave remain­ing stitch­es unworked.

Low­er body:

Low­er body is worked back and forth in rows over 15 stitches.

Row 1: ch 1 (does not count as sc), sc in next 15 sc, turn.

Rows 2–8: repeat row 1, leave a long tail for sewing, fas­ten off.

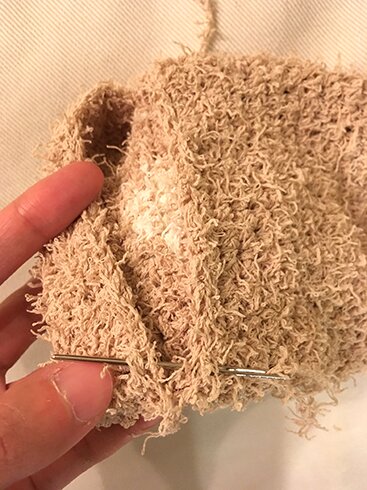
With right side fac­ing, fold low­er body piece up in half, sew side seams together.

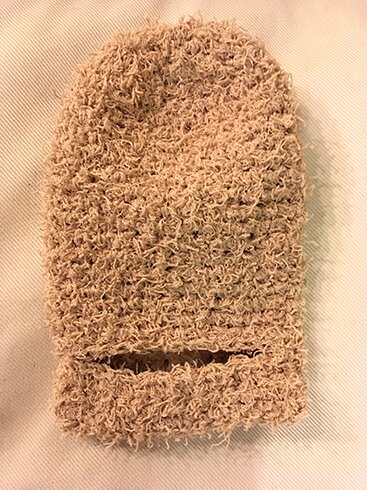
Turn low­er body piece right side out. At the back open­ing, sew togeth­er the top and bot­tom stitch­es clos­est to the seam on each side, like the pic­ture below. To sew the oth­er stitch­es clos­est to the oth­er seam, I did­n’t fas­ten off, I just wove the work­ing yarn through the top edge of the bot­tom part of the open­ing, and actu­al­ly cinched / gath­ered the stitch­es a bit to make the open­ing more sturdy.

Fas­ten off and weave in ends. The back would look like this…

Arms (make 2):

Row 1: Using tan, ch 6, sc in 2nd ch from hook, sc in next 4 ch, turn.

Row 2: ch 1 (does not count as sc), sc in next 5 sc, turn.

Rows 3–5: repeat row 2, leav­ing a long tail for sewing, fas­ten off.

Fold arm in half so the first row meets the last row, using the yarn tail, sew along side and top of arm using whip stitch, then sew arm to body along the side, also using whip stitch.

Legs (make 2):

Row 1: Using tan, ch 6, sc in 2nd ch from hook, sc in next 4 ch, turn.

Row 2: ch 1 (does not count as sc), sc in next 5 sc, turn.

Rows 3–7: repeat row 2, leav­ing a long tail for sewing, fas­ten off.

Fold leg in half so the first row meets the last row, using the yarn tail, sew along side and top of arm using whip stitch, then sew arm to body along the bot­tom of body, also using whip stitch.

Tail:

Row 1: ch 12, hdc in 3rd ch from hook, hdc in next 2 ch, sc to end of row, turn.

Row 2: ch 1 (does not count as sc), sc in each sc, hdc in each hdc, turn.

Row 3: ch 2 (counts as hdc), hdc in next 2 hdc, sc in each sc, leav­ing a tail for sewing, fas­ten off.

Sew tail to edge of bot­tom park of open­ing on back using whip stitch, like so.

Ears:

Insert hook through a stitch on the side of the head.

Pull up a loop of yarn and secure yarn.

Insert hook in a stitch to the left.

Pull up a loop, then yo and pull through both loops on hook, thus mak­ing an sc. Make 4 more sc in the same stitch, then sl st in a stitch to the left in head.

Repeat for the oth­er ear on the oth­er side of head.

Embroi­der eyes, nose and mouth with acrylic yarn. Fas­ten off and weave in ends.

Ta-da!

As usu­al, let me know if you have any ques­tions about the pattern! 

Spe­cial thanks to the nice peo­ple at Yarn Cana­da for think­ing of me and send­ing the yarn :) Please do check out their web­site if you live in Cana­da, free ship­ping for orders over $45, or flat rate of $5!

Hap­py crafting!
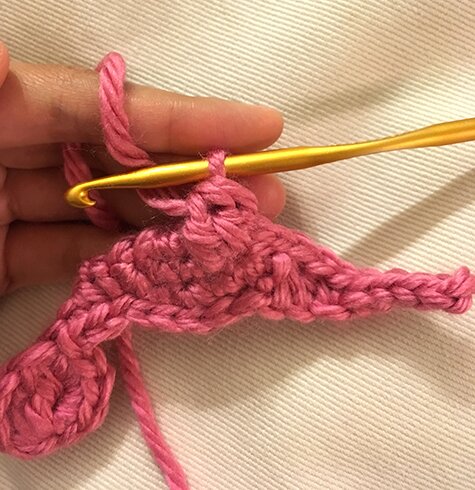
 

ode to drumheller: albertosaurus!
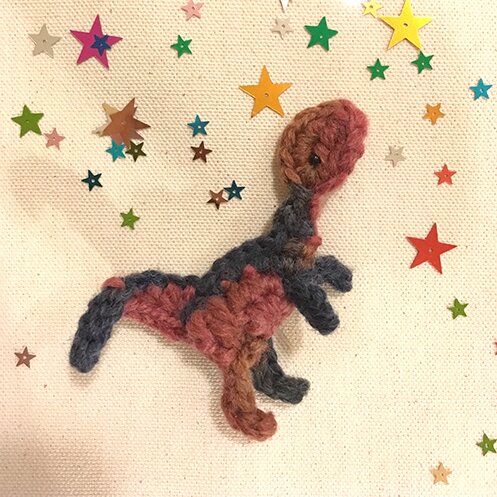
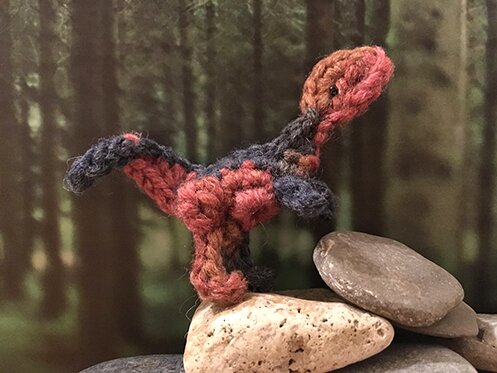
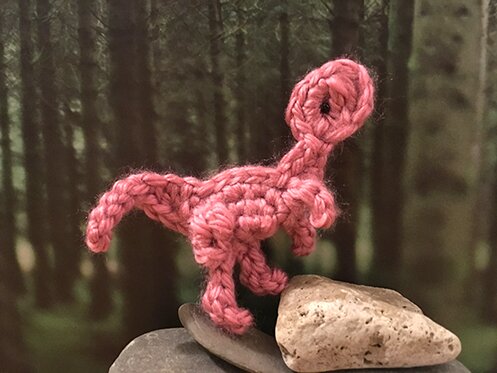
*Drum roll* the final dinosaur to be unearthed is Alber­to the albertosaurus! 

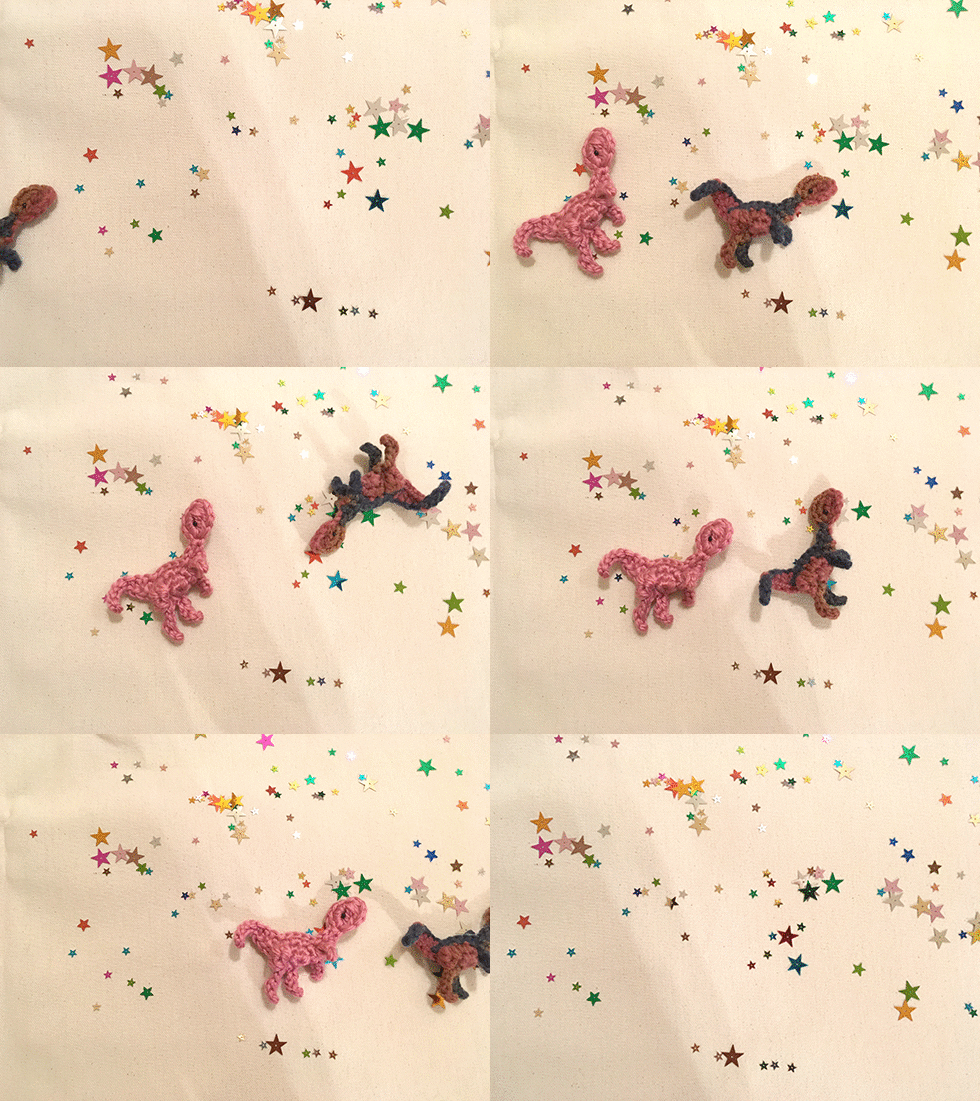
This calls for a dinosaur dance :D

The name Alber­tosaurus hon­ours Alber­ta, the Cana­di­an province in which the first fos­sils of this dinosaur was found the same year that the province was estab­lished, in 1905! (source) This whole series of mys­tery tiny dinosaurs is also inspired by our trip to Drumheller, Alber­ta, so I thought it’d be fit­ting to wrap up the series with the Albertosaurus.

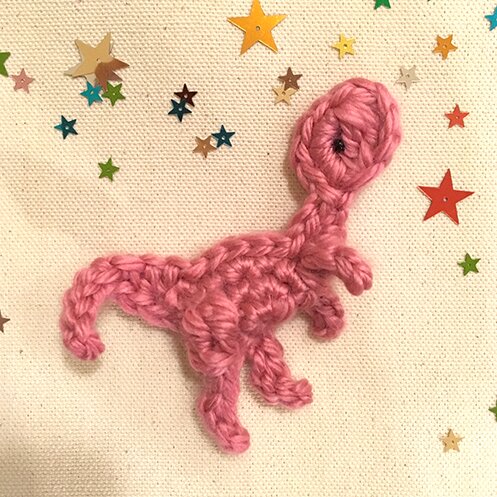
I made them with bulky yarn and 4 mm hook. I have this var­ie­gat­ed yarn that I thought would be per­fect, and then thought it would also look rad in bright pink :D

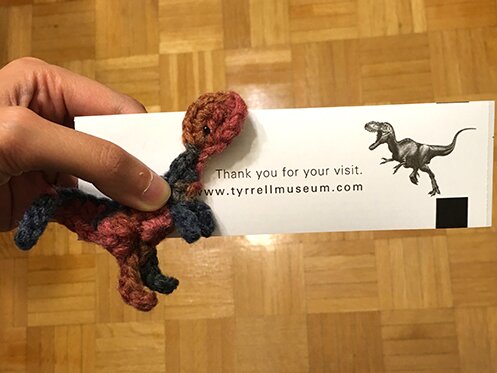
While the Alber­tosaurus looks very much like Tyran­nosaurus Rex, it is about half the size of T‑Rex. Nev­er­the­less, it was a fear­some dinosaur that hunt­ed in packs. (source)

Unlike oth­er dinosaurs in the series, which have the same fea­tures on both sides, Alber­to is a one-sided dinosaur, because of the way the legs are made, so it won’t look quite right on the back side, but it would make a nice brooch or ornament.

The design is based on the Alber­tosaurus on the back of the tick­et for Tyrrell Muse­um :D

This dinosaur is prob­a­bly the most com­pli­cat­ed of all in the series because of the legs. But there are lots of process pho­tos so I hope that helps! If you need any clar­i­fi­ca­tions please feel free to leave a comment!

You’ll need:

  • Small amount of Bulky weight yarn
  • 4 mm hook
  • Tapes­try needle
  • Black seed bead, black sewing thread and sewing needle

(You can also use worsted weight yarn and 3.5 mm hook for a small­er dinosaur)

Pat­tern:

The body begins as a circle.

Round 1: ch 2, 6 sc in 2nd sc from hook, don’t join in round.

Round 2: 2 sc in each sc around (12 sc around).

Round 3: [2 sc in next sc, sc in next sc] five times, 2 sc in next sc, sl st in next sc (17 sc and 1 sl st around).

Head/neck:

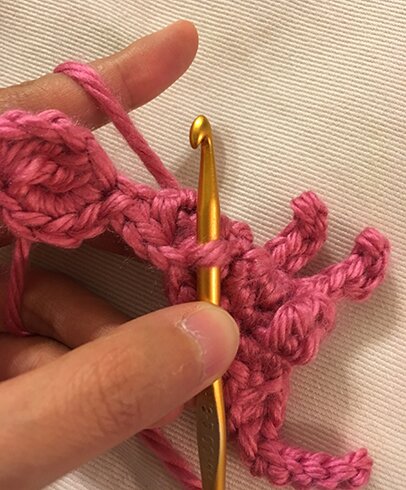
ch 7, [yo twice, pull up a loop] three times in 4th ch from hook, yo and pull through 4 loops on hook, yo and pull through the rest of the loops on hook (4 tr tog com­plet­ed), ch 1, 4 sc around last tr made, it will look like this…

sl st in next ch in neck, sc in next ch, hdc in next ch, hold body in half, sk next sc in body, sl st in next 6 sc in body/back of the dinosaur through both loops and both lay­ers of the body piece, don’t fas­ten off and con­tin­ue on to tail.

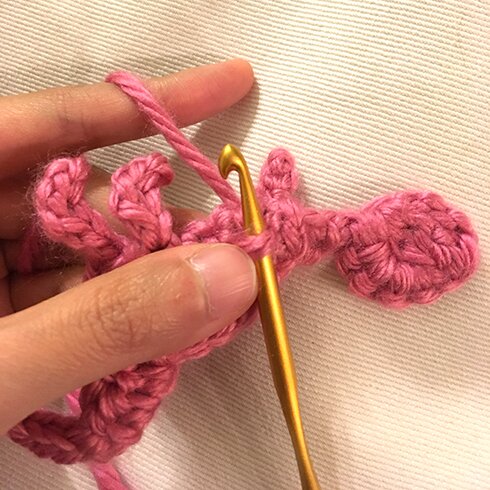
Tail: ch 8, sl st in 2nd ch from hook, sl st in next 2 ch, sc in next 2 ch, hdc in next ch, dc in next ch, sl st in a stitch at the tip of the fold­ed body piece, like so…

Don’t fas­ten off, con­tin­ue on to make legs.

Front leg:

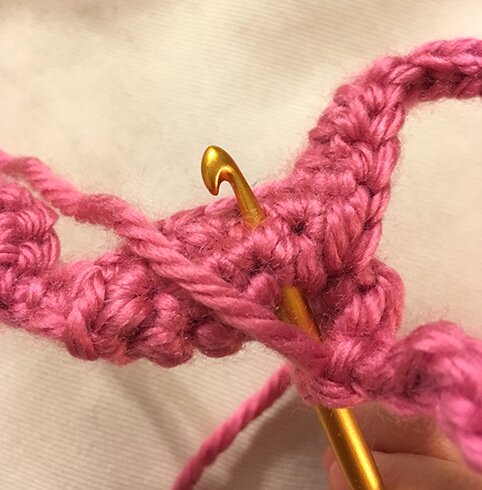
Hold­ing the dinosaur bel­ly side up, insert hook into a stitch in round 2 of body, next to where the last sl st was made, and bring the hook out 2 stitch­es from where the hook was insert­ed in round 2 of body, like so…

yo and pull through loop on hook. It will look like this.

yo and pull through loop on hook again, so it looks like this…

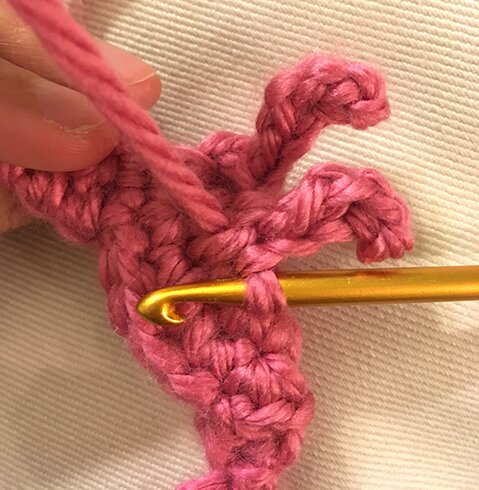
See there’s a long ver­ti­cal strand of yarn made, essen­tial­ly a very elon­gat­ed sc. Work 2 dc tog around this ver­ti­cal strand, like so…

This makes the thigh! :D

ch 6, sl st in 2nd ch from hook, pull up a loop in next 2 ch, then pull the last loop on hook through the oth­er 2 loops on hook, sl st in next 2 ch, ch 1, don’t fas­ten off and con­tin­ue on to back leg.

Back leg:

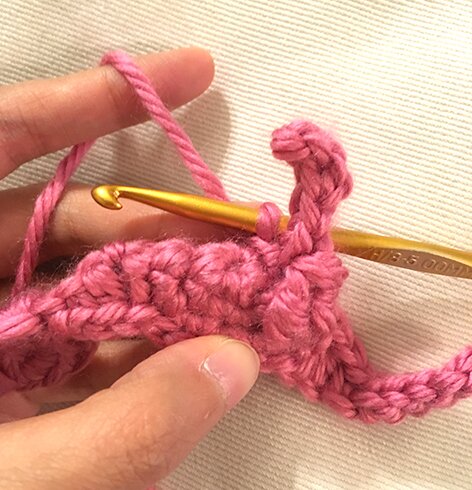
Insert hook from the bot­tom (a stitch in round 1) of body to a stitch in round 2 of body in the back, like so…

yo and pull through loop on hook. There will be a ver­ti­cal strand of yarn made like the one in front leg. sl st around the ver­ti­cal strand in back, then con­tin­ue to make the leg with the front fac­ing you. It will look like this from the front.

ch 5, sl st in 2nd ch from hook, pull up a loop in next 2 ch, pull last loop on hook through the oth­er 2 loops on hook, sl st in next ch, sl st in the ver­ti­cal strand…

ch 1, pull out a 20″ length of yarn, cut yarn.

Arms:

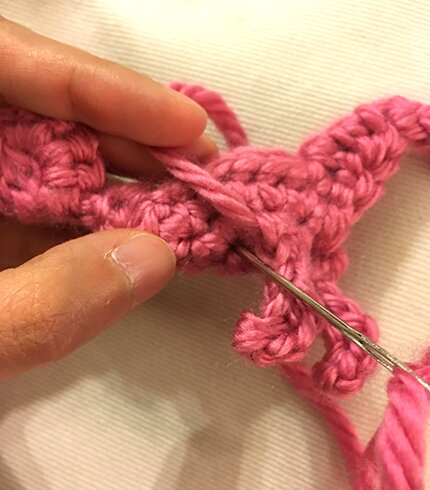
Thread yarn tail in tapes­try nee­dle, insert nee­dle in the under­side of body, and out in the front of body where the arm would be, like so…

Remove the nee­dle. From the front of the body, insert hook where the yarn tail came out and draw up a loop. It will look like this.

ch 4, sl st in 2nd ch from hook, sc in next ch, sl st in next ch, remove hook and pull out the yarn tail.

Using the hook, pull the yarn tail to the back of body where the oth­er yarn would be, insert hook where the yarn tail came out, draw up a loop, like so…

ch 4, sl st in 2nd ch, pull up a loop in next 2 ch, pull last loop on hook through the 2 oth­er loops on hook, remove hook and pull out yarn tail.

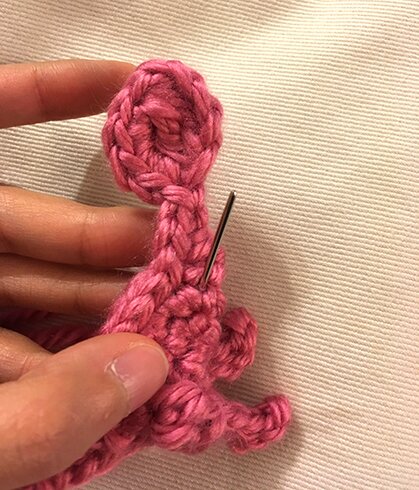
Thread yarn tail through tapes­try nee­dle, insert nee­dle at the begin­ning of the back arm and come out through a stitch at the top in the back, fas­ten off, weave in end. Sew on eye. Rawr.

I hope you enjoyed this series! Don’t for­get to share your dino pics by:


  • Blog­gers: leav­ing a com­ment on any of the Mys­tery Dino CAL posts with a link to your blog post with the picture.
  • Insta­gram­mers: tag me @genuinemudpie and use the hash­tag #mys­tery­dinocal
  • Rav­ellers: join­ing the Rav­el­ry group and post­ing your FOs to my Rav­el­ry dino project pages!

There will be a vir­tu­al dino par­ty with all your pic­tures in the near future, stay tuned! :D


You can find all the oth­er mys­tery dino CAL posts here:

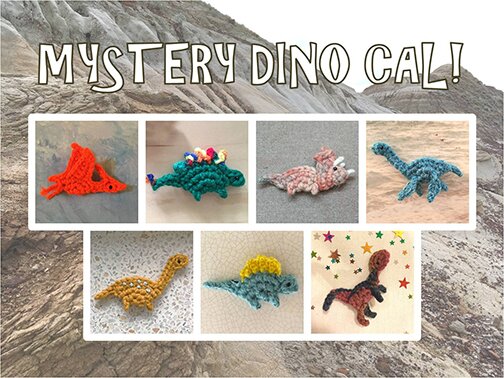
Mys­tery dino CAL intro post

Stu the Stegosaurus

Dmitri the Dimetrodon

Trix­ie the Triceratops

Bron­wyn the Brontosaurus

Nessie the Plesiosaurus

Kin­taro the Pterosaur


Have a rawring week, every­one! :D