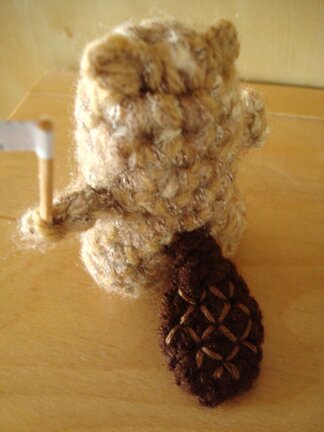
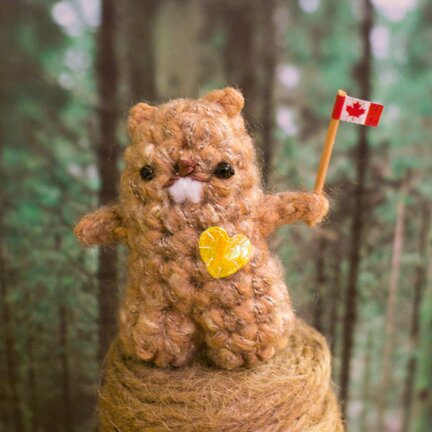
with glowing heart and beaver tail

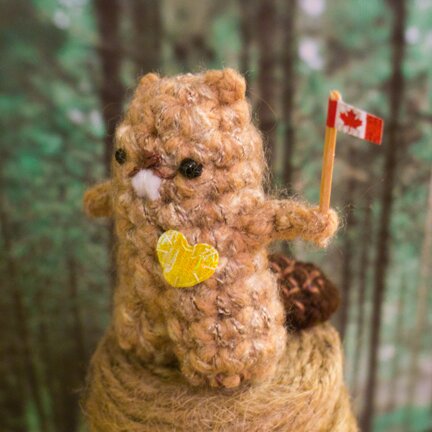
It’s Cana­da Day on Fri­day! And proud Cana­di­an Beaver, with glow­ing heart, is here to cel­e­brate! :D

I was sur­prised how dif­fi­cult it was to find glow-in-the-dark stick­ers at the dol­lar store. There were plen­ty of glow sticks, but no glow-in-the-dark stick­ers. Even­tu­al­ly I set­tled on some reflec­tive fab­ric appliqué. So Beaver’s heart badge is more shiny than glow‑y, but it will not damp­en his cel­e­bra­to­ry spirit.

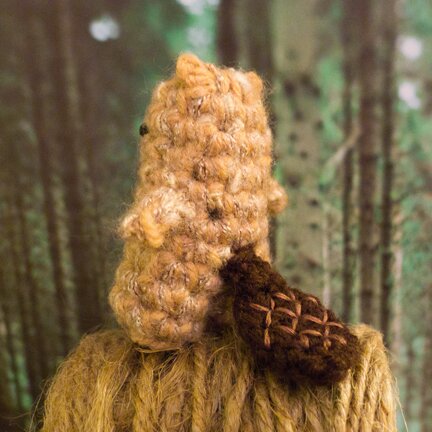
You may have noticed already, but Beaver is made exact­ly the same way as Ground­hog, except for the tail. (I also made Beaver’s teeth a bit larg­er than Ground­hog’s, with bits of white felt.)

To make your own Beaver friend (and cel­e­brate Canada’s birth­day with us! :D), fol­low the Ground­hog pat­tern for head/body, ears, and arms.

To make Beaver’s tail:

Tail is made in con­tin­u­ous rounds, with 3.5mm hook and brown worsted weight yarn:

ch 3, 4 sc in 2nd ch from hook, sc in the top of begin­ning ch, *2 sc in next sc, 1 sc in each of next 2 sc*, repeat from * to * once.

1 sc in each sc around until piece is 3/4″ long. Then *2 sc tog, 1 sc in each of next 2 sc*, repeat from * to * once.

2 sc tog, 1 sc in each of next 4 sc. Leav­ing a 12″ tail for sewing, fas­ten off.

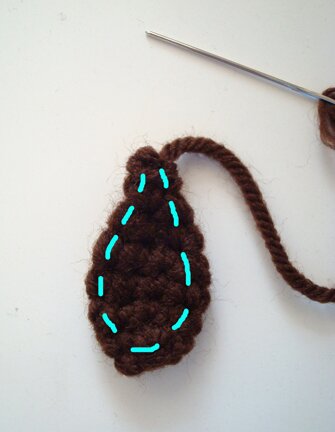
The result will be a pouch shape. Flat­ten the pouch and, with the tail left for sewing, sew a line of run­ning stitch through both lay­ers, like so…

Embroi­der criss­cross pat­tern on top lay­er only, then sew to body.

And here’s to Cana­da ‑ glo­ri­ous and free! *waves flag*

Cheers! :D


ode to kiki


Last week­end I bought some plain plas­tic head­bands for my tea rose project, but the colours and tex­ture work out so I just end­ed up using an elas­tic head­band I had for the rose.

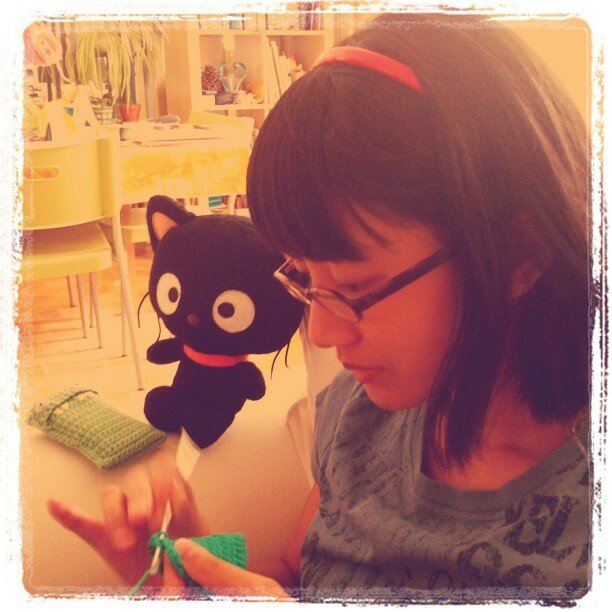
The plas­tic head­bands were 4 for a $1 from a cor­ner store near­by. I tried them on for fun and was sur­prised to find that the red one actu­al­ly com­ple­ments my hair­style quite nice­ly (I don’t wear red very often). Then Mike took this pic­ture to test out his new phone…

Then he said, “you look like a car­toon char­ac­ter with that head­band, but I don’t know from which cartoon.”

This one, per­haps? :D


If you haven’t seen it, Kik­i’s Deliv­ery Ser­vice is an ani­ma­tion cre­at­ed by Hayao Miyaza­ki. It was released in 1989, and, Accord­ing to Miyaza­ki, “the movie touch­es on the gulf that exists between inde­pen­dence and reliance in Japan­ese teenage girls. Going far beyond com­ing of age themes, the work deals with the nature of cre­ativ­i­ty and tal­ent, and the cen­tral dif­fi­cul­ty every per­son faces in becom­ing them­selves, whether through luck, hard work or con­fi­dence” (source).

It’s a time­less piece. I find myself in Kik­i’s shoes time and time again, try­ing to find my own voice in new surroundings.

And now, with Fil­bert the cat in the pic­ture, I find myself in Kik­i’s head­band, just miss­ing a bow! (Kik­i’s cat is named Jiji, by the way.)

There’s no way I can pull off wear­ing a giant bow on my head. So per­haps I can make a small, styl­ish, grown-up-ish bow. Like these ones, per­haps.

The prob­lem is that the red head­band is made of a shiny plas­tic, and so rib­bons or cro­chet would look out of place. Pleather (aka faux leather)? Vinyl? Trust me, if I have a red vinyl purse or any­thing like that I can cut from, I would go straight to it. But I don’t.

What I have is this -

It comes in a roll -

It’s super sticky on the one side -

It’s shiny on the other -

It comes in all the bright colours -

Give up?

ELECTRICAL TAPE! :D

And here’s how I made a bow with it.

I used: a bit of elec­tri­cal tape, a head­band, scis­sors, a ruler, and hot glue gun.

1. Cut a piece of tape about 5″ long, turn it sticky side up and fold it length­wise about 1/3 of it toward the cen­tre (to keep the fold straight, it helps to start fold­ing in the cen­tre, then work your way out toward each end).

2. Fold down the oth­er long edge in the same man­ner. There would be air bub­bles trapped in the folds. I used my thumb­nail to gen­tly scrape and push the air out of the folds (again, it helps to start scrap­ing from the cen­tre, and work your way out toward each end).

3. Nar­row the ends by cut­ting off the cor­ners, so when it’s fold­ed under to form the bow the edges won’t show.

4. Fold the plas­tic strip in half, make a light crease, unfold, and mark the half way point with a pencil.

5. Fold each end toward the cen­tre, 2–3mm from the half way mark.

6. Tape down the ends with a nar­row piece of tape.

7. Cut anoth­er piece of tape about 3″ long, repeat the first two steps, except leave a 2–3mm gap in the cen­tre when fold­ing the long edges, thus mak­ing a wider strip.

8. Turn the bow so that the ends of the strip are fac­ing down, then hot glue it to the head­band. For­got to take a pho­to of this step, sorry ^^;

Place the wider strip on the cen­tre of the bow, extend­ing about 3/4″ to one side, like so… (the exposed adhe­sive on the back of the strip will help keep its place before it’s glued down in the next step)

9. Turn to the under­side of the head­band, fold down the short end of the wider strip and hot glue it down, push­ing the end into the space between the 2 rows of combs.

10. Fold the longer end over and mark where it over­laps with the oth­er end but does not extend beyond the width of the headband.

11. Cut where it’s marked and hot glue it down.
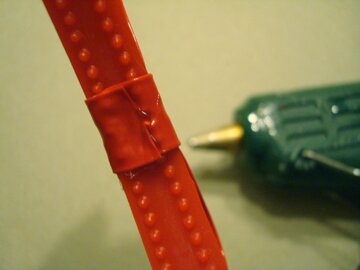
 

And we’re done! :D Pret­ty sim­ple, eh?


It com­pletes the pic­ture :D


I’m actu­al­ly real­ly hap­py with the way it turned out, which is sur­pris­ing because I’m not real­ly a bow per­son. But I love how it match­es the colour and the plas­tic feel of the head­band per­fect­ly. Like the bow came with the head­band when it was bought, not added on lat­er. With elec­tri­cal tape.

My favourite part has got to be the elec­tri­cal tape :D

I was lucky with the red; it may be tricky to match the exact shades of elec­tri­cal tape to head­band with oth­er colours, but I imag­ine black or white would work per­fect­ly. But then the colours don’t have to be matchy-matchy nei­ther. What about a black bow on a white head­band? Or yel­low bow on a blue head­band? I imag­ine the plas­tic head­bands can be bought cheap­ly in most dol­lar stores, and so can elec­tri­cal tape :)

This made me real­ly hap­py last night. I hope you’re find­ing things through­out your day that make you hap­py too! :D
tea rose for pony


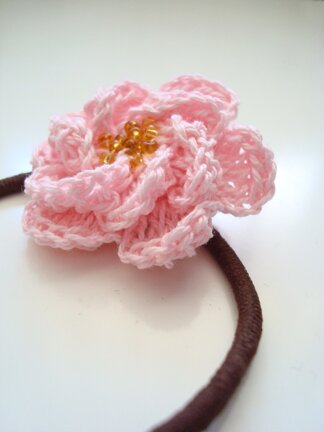
Tea ros­es don’t look quite like that, I real­ize. It’s more like those wild ros­es (we used to have them in our front yard), but “tea rose for pony” sounds nice. And reminds me of a book I read in high school called Flow­ers for Alger­non.

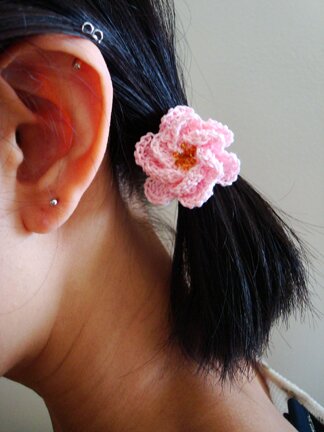
Any­way, I saw a girl wear­ing small flop­py pink flow­ers on her pig­tails one day, and I want­ed to make my own.


My hair was­n’t quite long enough for a pony tail, so I was wear­ing pig tails. So I guess this could also be a tea rose for pigs :P

The hair ties I buy at the drug store get worn out quick­ly, so I want­ed to make the flower detach­able. When the hair elas­tic is worn out, one could attach the flower to a new hair elas­tic. See?


I’m sure there are tons of pat­terns for cro­chet­ing ros­es, but I’ve nev­er made one before and want­ed to fig­ure out how to make the petals over­lap. So I thought I’d write it all down :)

I used:

Pink cro­chet thread

2.35mm hook (I used it because that’s what I have, but one could prob­a­bly use a small­er hook)

One but­ton

Yel­low seed beads

Sewing nee­dle and thread

Glue gun

Top petals:

ch 5, sl st into first ch and form a ring.

First petal: ch 3, 4 tr into ring, ch 3, sl st into ring

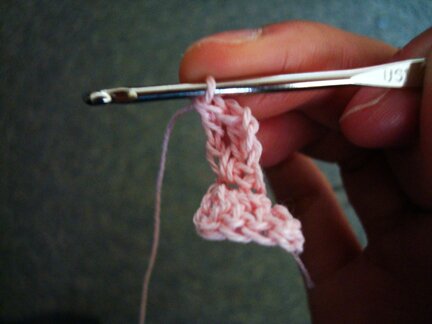
Sec­ond petal: ch 2, turn and insert hook into the base of a stitch in the mid­dle of pre­vi­ous petal, pull up a loop, ch 3, turn, 2 tr into the ch 2 space just made, like so…

Then work 2 tr into ring, like so…

Com­plete sec­ond petal with ch 3, then sl st into ring.

Repeat sec­ond petal until there are five petals.

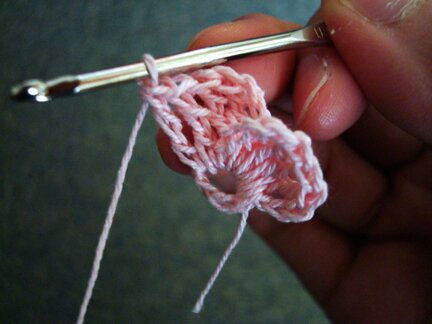
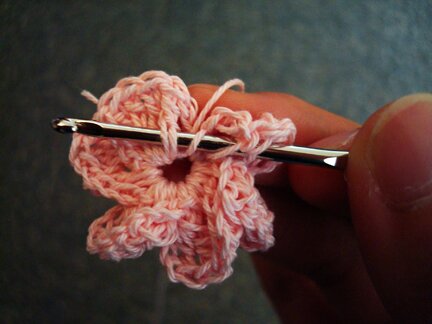
Sixth petal: ch 2, turn and insert hook into the base of a stitch in the mid­dle of pre­vi­ous petal, pull up a loop, ch 3, turn, 2 tr into the ch 2 space just made, 1 tr into ring, 1 tr into the base of a stitch in the first petal in the front, like so…

Com­plete last petal with ch 3, then sl st into same st in the first petal. Fas­ten off, weave in ends.

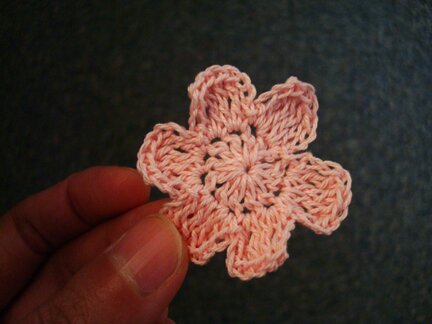
Top petals, com­plete :D

Bot­tom petals:

12 dc in mag­ic ring, sl st in top of first dc to form a circle.

First petal: ch 3, 2 tr in same st, 2 tr in next st, ch 3, sl st in same st.

Sec­ond petal: ch 3, 2 tr in next st, 2 tr in next st, ch 3, sl st in same st.

Repeat sec­ond petals until there are 6 petals alto­geth­er. Fas­ten off, leave a 10″ tail for sewing.

Bot­tom petals, com­plete :D

Sew top and bot­tom petals togeth­er, then sew seed beads to the centre.

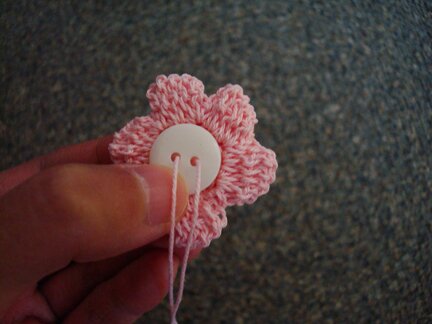
Find a but­ton that could rough­ly cov­er the first round (12 dc in mag­ic ring) of the bot­tom petals. Thread a 5‑inch piece of cro­chet thread through the but­ton holes, like so…

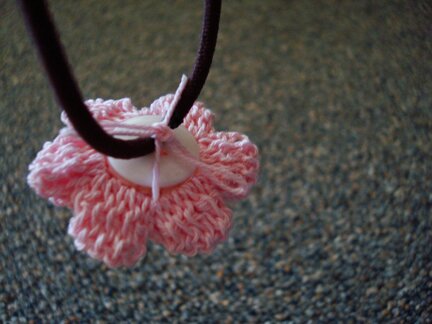
Ensur­ing that both ends of the cro­chet thread are rough­ly the same length, glue the but­ton to the tea rose with a hot glue gun, like so…

And that’s it! Now we can tie the tea rose to a hair elas­tic. (I tie a bow, and then tie the “ears” togeth­er again.)

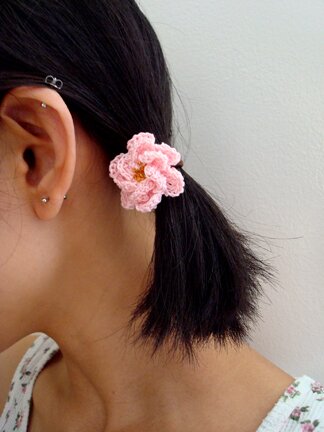
And then tied to pig tail…


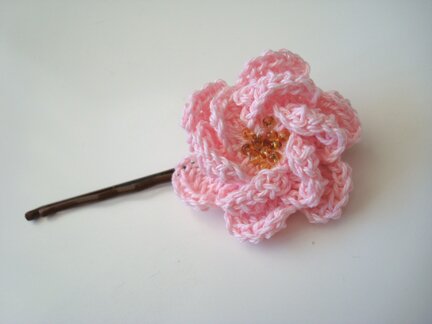
I tried tying it to a bob­by pin, it works as well :D


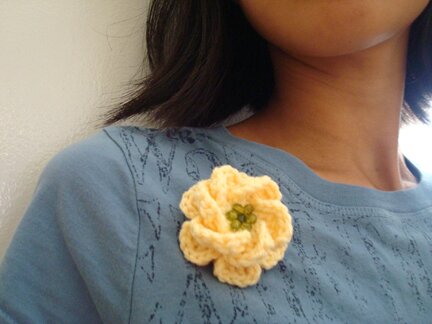
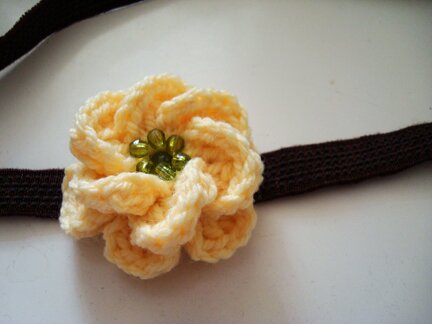
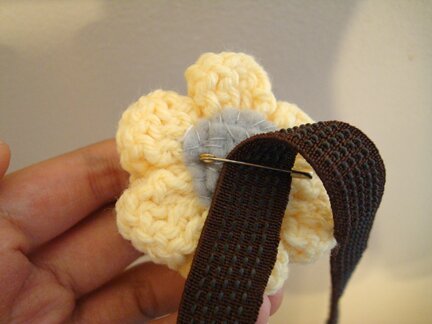
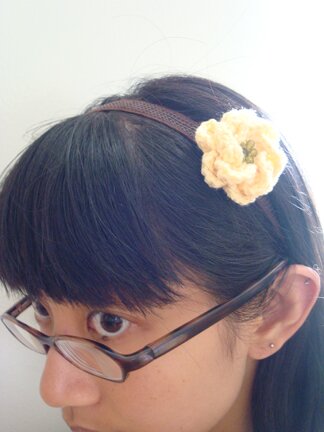
A larg­er tea rose can be made with reg­u­lar yarn rather than cro­chet thread. I made a yel­low one with a light worsted weight yarn and a 3.5mm cro­chet hook, for a headband.


I attached a small safe­ty pin to the back with pieces of felt, and then attached it to an elas­tic headband.


Because it’s detach­able, I can also wear it as a brooch! :D


I like mak­ing mul­ti­pur­pose things :)

Have a great start to the week!


sunday video: beet cake


I had some deli­cious baked beets that my sis­ter-in-law made ear­li­er this week. Then I remem­bered this video I book­marked a long time ago, about mak­ing a beet cake from tiger in a jar (with recipe too!). I don’t bake very often, but I com­plete­ly agree that there’s def­i­nite­ly some­thing beau­ti­ful in the process of cre­ation — whether one is mak­ing a cake, or cro­chet­ing a blan­ket, one stitch at a time.

I just love every­thing about this video — the colours, the music, the design, the hand­writ­ten script.

I thought my mom would like it, because she makes a lot of car­rot loaves and zuc­chi­ni bread. And my sis­ter-in-law too! She seems to like beets :)

Have a sweet Sunday!


favourite things friday

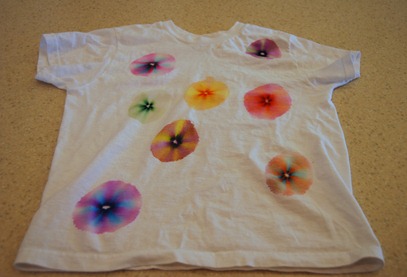
It is offi­cial­ly sum­mer! I’m going to look out for those super sun­ny cloud­less days to try out this sun print tech­nique — with­out the use of a sun print kit or pho­to paper, just fab­ric, and fab­ric paint! Isn’t the result just mar­velous? How-to on Mary & Patch.


More fab­ric colour­ing mag­ic from Shirin, Hand­made, with instruc­tion for tie-dying using just turmer­ic, pur­ple cab­bage, black tea, and beets! I love the bright shade of yel­low from the turmer­ic, and the tiered design of this shirt!


More tie-dye with stuff one could eas­i­ly find at home — Sharpies! It’s kind of expen­sive, but I’ve always want­ed to get a full set of colour Sharpies. Maybe I’ll get it for myself for my birth­day… and I will make a tie-dye t‑shirt with them! :D How-to on Crap I’ve Made.
 

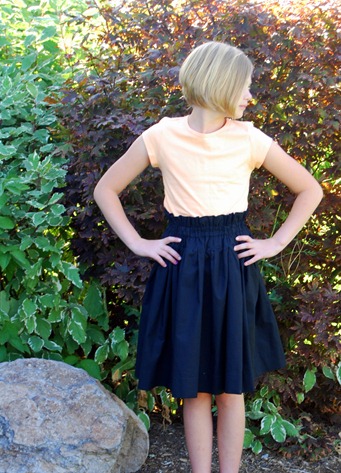
More from Crap I’ve Made (the stuff on there is def­i­nite­ly not crap) — I’ve been look­ing for a sim­ple way to make a high wast­ed skirt, and this seems sim­ple enough, with no shirring involved (but it looks kind of like it’s shirred, which I like very much). The tuto­r­i­al is writ­ten to make an old­er child-size skirt, but I’m sure it would be easy enough to mod­i­fy to fit an adult (espe­cial­ly a short adult, like me :D).


I love gar­ments with sim­ple con­struc­tion, and this is just a rec­tan­gu­lar piece of fab­ric fold­ed in half, seamed togeth­er at the shoul­ders and one side, with the arm­holes and neck­lines cut out. I have a large piece of blue pol­ka dot fab­ric, I might try it out! :D Instruc­tion on Amelie and Atti­cus.
 

Fan­cy a cup of tea? Invite the neigh­bour­hood birds to your tea par­ty with this teacup bird feed­er! :D How-to on Inti­mate Wed­dings.
 

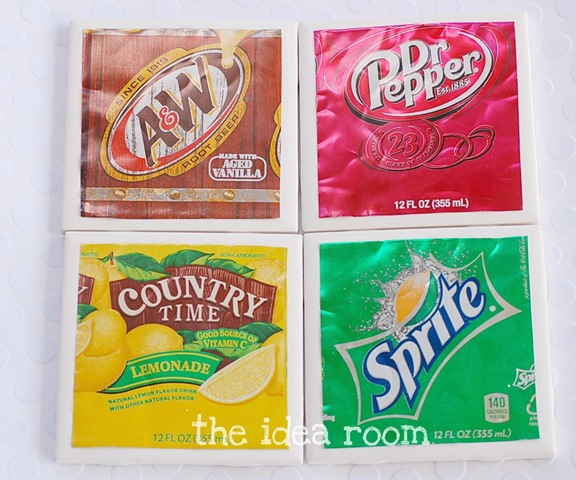
Cool coast­ers made with soda cans and plain white tiles! I do like the colour­ful designs of some soda cans (or pop cans, as we Cana­di­ans call it :D); it would be a great way to keep pop cans that we don’t get local­ly, like birch beer. Instruc­tion on The Idea Room.


A great way to recy­cle and dec­o­rate! Box lid frames from Art­ful Adven­tures. Per­haps also a great way to make shad­ow box­es, with 3‑dimensional objects, like seashells and acorns! :D
 

More fram­ing! This time with an old Scrab­ble set. I love how one can spell out words with the Scrab­ble tiles. How-to on Pho­to­jo­jo.


This is how every pair of jeans should be repaired. From The Evo­lu­tion of Home.


I’ve actu­al­ly nev­er tried mak­ing things with Per­ler beads, but I know they sell large jars of them at Ikea — must pick up a jar on our next trip! I need some of these gar­den mark­ers in my house­plants :D How-to on Small­go­od Hearth.


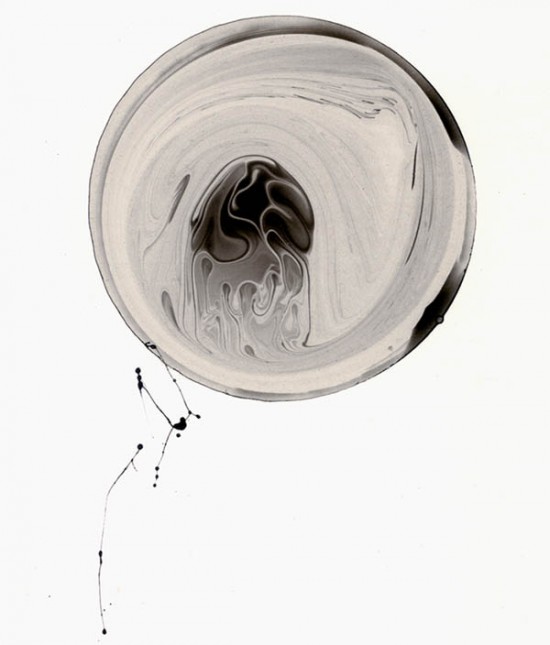
These ink bub­ble draw­ings are mes­mer­iz­ing. See the whole gallery of them on Fubiz.


And guess what? You can make your own mar­bleized draw­ings with just food colour­ing and veg­etable oil! How-to on Mom­tas­tic.


These bril­liant hous­es are made from old quilts. Sim­ply pre­cious and very inspir­ing. I just want to hold them in my hands. From Grrl+dog. They’re avail­able from this Etsy shop.


A dif­fer­ent kind of embroi­dery and a dif­fer­ent kind of awe­some. This reminds me so much of Chuck Close’ work. Embroi­dered por­traits by Daniel Korn­strumpf. (via Swiss­miss)

Hap­py Friday!

no glue gun? no problem!

Had a bit of a busy week last week. It was excep­tion­al­ly awe­some, but we had a wed­ding to attend on the week­end and I did­n’t quite have time to think about what I was going to wear.

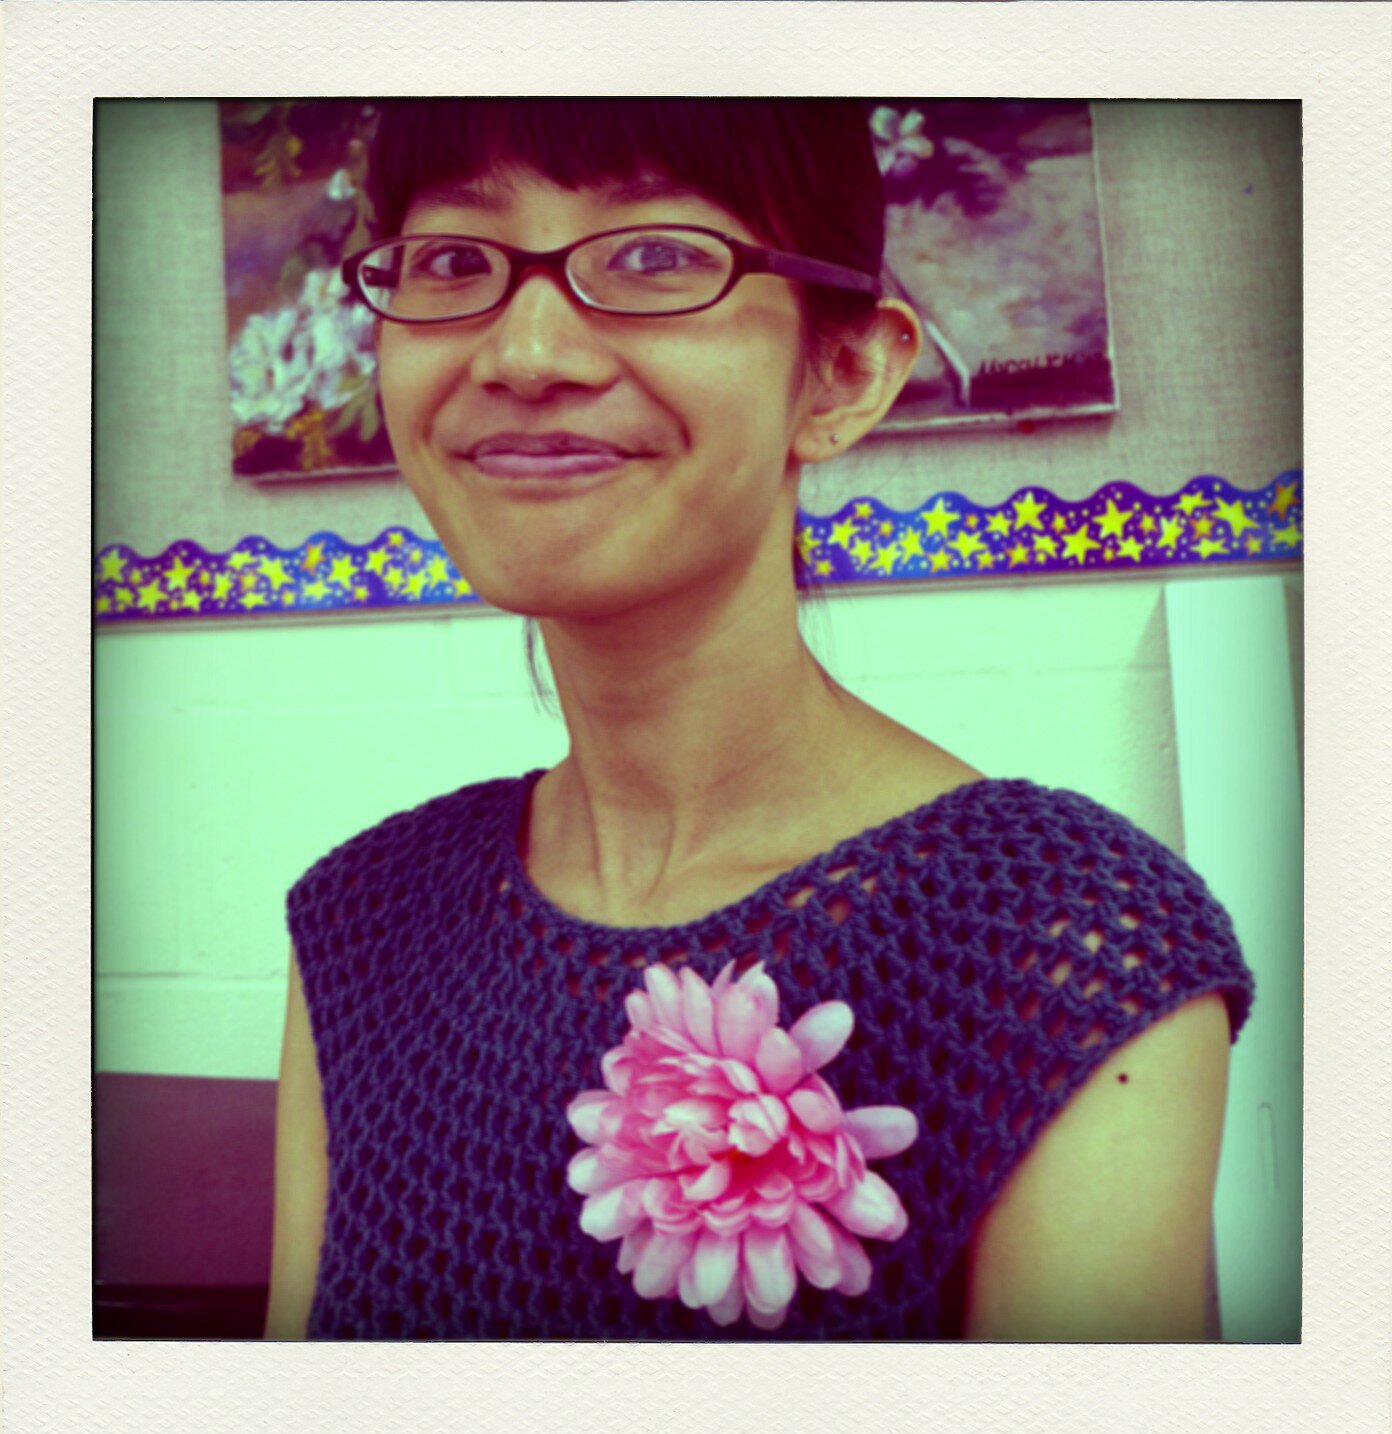
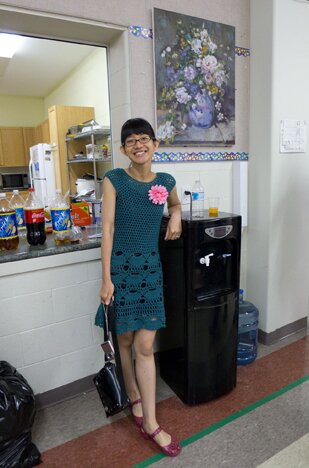
Actu­al­ly, I decid­ed a long time ago that I was going to wear the mus­sels dress, but it need­ed some­thing cheer­ful. I was going to make a fab­ric flower pin like these ones, but I seri­ous ran out of time.

So on our way to my par­ents’ to pick up the car to dri­ve to the wed­ding, I wan­dered into a dol­lar store and — thank­ful­ly — found the per­fect flow­ers to go with my dress.

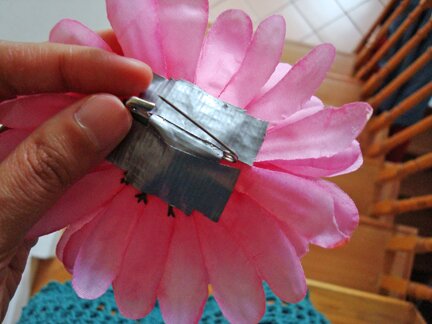
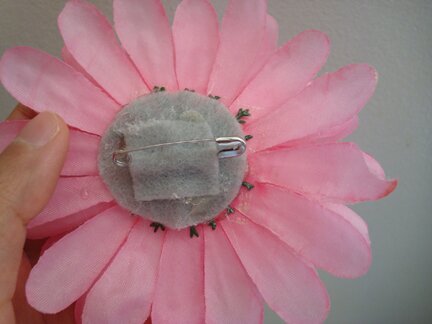
I was at my par­ents’ and did­n’t have any of my craft tools with me, includ­ing my handy glue gun. Not a prob­lem. I snipped off a flower from its stem, secured all the lay­ers of petals togeth­er with a few stitch­es in the mid­dle, and duct-taped a safe­ty pin on the back.


Instant flower brooch! One would nev­er be able to tell it was duct-taped :D (at least I did­n’t think so…)


But duct-tape was real­ly just a Band-Aid solu­tion. It was slow­ly start­ing to peel off dur­ing the cer­e­mo­ny. Then I left it in the hot car to get gro­ceries on our way home, and the duct tape was real­ly com­ing off after­ward. I think the adhe­sive melt­ed :S

I real­ly like how the flower look on the cro­chet dress. So when I got home, back with my glue gun again, I attached the safe­ty pin on it with felt. Now I can wear it again and again! :D (I kind of did a messy job apply­ing the hot glue though… oh well, no one is going to see.)

Hap­py Wednes­day! :D


super awesome week! :D

I’m very eas­i­ly amused, so it’s not hard for me to find awe­some things to feel hap­py about on an ordi­nary day. But last week was SUPER awe­some! Just an accu­mu­la­tion of awe­some things that I don’t encounter on a reg­u­lar basis.

First, the weath­er was REALLY nice all week. So nice that I start­ed to expect rain — sun­ny weath­er does­n’t last more than a few days until the rain clouds start to take over again, and so if I start to expect rainy weath­er than I would­n’t be too dis­ap­point­ed about the loss of sun and blue sky.

But rain did­n’t come! And at the end of most days last week Mike and I were able to enjoy some gor­geous sun­sets on our west-fac­ing balcony.


Thurs­day was the day that I was real­ly pray­ing for the rain to stay away. It was the open­ing recep­tion of a small art show I orga­nized in the com­mu­ni­ty, and the Weath­er Net­work called for rain all day. So I was a bit ner­vous about it through­out the day, but guess what? It did­n’t rain. Not one bit.

AND guess who walked through the door at the art show opening?

MURDOCH!!!


I still can’t get over it ‑ Yan­nick Bis­son, of Mur­doch Mys­ter­ies, one of my absolute favourte TV shows, came to the open­ing reception!

I was too utter­ly shocked to go up to intro­duce myself or even to snap a pic­ture (I also had to give a short speech and I’m ter­ri­fied of pub­lic speak­ing, so I want­ed to focus on prepar­ing myself for that). I saw that he was min­gling with the direc­tors, so I thought some­one would even­tu­al­ly intro­duce me after the speech­es and all that… but he left! He left ear­ly, even before I gave my speech :’(

Oh well. It was still real­ly cool to see detec­tive Mur­doch in per­son! :D Mur­doch Mys­ter­ies is prob­a­bly my sec­ond favourite show at the moment (a close sec­ond behind Fringe), because not only is it a Cana­di­an pro­duc­tion, it is also set in late 19th cen­tu­ry Toron­to (you know how I like to vis­it old hous­es and learn about life in the past). And so when Inspec­tor Brack­en­reid men­tioned “Mary of Shuter Street”, I know exact­ly where that is! :D

The next day I had to work at a school pic­nic. The sky final­ly sprin­kled a few drops of rain on us but noth­ing major after every­thing was set up, which I was real­ly thank­ful for, because oth­er­wise it would­n’t be pos­si­ble to run the cot­ton can­dy sta­tion outside!

I even got to work at the sta­tion for part of the day, mak­ing cot­ton can­dy cones! Despite my hair and glass­es and clothes being cov­ered in cot­ton can­dy floss, it was way fun!

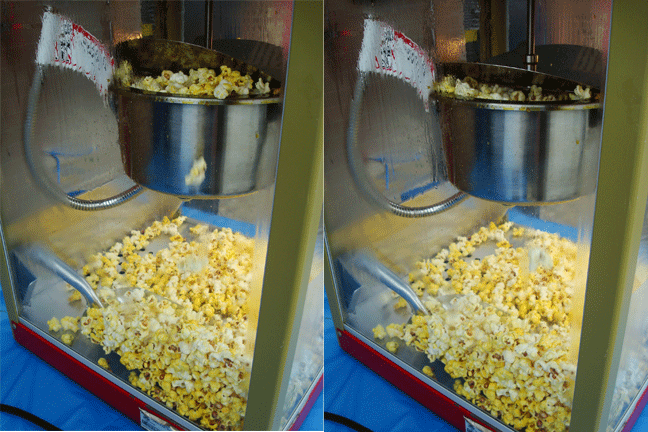
I also served pop­corn from the popper!

I saw this very cool tuto­r­i­al for mak­ing ani­mat­ed image on Make it and Love it, and thought some of the pic­tures I took of the pop­corn pop­ping would make a fun ani­ma­tion. Though I did­n’t take the pic­tures with that in mind and so only two pic­tures were usable… but I thought I would give it a try any­way :D

Looks like it’s eat­ing the pop­corn rather than pop­ping them out :P

nom nom nom nom nom…

The ani­ma­tion was so much fun to make! I’ll have to try it with oth­er pic­tures sometimes…

And then I got a cup­cake at lunch break (on top of all the oth­er great food the par­ents brought), which I ate while sit­ting on the grass. The cup­cake was as deli­cious as it was pretty.

Then on Sat­ur­day we met up with some old friends and wit­nessed anoth­er old friend being mar­ried :D Very excit­ing indeed. There was sushi as far as eyes could see at the lunch buf­fet recep­tion. After much eat­ing and chat­ting and clap­ping and laugh­ing and singing, and while oth­er guests start­ed leav­ing and helpers start­ed clean­ing, here I am rest­ing by the water­colour, feel­ing very happy.

Rec­og­nize the mus­sel­s dress, and my sum­mer shoes? :D

The flower pin is anoth­er crafty sto­ry in itself. I will have to save it for next time.

I know not every week will be like this one, and some weeks are com­plete­ly dis­as­trous, but I’m just very, very thank­ful for all the won­der­ful things this week. Hope you have a great start to your week!


If good things last­ed for­ev­er, would we appre­ci­ate how pre­cious they are?
— Hobbes (the stuffed tiger)


favourite things friday

Sweet­est thing ever. Free stitch­ing pat­tern on Lazy May. (via Feel­ing Stitchy)


I always admire the twig struc­ture that vines grow on in peo­ple’s yards. Here’s how to build one! From Craft Left­overs.


Portable weav­ing, involv­ing just card­board pieces and stash of yarn, both of which I have plen­ty — anoth­er must-try on my list! :D A very detailed and clear tuto­r­i­al on Gin­ger­bread Snowflakes.


I could­n’t help but grin when I saw these. So delight­ful­ly sim­ple. Loo roll crit­ters from El hada de papel.


I love how the hinge is made of rolled up paper too! Makes a very sculp­tur­al home decor. Paper bowl tuto­r­i­al on Recy­cle, eh.


I’ve heard of freez­er paper sten­cil­ing but nev­er tried it myself. Say YES! to Hobo­ken has some real­ly clear instruc­tion for it, and from her projects (like this beau­ti­ful Gold­en Gate Bridge!) it looks like small details trans­late well — like screen print­ing, but with equip­ment one can find in the pantry! I might try it out soon!


Per­fect father’s day gift and a bril­liant idea. How-to for pock­et watch album on The Moth­er Hud­dle.


Also bril­liant is this apron with a remov­able tow­el. I used to have to wear an apron for work every­day, and I imag­ine a tow­el is prob­a­bly more effec­tive for clean­ing hands than the aver­age apron mate­r­i­al. How-to on H is for Hand­made.


Clever and styl­ish use of the queen Anne’s lace pat­tern! Spot­ted on Lit­tle Trea­sures.


This lit­tle crea­ture reminds me so much of vaca­tion on the East Coasts. Hap­py times! Free pat­tern from Karabouts.


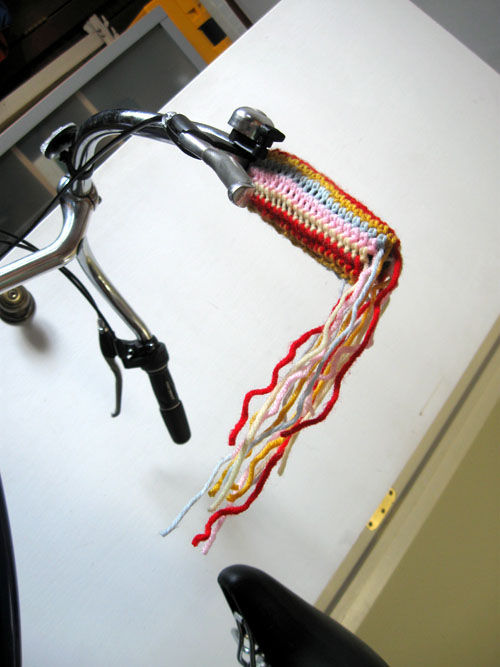
I was so excit­ed when I saw this — I have a friend who loves to cycle and I was going to make it and mail it to her as a belat­ed birth­day present. But then I read the pat­tern I real­ized that I need to have the bike on hand to cro­chet the stream­ers around the han­dles (kind of like yarn-bomb­ing!). Does­n’t make it any less awe­some though! In fact, it’ll just give me an excuse to invite my friend (and her bike) over :D Bril­liant pat­tern on Spec­less.


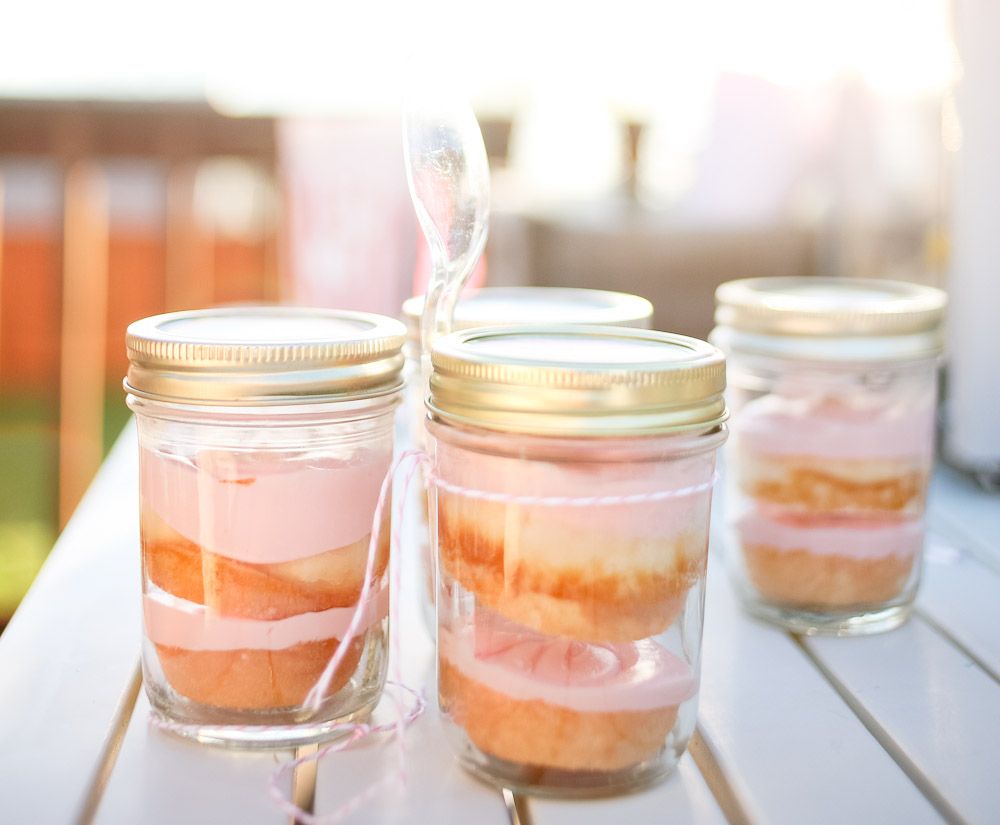
Instruc­tion to make cake in a jar! No, not the kind you have to pour out, add an egg and bake — the kind you can just dig in with all the icing and every­thing! I mean, cup­cakes are cute but I always have a hard time eat­ing the icing and the cake togeth­er. With these one could enjoy both the cake and the icing all at once, and there’s no mess, and one could put it down if it’s absolute­ly nec­es­sary and come back to it lat­er, and it’s just as pret­ty as cup­cakes. Bril­liant! From Dear Lizzy.


French artist Eti­enne Cli­quet designed these origa­mi mod­els to unfold on water through cap­il­lary action. Watch the mes­mer­iz­ing video on Craft!


Lego ship in a bot­tle! There’s even a time lapse video doc­u­ment­ing how it’s built here!


A gallery of card­board cities and places in the world — I love the card­board pan­das and the dou­ble-deck­er bus in Lon­don :D From Paper Crave.


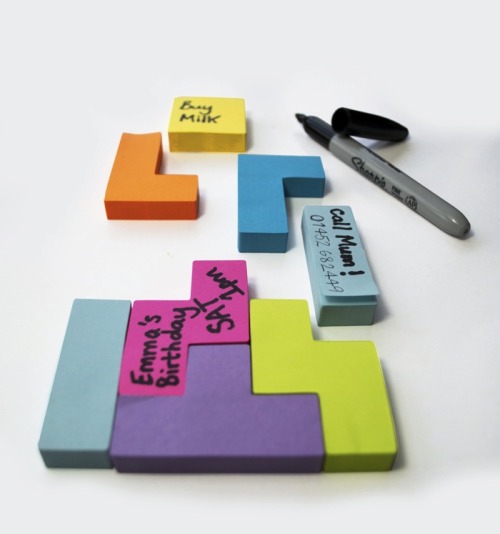
Tetris is my favourite video game (and the only game I can play well. Real­ly well, actu­al­ly, if I do say so myself), so I have to put this in my list of favourite things this week — Tetris sticky notes! (via Inspire me now)


Final­ly, I must also share this. It’s been in my favourite thing fold­er for a while, and I open it every now and then to watch the video. It’s a real­ly short video but it delights me to no end. Some­thing my broth­er-in-law would total­ly do. It makes me chuck­le. Every time. So here it is. I hope it brings a smile to your face too. (From Cutesy But Not Cutesy)


Hap­py Fri­day! :D

house on a hill


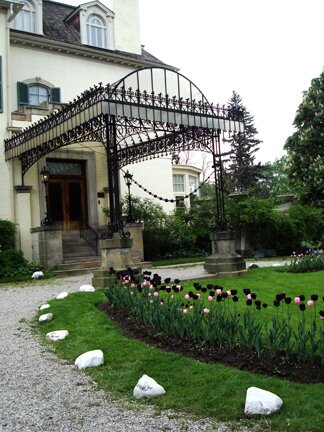
Dur­ing Doors Open Toron­to last month we vis­it­ed the Spad­i­na House Muse­um.

As its name sug­gests, it locat­ed on Spad­i­na Road, and “Spad­i­na” comes from an Ojib­wa word ish­pad­i­naa, mean­ing “be a high hill or sud­den rise in the land” (source).

The house was home to three gen­er­a­tions of the Austin fam­i­ly from 1866–1982. It was donat­ed to the city and opened to the pub­lic as a muse­um in 1984.

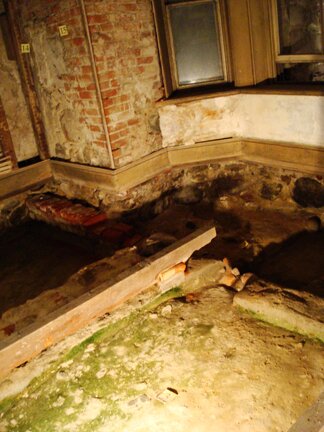
Before the Spad­i­na House, though, there was the Bald­win House, which was burnt down in 1835 (Mr. Bald­win was OK; he lat­er moved to Front St. to be clos­er to work). The Spad­i­na House was lit­er­al­ly built on top of the Bald­win house, as exca­va­tion found the ghost of the old­er house (i.e. the foun­da­tion, brick-bor­dered paths) under­neath the floor boards of the new­er house. I thought that was pret­ty fascinating.


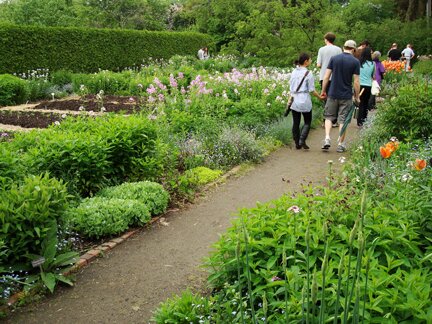
Com­ing back up to ground lev­el, we vis­it­ed the Vic­to­ri­an-Edwar­dian gar­dens sur­round­ing the house.


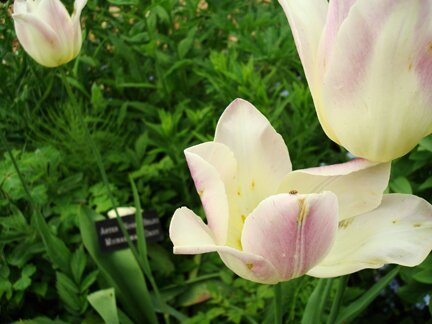
Love­ly pink tulips (and a bug! I love it when I don’t real­ize I caught a bug on cam­era until I look at them on the com­put­er :D).


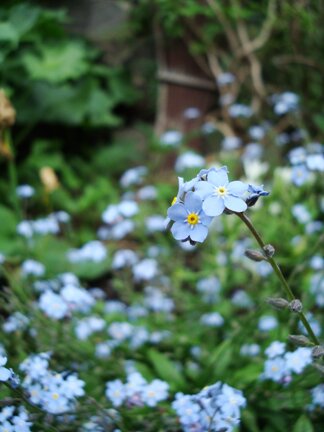
And for­get-me-nots as far as the eye could see! (They’re my favourite.)


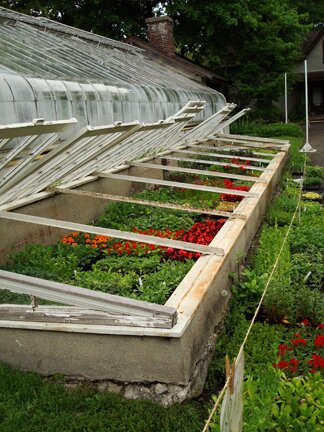
There’s also a green house. I love these win­dow roofs (I don’t know what they’re called :S) for the pot­ted plants.

The house was restored to the 1920–30 peri­od. Beau­ti­ful art deco and arts and crafts style wall­pa­per, car­pets and fur­nish­ing through­out the house. It was rather crowd­ed that day due to Doors Open, so it was kind of dif­fi­cult to take it all in. Must go back and revis­it one day.

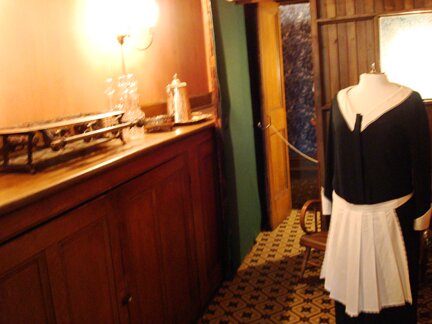
But we saw many cool things nonethe­less. Like the head­less but­ler. (It was a dis­play of the but­ler’s pantry.)


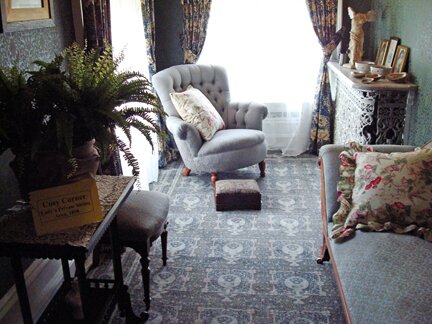
The “cozy cor­ner”, for the women of the house. (If we ever own a house, I’m so get­ting a day bed.) Check out the pat­tern of the met­al cov­er­ing on the radi­a­tor — isn’t that beautiful?


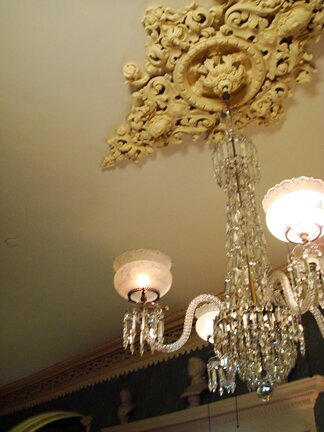
Also beau­ti­ful are the mold­ings around the chan­de­liers. Each is dif­fer­ent and so intri­cate and mesmerizing.

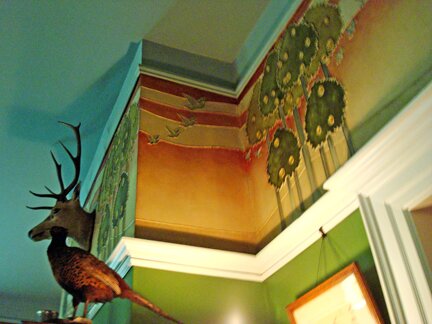
The bil­liard room has this real­ly inter­est­ing wall­pa­per, kind of fairy tale and chil­dren’s book-like.

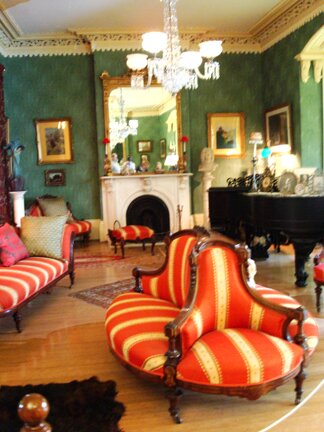
I think this is the room where the fam­i­ly had gath­er­ings. It has a fun-look­ing couch (the orange one in the cen­tre). One of the docents said that its for men and women to sit togeth­er but not touch. (I think she was refer­ring to that couch, but there were too many peo­ple around I can’t be sure whose ques­tion she was answering.)

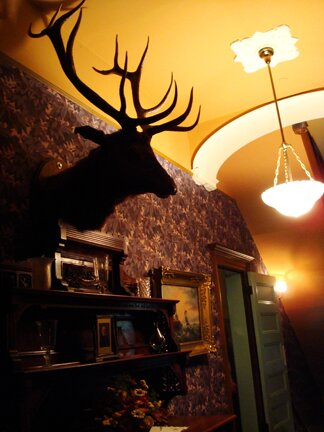
The fam­i­ly was appar­ent­ly avid hunters, so here’s the elk in the hall­way… (if I were a kid grow­ing up in this house, I’d be pret­ty scared walk­ing through this hall­way if I need to use the bath­room at night, being stared down by the loom­ing elk head in a nar­row hallway…)


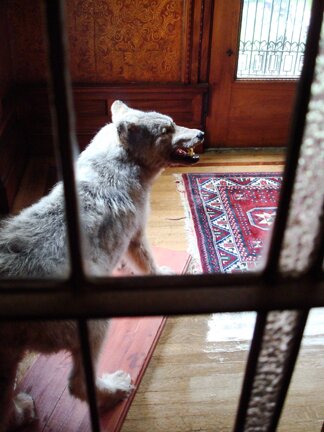
… And a pair of wolves in the front entrance. (Accord­ing to a friend­ly docent, the young chil­dren in the fam­i­ly were real­ly scared of the wolves, and would tip­toe past them every time they walk through the door. I don’t blame ’em :S).


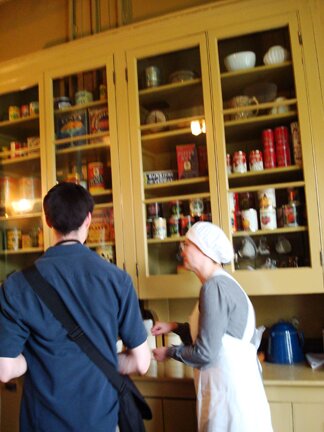
The kitchen is always my favourite place when I vis­it his­toric hous­es. I find it so unpre­ten­tious com­pared to the rest of the house; it’s where peo­ple work and laugh and grum­ble, where peo­ple do hon­est, hard work. Now here’s some­one pre­tend­ing to live in the past for edu­ca­tion’s sake. A docent was explain­ing to Mike the dif­fer­ent “new” prod­ucts in the cup­board, includ­ing Maxwell cof­fee beans.


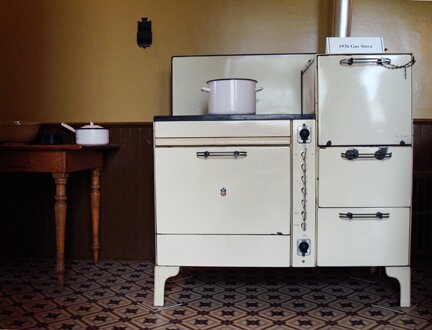
A beau­ti­ful stove.


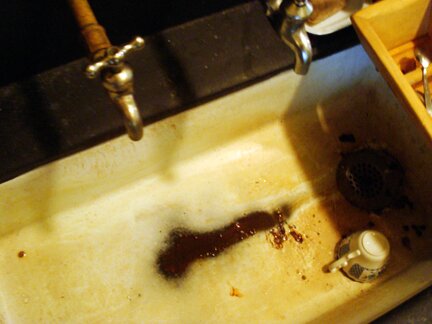
Teacup wait­ing to be washed in the old sink, just like in 1889.


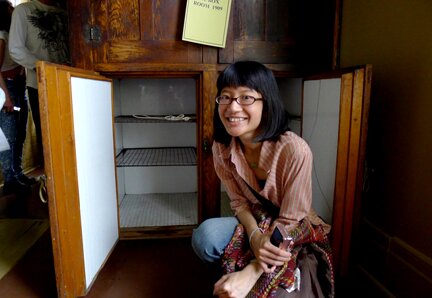
An ice box! :D “But… if there was no freez­er, how did peo­ple make ice to put in the ice box?” asked the child of the tech­no­log­i­cal age sit­ting in front of the ice box.

And then there are the small things that delights me so much…


I love museums :)

Thank you for drop­ping by, have a love­ly day!