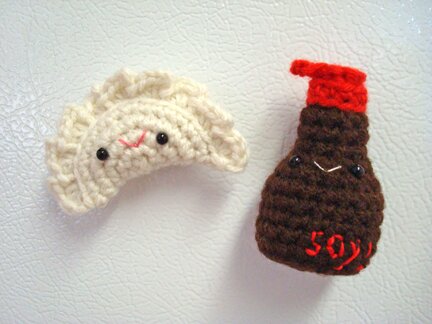
happy together: dumpling + soy sauce :D

Anoth­er pair of plush­es for the hap­py togeth­er series! :D (I’m con­tem­plat­ing the idea of mak­ing a sep­a­rate page for the series, but for the time being you can see oth­er char­ac­ters of the series here, here, and here.)

I’m mak­ing this as a wed­ding gift for a friend who first met her fiancé at a dumpling gathering!

I always eat dumplings with soy sauce… but I don’t know if that’s the norm. I think so… any­way, I wrote down the pat­tern to share. One might think of oth­er things to make that pair bet­ter with soy sauce. (Wasabi? Sushi? Plain bowl of rice? Pos­si­bil­i­ty is end­less for this lit­tle bot­tle of soy sauce!)


Mate­ri­als:

Bits of worsted weight yarn in white, brown, and red

3.5mm cro­chet hook

Stuff­ing (I used yarn ends from unrav­el­ing old work)

Embroi­dery thread in pink and white

Nee­dle and thread

4mm black beads for eyes


Dumpling is made by cro­chet­ing a cir­cle, which is then fold­ed in half and seamed togeth­er with a scal­loped edge.

The cir­cle is cro­cheted in con­tin­u­ous rounds (i.e. no slip stitch at the end of round):

With white

ch 3, 5 sc in 3rd ch from hook, 2 sc in top of begin­ning ch, 2 sc in each of next 4 sc, sc in next sc, repeat [2 sc in next sc, sc in next sc] until piece mea­sures 1 3/4 inch­es across.

Then, repeat [1 sc in each of next 5 sc, 2 sc in next sc] until piece mea­sures 2 1/4 inch­es across. Then sc in next sc, sl st in next sc. Don’t fas­ten off.

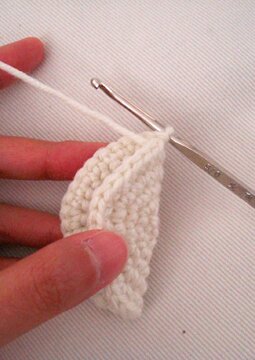
Fold piece in half so that the raw stitch lies on the fold line, like so…

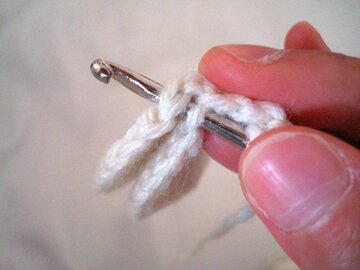
The scal­loped edge is worked through both lay­ers of the fold­ed cir­cle, through the back loop only of the front lay­er and both loops of the back lay­er, like so…

Cro­chet scal­loped edge as follows:

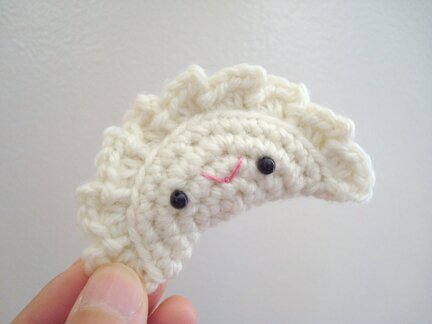
[ch 2, 3 hdc in next st, sl st in next st] 4 times. Leave hook on loop, sew on the eyes and mouth.

Con­tin­ue with repeats of [ch 2, 3 hdc in next st, sl st in next st] across until there are 3 or 4 stitch­es left. Stuff dumpling, then com­plete scal­loped edge, fas­ten off.

And dumpling is com­plete! :D

Now on to the bot­tle of soy sauce. It’s made in rounds, and each round ends with a sl st into the first sc of the round.

With brown

Round 1: ch 3, 5 sc in 3rd ch from hook, sl st in top of begin­ning ch.

Round 2: ch 1, sc in same st, 2 sc in each sc around, sl st in first sc.

Round 3: ch 1, sc in same st, [sc in next sc, 2 sc in next sc] 6 times, sl st in first sc.

Round 4: ch 1, sc in same st, through back loop only, 1 sc in each sc around, sl st in first sc.

Round 5: repeat row 4, except work each stitch through both loops.

Round 6–8: repeat row 5. Don’t fas­ten off.

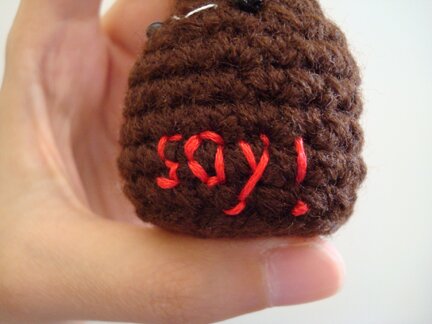
I embroi­dered “soy!” on the bot­tle at this point.

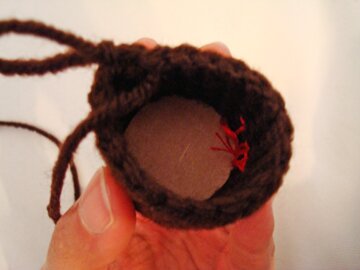
Cut a round piece of card­board (I cut mine from a frozen piz­za box) about the size of the bot­tom of the bot­tle and place it into the bot­tom of the bot­tle. This way the bot­tom will stay flat when the bot­tle is stuffed.

Con­tin­ue with shap­ing the bottle:

Round 9: ch 1, sc in same sc, [2 sc tog, sc in next sc] around, sl st in first sc.

Round 10: repeat row 9.

Sew on eyes and mouth.

Round 11–13: ch 1, sc in same sc, 1 sc in each sc around, sl st in first sc. Fas­ten off.

Now we make the bot­tle cap:

Round 1: Join red where brown is fas­ten off, sl st in each sc around in front loop only.

Round 2: ch 1, sc in same st, through top loop only, 1 sc in each st around, st sl in first sc. Leave a 6″ tail for sewing, fas­ten off.

Stuff bot­tle firm­ly to keep shape.

Top of cap, with the sprout:

With red

Round 1: work 6 sc in mag­ic ring, sl st in 1st sc.

Round 2: ch 3, dc in next sc. Fas­ten off.

Sew top of cap to top of bot­tle, weave in ends.

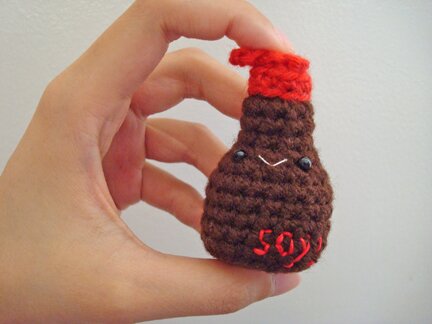
Soy joy! :D

Every­body says “soy!”

And here they are again, hap­py togeth­er :D


If you spot any mis­take or need clar­i­fi­ca­tion please feel free to drop me a note! Chee­rio! :D

dim sum love

I love dim sum.

I like going to dim sum with my fam­i­ly. Lots of chat­ting, lots of eat­ing, lots of dawdling. Makes a relax­ing Sat­ur­day morning.

I also tried to make dim sum at home, with the frozen stuff, steamed in a large saucer. (I tried microwav­ing them before, it was bad news. They must be steamed.)

And of course, I have to make them with yarn.

If you like all-day dim sum that smiles back at you, they’re in my shop :D

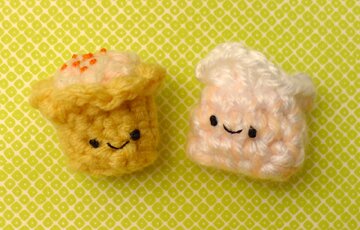
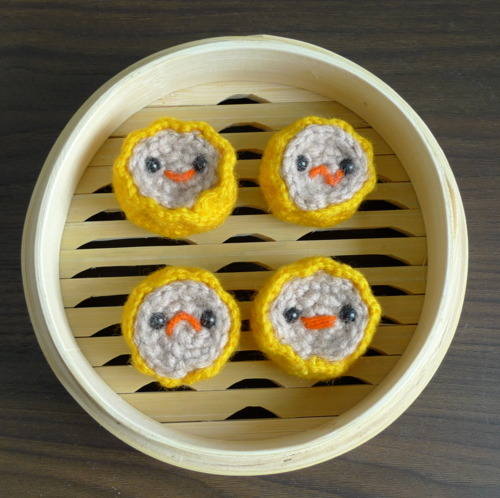
The one on the right is a shrimp dumpling (蝦餃, “har-gau,” the pale pink one), and the one on the left is a pork/shrimp dumpling (燒賣, “siu-mai,” the yel­low one). Siu-mai was the kind I was steaming.

Har-gau is a steamed dumpling filled with shrimp and wrapped in a white, translu­cent wrap­per. Siu-mai is also a steamed dumpling filled with both pork and shrimp and wrapped in a yel­low wheat wrap­per and topped with crab roe.

If you do know how to cro­chet though, here’s a bril­liant pat­tern for mak­ing siu-mai from All About Ami! I’m so tempt­ed to make them, they would make a great “how are you feel­ing today” chart on my fridge! :D
If you pre­fer to knit, I stum­bled upon this great pat­tern for knit­ting dumplings (or jiao-zi, in Man­darin)! The writ­ten pat­tern is a free Rav­el­ry down­load if you’re a Rav­el­er, but there’s also a how-to video for every­one. The cre­ator stuffed the dumplings with cat­nip for her cat to play with :D
 

I’ve been work­ing on some dumplings as well! Cro­chet­ing, of course, and adding anoth­er pair of char­ac­ters to my “hap­py togeth­er” series (which includes, so far, nigiri and wasabi, napa cab­bage and chest­nut, and pina cola­da). Char­ac­ters in the hap­py togeth­er series were main­ly made for wed­dings (except for the napa cab­bage and chest­nut, which are for my mom), and these ones I’ve just made are no excep­tion — they’re for an old friend who first met her fiance at a dumpling gath­er­ing! She’s prob­a­bly too busy to read my blog at this point, and I’m going to block her from see­ing this post on Face­book, so it should be safe to show you… if you promise to keep a secret, that is.

Ta-da! Dumpling, and a lit­tle bot­tle of soy sauce! XD They’re spend­ing a few hap­py days on my fridge, then I must say good­bye to them and send them to their new home on Sat­ur­day… *sniff* But I’ll be ok…

Stay tuned for the pat­tern, com­ing in the next cou­ple of days!

Hap­py Monday!

sunday video — greetings from buttonville!

Spot­ted this on Craft this week, a super adorable stop motion video fea­tur­ing but­tons and a zip­per train!

More fun facts from Bonkers About But­tons:

Russ­ian ani­ma­tor, Anas­ta­sia Zhu­ravle­na cre­at­ed & direct­ed this fab­u­lous short film ded­i­cat­ed to all the but­tons lost in the metro… Start­ing with a rush-hour scene, where the trains are made from zips, the sto­ry unfolds of but­ton love found on the esca­la­tor, love lost and love redis­cov­ered. There are also some great lit­tle scenes of a but­ton tak­en ill and then the usu­al drunk­en but­tons on the last train home!

I love the “Asian tourists” with squin­ty eyes, espe­cial­ly when they start­ed snap­ping pic­tures! XD

Accord­ing to Google Trans­late, the title means “care­ful­ly doors open”. Enjoy!


p.s. The title of this post is inspired by the mem­o­ry of dri­ving by But­tonville every week going to water­colour class. It even has an air­port. I always thought it was a cute name for a small com­mu­ni­ty :D
favourite things friday

I love look­ing at maps and read­ing all the names of dif­fer­ent places. These coast­ers will have me mes­mer­ized for hours. How-to on I Could Make That.


Oooh, what an idea! “When you can’t hide them, embrace them,” it says. From Unplggd.


Love the sim­plic­i­ty of this. Per­fect craft for beach­combers, like me :D I can pic­ture them being won­der­ful place card hold­ers too! For a par­ty or even a beach-themed wed­ding! I so want to make this, but we have no room to put them in our apart­ment — I vol­un­teer to make place­card hold­ers if any­one is hav­ing a beach-themed wed­ding! How-to on Paint Cut Paste.


A skirt made of fab­ric nap­kins! I’m intrigued! Tuto­r­i­al on Bet­ter Togeth­er (via Ucre­ate).


A very love­ly yet sim­ple design. Head­band how-to on say YES! to hobo­ken.


I guess it has a bit to do with the blue table cloths in the pho­tos, but these remind me of the Japan­ese cer­e­mo­ny of Toro nagashi, in which par­tic­i­pants float lanterns down a riv­er. Very peace­ful to look at. How-to on Mom­tas­tic.


I recent­ly dis­cov­ered and start­ed fol­low­ing My Lit­tle Hut, a blog with absolute­ly amaz­ing paper cut designs. Here the artist behind the blog shares how to make wal­lart with junk mail on Craft. It’s brilliant!


Equal­ly bril­liant is this match­book card or wall art, also shared on Craft. It was post­ed as a Valen­tine’s Day project, but I think it would be love­ly gift idea for any season.


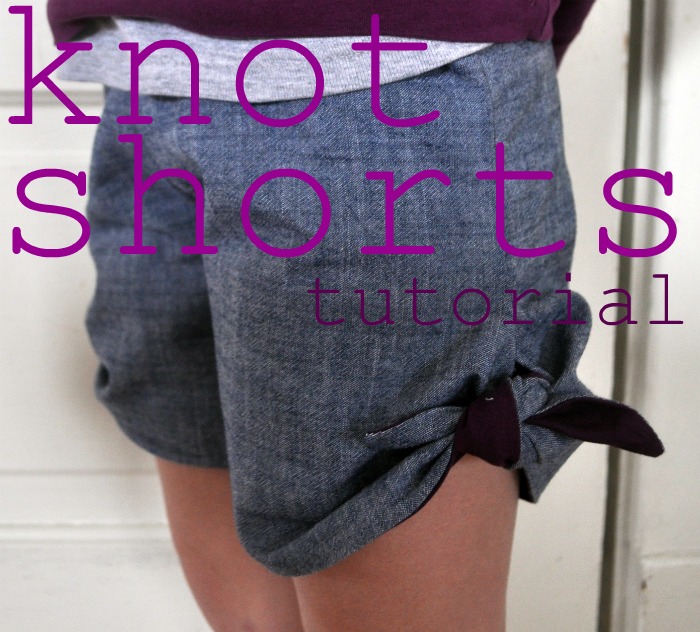
These are, of course, made for kids, but the tuto­r­i­al involves trac­ing an exist­ing pair of shorts or pants, so I imag­ine it would be easy to mod­i­fy to adult sizes. I don’t usu­al­ly wear shorts, but I would total­ly wear these. Tuto­r­i­al on Gros­grain. (I think I just like the look of twist­ed or knot­ted fabric…)


Pho­to­booth pic­tures seem to be a trend at wed­dings these days. Mike and I always joke that if we do our wed­ding again we would need to have a pho­to­booth. And a prop­er cake (we had one but it was pre-cut into squares thanks to the cater­ing staff :S). But since we’re not going to have anoth­er wed­ding we can have a pho­to­booth for par­ties, with these fun props! How else could you get a pic­ture with the fas­ci­na­tor? Print­a­bles on Oh Hap­py Day.


Print­ing with seeds and pods! I real­ly like the pat­tern that the pop­py pod makes (the white prints). From Maya Made.


This key lime pie pop­si­cle is appar­ent­ly made from con­densed milk — A must-make! If con­densed milk and lime aren’t your thing, there is a list of oth­er dessert flavoured pop­si­cles over on Be Dif­fer­ent Act Nor­mal, I’m sure you’ll find one you like :D


This is the funnest snack ever — fea­tur­ing Bert and Ernie! (My brain prompt­ly cues Healthy Food). How-to on Kitchen Fun with My Three Sons.


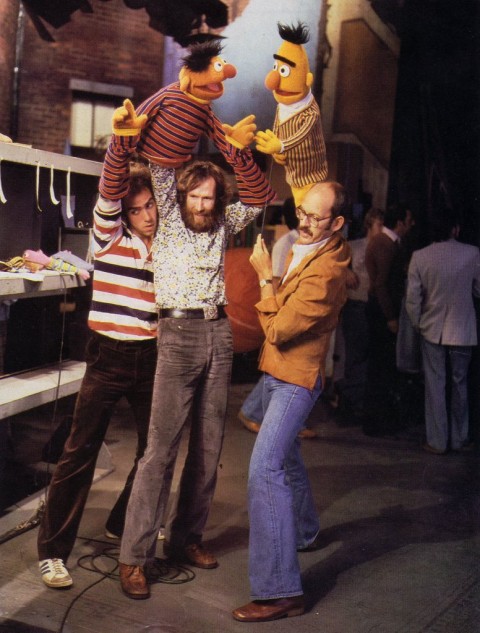
And final­ly, see Ernie and Bert on set! A very cool gallery of behind the scene pho­tos of famous movies, back when sets were hand­made and spe­cial effects mechan­i­cal, on angusrshamal.com (via Swiss­miss).

Wish­ing you a love­ly Fri­day! :D

today


Today I want­ed to wear my pink tunic/dress, but I need­ed to lay­er it with something.

All the tank tops are in the wash.

I have a pile of wait­ing-for-ideas-to-mod­i­fy cloth­ing in my clos­et (“you mean, the pile of rags in your clos­et,” said Mike). Ok, fine, the pile o’rags.

And I found this shirt that was giv­en to me, from a cer­tain Iron­work Fit­ness health club in south­ern Ontario. It fits well, and I like the colour and the length of it, but I don’t work out. I would feel bad wear­ing this shirt just as it is, as if I were pre­tend­ing that I work out.

At first I just cut away the sleeves and the col­lar, but the arm­holes turned out too big, so I decid­ed to low­er the shoul­der seams, as shown in my nifty dia­gram here.


All done before I had to leave for work.


It’s noth­ing spec­tac­u­lar. The mod­i­fy­ing is pret­ty sim­ple, and I work pret­ty late so I have plen­ty o’time in the morn­ing. Also, I work in a rather casu­al set­ting, so I can get away with wear­ing a cut-up shirt because 4 year-olds have more impor­tant things on their minds than to care about what I’m wearing.

If you want to see some real­ly amaz­ing refash­ion­ing, check out New Dress A Day! That is, if you haven’t come across it already…

In fact, I was just catch­ing up on NDAD’s posts, and that was what moti­vat­ed me to make some­thing with the pile o’rags today. Even though it’s just mak­ing a few cuts and sewing a cou­ple of lines. I’m rather pleased with it. I liked it with the pink dress.

Hap­py Thurs­day! :D


milk tea chez mudpie

Once in a while we buy con­densed milk for tea. So instead of using sug­ar and milk, we add two heap­ing spoon­fuls of con­densed milk into our tea. It’s absolute­ly creamy and delicious.

It’s far too warm for hot tea in the after­noon these days, so I thought I’d try mak­ing some cold Hong Kong style milk tea that one could get at Chi­nese bakery/coffee shop/diners.

My process was pret­ty intu­itive (read: total­ly eye-balling and guessti­mat­ing), but it tast­ed almost as good as what I remem­ber from the Chi­nese din­ers! (but then I’m not very picky when it comes to taste… it should be good though, because con­densed milk makes every­thing bet­ter :D)

I need­ed some real­ly strong tea, because I would add ice cubes to it lat­er (I learned this from my barista days :D). So I tossed an orange pekoe teabag into a mug and filled it 2/3 of the way full with hot water.


While let­ting that steep, I poured  about 3 table­spoons of con­densed milk into a large mix­ing mug. (Please excuse the toast crumbs in the con­densed milk — we also put it on toast)


After the tea has been steep­ing for 5 min­utes, I poured it into the con­densed milk and gave it a vig­or­ous stirring.


Then I poured it over ice — TA DA! Cold milk tea! That was quick, was­n’t it?


I poured it into emp­ty jel­ly jars because it made a cool pho­to. I had some left­over after fill­ing one jar. It prob­a­bly makes one large glass of cold milk tea.

I like my tea real­ly sweet, but this is eas­i­ly adjustable — one could add more ice if one finds the tea too sweet, or add more con­densed milk if one finds it not sweet enough.

Cheers! :D

awesomeness

Recent­ly I took out The Book of Awe­some from the library. It had me chuck­ling to myself many times when I read it on the sub­way. That in itself is pret­ty awesome.

And so like many peo­ple who’ve read the book or the blog of 1000 Awe­some Things, I’ve start­ed to men­tal­ly doc­u­ment every­day awe­some things.

Like, fresh­ly opened ice cream! When its sur­face is all smooth and creamy. I know that the ice cream will be soft and easy to scoop out and fresh tast­ing. And it’s so short-lived. After a week of open­ing, ice crys­tals will start to form and the ice cream will be all hard and even gooey in spots.

But for now, we’ll savour the moment. And snap a photo.

I’m known to be the one who takes pho­tos. Some­times I get com­ments like, oh here’s Trish with her cam­era again.

I admire peo­ple who can just live the moment and savour the expe­ri­ence and the mem­o­ry of that is sat­is­fy­ing enough. I, on the oth­er hand, feel com­pelled to take a pic­ture when I see some­thing new or inter­est­ing (and new or inter­est­ing to me could mean a patch of light on the wall as the sun sets, or the shad­ow of my house plant with a strange shape that I’ve nev­er noticed before). What­ev­er it is, I feel the need to cap­ture and con­vey the essence of what I see and experience.

I’m by no means a pho­tog­ra­ph­er. I was nev­er trained in pho­tog­ra­phy (high school pho­tog­ra­phy class does­n’t real­ly count; plus, I did­n’t do so well in it), and I only know how to use a point and shoot. But it’s still exciting.

Today I was read­ing this inter­view with Moby who is going to release a pho­tog­ra­phy book with his new CD. Some­thing he said real­ly res­onat­ed with me. Made me feel like I’m not the only one who feels this way, like I’m not crazy (or maybe Moby is crazy, so then I’m not the only crazy one. I can live with that).

My uncle when I was grow­ing up and some of my oth­er friends who are doc­u­men­tary film­mak­ers instilled in me this idea that what­ev­er envi­ron­ment you live in it’s prob­a­bly worth doc­u­ment­ing even if you don’t see that, like things that seem nor­mal to you in your envi­ron­ment to some­one else can seem very inter­est­ing and strange and so I want­ed to doc­u­ment that strangeness…

… music and visu­al art for me is all the prod­uct on one hand of liv­ing in this strange and beau­ti­ful world and on the oth­er hand try­ing to rep­re­sent the strange­ness and the beau­ty and the world just keeps get­ting stranger and more beau­ti­ful. I feel com­pelled to make art that on one hand reflects and some­times almost cre­ate like a sense of com­fort when con­front­ed with the strange­ness of the world. 

That’s the most awe­some thing I’ve read this week, and it’s only Tues­day! Imag­ine how many more awe­some things we’re going to encounter for the remain­ing 5 days of the week!

Take care, friends :D

recycling bin kaleidoscope!

A while ago I showed you a project I did in school, the altered book project, where I turned a botan­i­cal for­eign book into a kalei­do­scope. I thought I would share the process here, but with a chal­lenge for myself — every­thing I use must come from the recy­cling bin!

It even has turn­able, inter­change­able lens­es, like my altered book project :D


I’ve made kalei­do­scopes with groups of kids in the past (6–12 years old), and they seemed to have lots of fun and quite proud of what they made. For the younger kids I cut some of the parts for them ahead of time, like the clear plas­tic, and the hole in the mid­dle of the eye piece (because it’s eas­i­est to cut with a util­i­ty knife). For the old­er kids I just made copies of tem­plates and had them cut out the shapes them­selves (except the hole in the eye piece — I still cut that ahead of time).

Old­er kids (8+ years old) can prob­a­bly han­dle a lot of the steps them­selves, but help from an adult would be nec­es­sary for this project, espe­cial­ly for stuff involv­ing the util­i­ty knife and hot glue gun.

There are lots of instruc­tions for home­made kalei­do­scope, like this one. But I’ll show all the steps here, makes it eas­i­er if any­one’s going to try this.

So! From the recy­cling bin, I pulled:

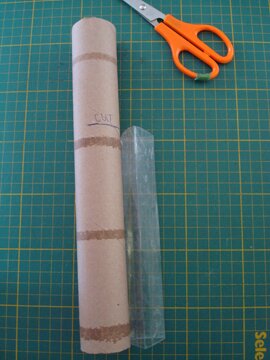
- Two card­board tubes. One is slight­ly larg­er than the oth­er in diam­e­ter, i.e. a loo roll (aka TP tube) is usu­al­ly larg­er in diam­e­ter than paper tow­el tube.

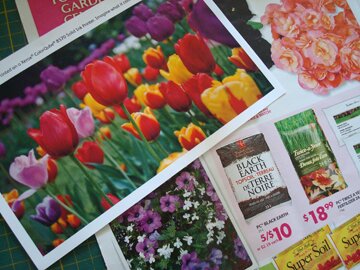
- Fly­ers with pic­tures of flow­ers, i.e. the gar­den­ing section.

- Bit of card­board from a gra­nola bar box.

- A stiff sheet of clear plas­tic from the pack­ag­ing of a swiss roll. A sheet of clear plas­tic that’s large enough for this project may be hard to come across, so if you can’t find any, over­head trans­paren­cies or project cov­ers work perfectly.

Then I used these tools:

- Clear pack­ing tape

- Hot glue

- White glue

- Util­i­ty knife

- Scis­sors

- Ruler

- A bowl

To make the kaleidoscope:

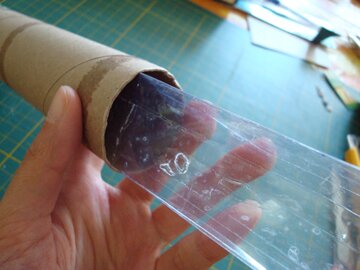
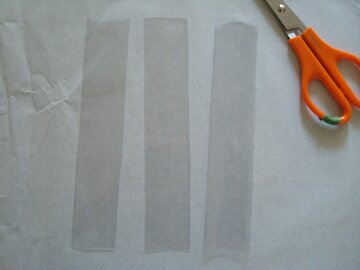
First, make the prism by cut­ting out three pieces of clear plas­tic. It needs to fit snug­ly inside the small­er paper tow­el tube. To deter­mine the length of the short side of each piece, I Googled “para­me­ter of a tri­an­gle inscribed inside a cir­cle”. I found this for­mu­la that some­one real­ly smart came up with and fol­lowed it.

The for­mu­la is: 3 x square root of 3 x radius.

The radius of the small­er paper tow­el tube is 2 cm. So fol­low­ing the for­mu­la I got 3.46.

I mea­sured 3.4 cm on for each short side. It does­n’t real­ly mat­ter how long the long side is, as long as the three pieces are iden­ti­cal in mea­sure­ment. I just har­vest­ed as much plas­tic from the pack­ag­ing as possible.

Then I taped them togeth­er along the long sides with some pack­ing tape, form­ing a prism.

Now for the kalei­do­scope tube, I took the small­er card­board tube and cut it to the same length as the prism.

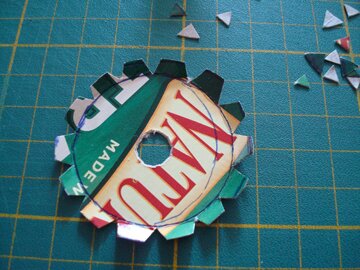
To make the eye piece (i.e. the end where one looks in), I traced the end of the small­er card­board tube on a piece of card­board, print side up. I then drew a larg­er cir­cle around it and cut it out. Then I cut out small tri­an­gles all around, and fold­ed the notch­es up. Final­ly, I cut a small cir­cle in the cen­ter with a util­i­ty knife.

This piece is then taped to one of the ends of the small­er card­board tube with pack­ing tape, like so (prob­a­bly looks nicer if you glue the notch­es down with some white glue, but tape is quicker).

One could prob­a­bly wrap/decorate the tube with some nice papers at this point, but I did­n’t have any­thing in the recy­cling bin that I liked, and plus I like how it has the “recy­cling bin look” with the bare card­board, so I just left it.

Then I took the prism and put some white glue all along the edge of one end…

Then I slid the prism inside the tube with the eye piece, with the glue side going in first.

I let it stood, eye piece down, to dry for a while…

Which made it a good time to make the inter­change­able lens­es, from these flyers!

I put a short length of pack­ing tape on a pic­ture of the flowers.

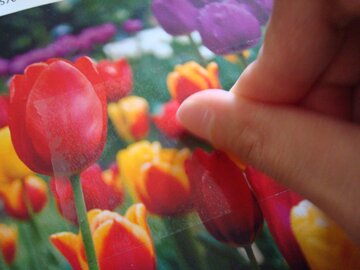
Then I scraped it with my thumb­nail to get rid of any air bub­bles, so the tape is in com­plete con­tact with the paper.

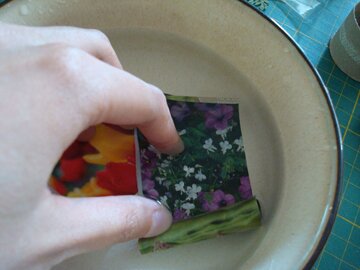
I cut out the taped areas of the pic­tures and immersed them in a bowl of water, let­ting them soak for a few minutes.

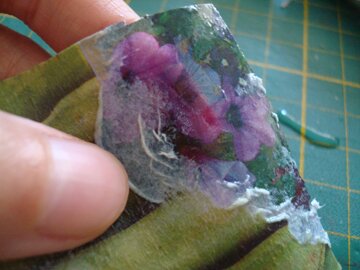
Then I took it out and start­ed rub­bing off the paper fiber on the back of the image (the side that’s not taped).

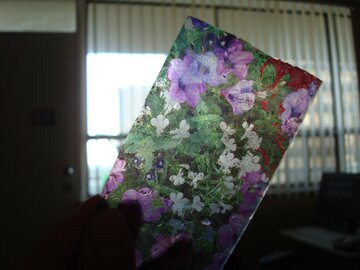
Remove as much fiber as pos­si­ble, and you’ll get a trans­par­ent image! Pret­ty neat, huh?

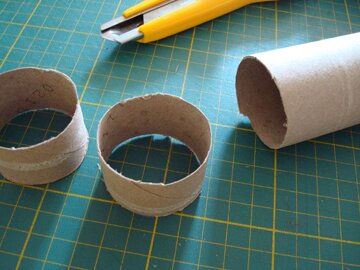
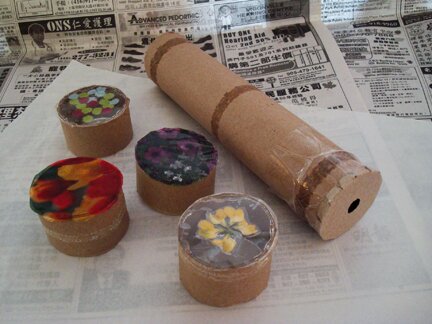
While I let these dry com­plete­ly, I took the larg­er card­board tube and cut them into rings that are about 1 inch tall.

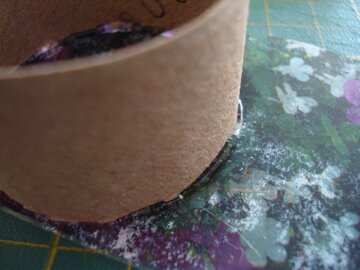
To attach the ring to the image, I put hot glue all around one end of the ring, and placed it on top of the image, tape side down (this is a bit tricky, an adult should do it). After the glue cooled down I trimmed the image around the ring.

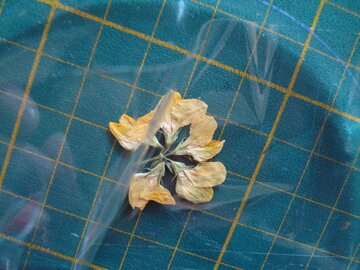
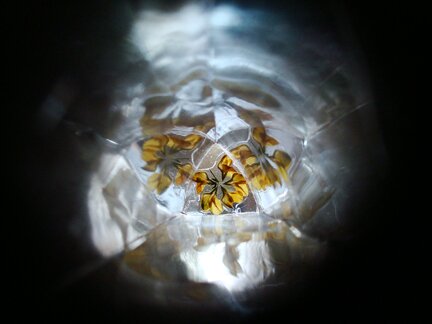
While I was at it, I tried mak­ing lens­es with a pressed flower by tap­ing it on a piece of clear plas­tic. (the flow­ers did­n’t come from the recy­cling bin… but I just want­ed to see how it looks in the kalei­do­scope :D)

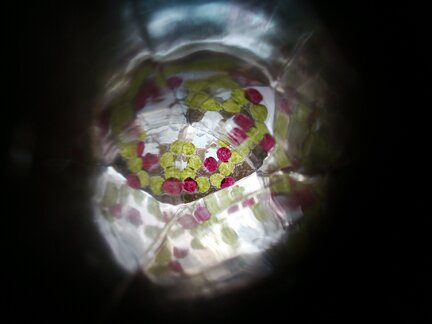
And some some tis­sue paper dots made with a hole punch, also sand­wiched between clear plas­tic and pack­ing tape.

I attached both to card­board rings the way I did with the fly­er images.

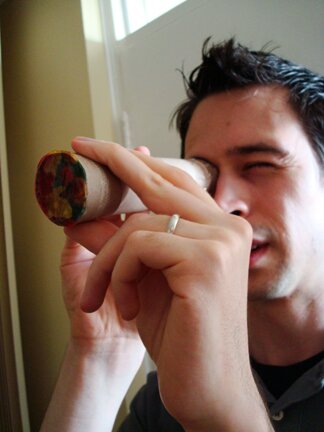
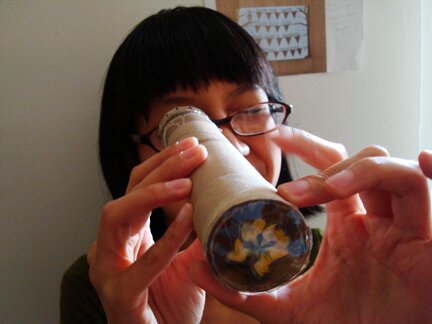
So it’s done! Let’s put the lens­es on the tube and test it out…

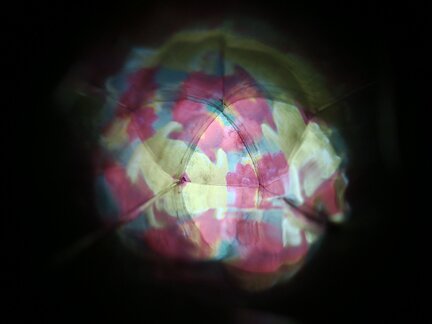
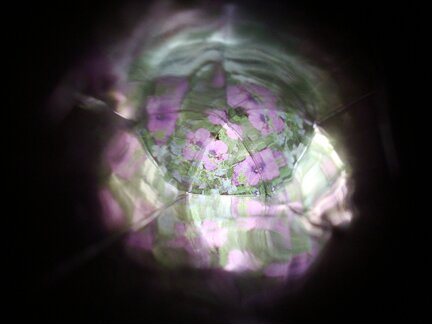
Mike found that the fly­er image of the tulip worked the best, and I agreed with him.

The one with pur­ple flower is also pretty.

The pressed flower was too cen­tered to make any inter­est­ing illu­sions, I think.

And the tis­sue paper dots looked alright, but the shapes weren’t as inter­est­ing as the tulips.

I think pressed flow­ers would make cool illu­sions, just need to per­haps use more flow­ers so they cov­er the whole lens. I’ll be on the look­out for flow­ers to press this sum­mer! :D

Kind of an odd project, but I’d love to see it if you do give this a go!

Have a great start to the week!

sunday video — jellyfish!

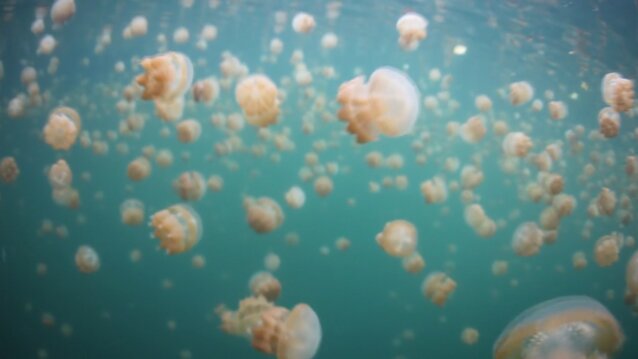
I’ve nev­er real­ly giv­en seri­ous thoughts to keep­ing a buck­et list. But if I do keep one, vis­it­ing the jel­ly­fish lake in the Repub­lic of Palau would be my num­ber one item. (First I would need to learn how to swim, though)

Can you imag­ine? Swim­ming with thou­sands of jellyfish!


The video’s cre­ator Sarosh Jacob gives a fas­ci­nat­ing back­ground about the jel­ly­fish lake:

Twelve thou­sand years ago these jel­ly­fish became trapped in a nat­ur­al basin on the island when the ocean reced­ed. With no preda­tors amongst them for thou­sands of years, they evolved into a new species that lost most of their sting­ing abil­i­ty as they no longer had to pro­tect them­selves. They are pret­ty much harm­less to humans although some peo­ple with very sen­si­tive skin may get a minor sting from them…

These fas­ci­nat­ing crea­tures sur­vive by shar­ing a sym­bi­ot­ic rela­tion­ship with algae that live inside of them. At night, the jel­ly­fish go down to the depths of the lake where the algae feed on nutri­ents. Dur­ing the day, the jel­ly­fish come back to the sur­face and fol­low the sun across the lake in a mas­sive migra­tion. The algae con­vert the ener­gy of the sun via pho­to­syn­the­sis into a sug­ar that feeds the jellyfish.

So mag­i­cal… *sigh* Don’t know when I’ll be able to vis­it them in per­son, but for now, let’s enjoy the video.


p.s. if you’re inter­est­ed in watching, here’s my attempt of mak­ing a jel­ly­fish video while vis­it­ing Hong Kong :D

she looks at the rain as it pours…


The weath­er is so unpre­dictable these days. Here I am post­ing these pho­tos I took yes­ter­day under a cloud­less sky and beam­ing sun, while the rain pours out­side my win­dow with thun­der and lightning.

(Oooh! And I cap­tured an escap­ing fly in the frame! Did­n’t even noticed that :D)

We’re sup­posed to go to our church pic­nic at High Park today, but it looks like we’re just going to stay home.

And I’m lis­ten­ing to Her Morn­ing Ele­gance as I write this (it’s a beau­ti­ful video, check it out if you haven’t seen it!), I thought one of the lines would make a fit­ting title for this post.

It took me a while to fig­ure out that the tall, pur­ple, globe-like flow­ers is Alli­um.


They are plant­ed in the park near our apart­ment build­ing. One of those build­ings in the back­ground is prob­a­bly one we live in.


It’s bee a very busy cou­ple of weeks, which is kind of unusu­al for me, but not nec­es­sar­i­ly a bad thing. Not bad at all. We’ve got­ton togeth­er with a cou­ple of friends from out of town (way far away, like across provinces and even con­ti­nents!). I’ve got­ten a few small design jobs (hur­ray! Mike is proud), a con­tract project in progress and a few more con­tract jobs to plan for, and still edit­ing my the­sis for jour­nal sub­mis­sion. (I’ve been work­ing on var­i­ous aspects of that the­sis for almost two years now… sigh…)

Small fry com­pared to peo­ple who have kids and full-time jobs, I know. I just get eas­i­ly over­whelmed, I guess. So I don’t have kids. I would­n’t mind a full-time job, though. I just need to carve out some time to craft.

Speak­ing of which, there are a cou­ple of craft projects on my to-post list and they’re still not done… hope­ful­ly I’ll get to work on them more this com­ing week, before it gets busy again in the final weeks of June…

But for the rest of this after­noon I’m going to drink tea and cro­chet and watch CSI marathon on TV.

Cheers!