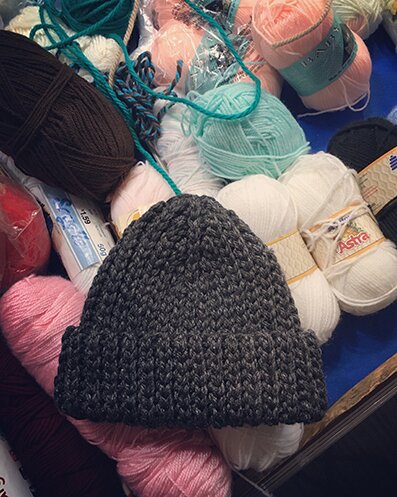
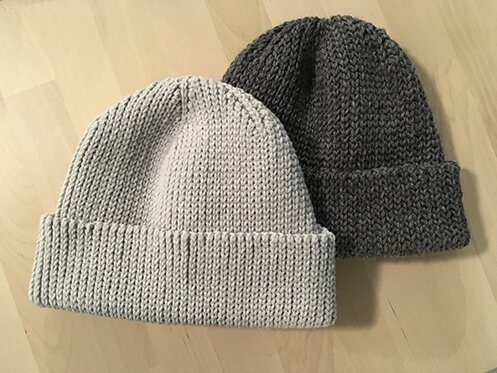
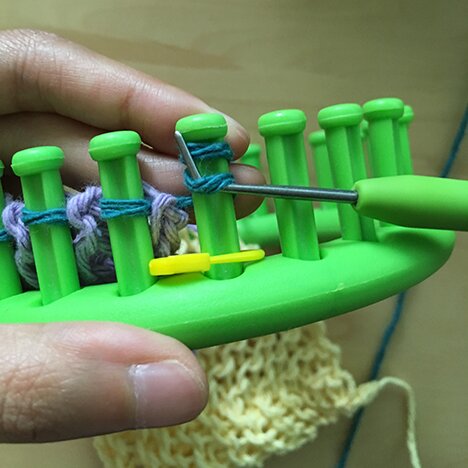
slow: hats

Update Nov. 30/2020: I’ve received quite a few com­ments and ques­tions regard­ing this pat­tern since it’s been pub­lished. It is not a begin­ner’s pat­tern. A few folks are fine with the writ­ten pat­tern and few pho­tos, and some folks request­ed more clar­i­fi­ca­tions. I apol­o­gize that I’m not a pro­fes­sion­al pat­tern design­er, my pat­terns have not been test­ed by oth­ers (though this one was repeat­ed­ly test­ed by me), I don’t have the time or know-how to make videos, I write pat­tern and instruc­tion to the best of my abil­i­ty in the clear­est way in my under­stand­ing and offer them for free. I do acknowl­edge that the pho­tos in this par­tic­u­lar pat­tern is admit­ted­ly lack­ing. I’m sor­ry about this, and if I do make anoth­er hat this win­ter, I will retake/replace the pho­tos. Work­ing and study­ing full-time cur­rent­ly means that at this point I don’t have the time nor capac­i­ty to respond exten­sive­ly to inquiries about how to make this hat. And a lot of times I can­not deci­pher what is going wrong in the ways that peo­ple describe them with­out see­ing the pieces and show­ing peo­ple what to do in per­son. So it means that at times it is sim­ply impos­si­ble for me to help peo­ple out. Going for­ward I will sup­port and clar­i­fy to the best of my abil­i­ty, but my respons­es may be delayed. I con­tem­plat­ed tak­ing this pat­tern down alto­geth­er because it sounds like it’s been caus­ing a lot of frus­tra­tion for peo­ple. But I thought I’d still leave it up for folks who find it use­ful. Thank you for visiting.   

I’ve made quite a few of these hats with cro­chet slip stitch. I like that they’re made slowly. 

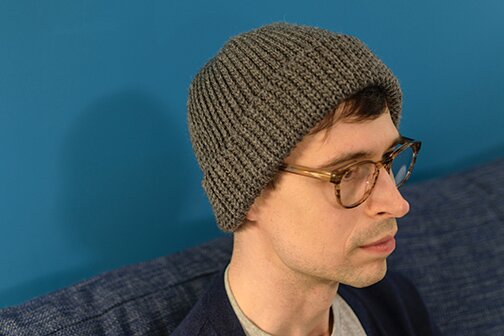
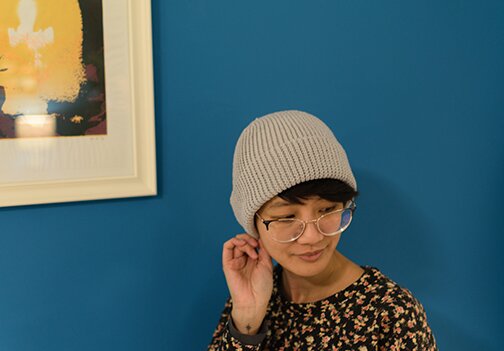
I’m going to attempt to write the pat­tern for 3 dif­fer­ent yarn weights, so it’s ver­sa­tile for what­ev­er yarn you have on hand. They all make a hat that is 19″ around and 11″ in length (with brim unfold­ed). The stitch is quit stretchy so it will fit most I think. Here’s the worsted weight ver­sion on me.

And the worsted weight ver­sion on Mike (I have a small­er head than he does).

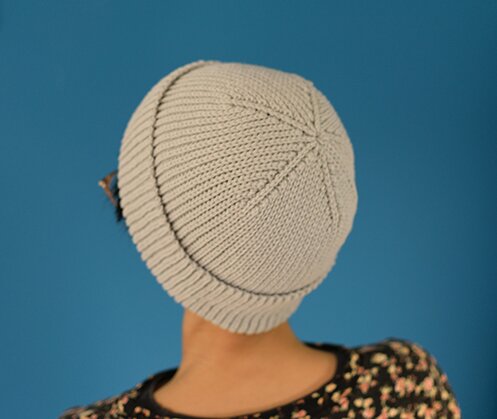
This is the sport weight version.

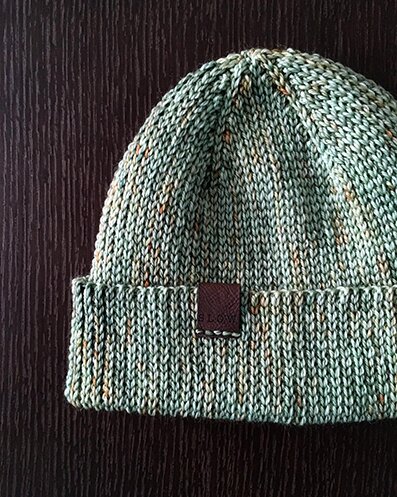
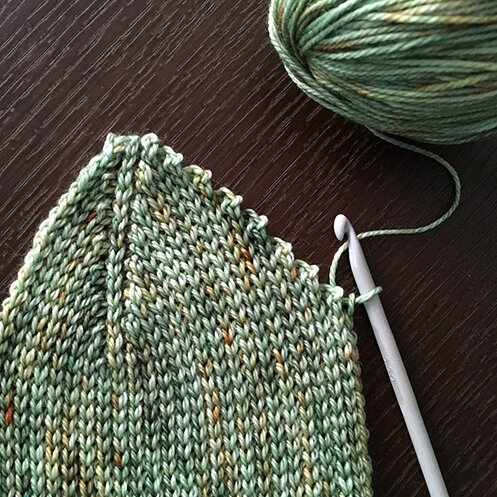
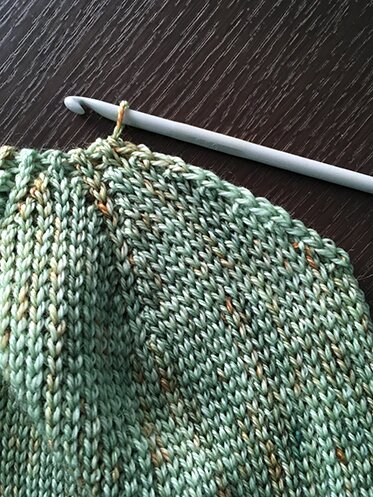
After test­ing the sport weight ver­sion with a left­over skein of acrylic yarn, I treat­ed myself to a skein of meri­no hand-dyed by Toron­to Yarn Hop co-orga­niz­er Emi­ly Gillies. She has a range of beau­ti­ful colours, and one skein of meri­no sport is per­fect for mak­ing one hat. 

I made the hat in blue spruce (pic­tured here, in first pho­to, and in process pho­tos below). The won­der­ful cus­tom veg­an tag is by Mil­lie Mar­ty Co. in Belleville, ON.

The hat can also be made more quick­ly in bulky yarn. I test­ed it while attend­ing the Warm­ing Toron­to event (an after­noon of hang­ing out with great folks at a local pub while mak­ing hats, scarfs and mit­tens for dis­tri­b­u­tion at emer­gency shel­ters in the win­ter). And this hat took about 3.5 hours to make.

Dimen­sion of all three ver­sions (sport, worsted, bulky): 19″ around, 11″ in length with brim unfolded. 

Sug­gest­ed yarn:

Sport — Meri­no Sport by Emi­ly Gillies, 1 skein, 282 yards

Worsted — Patons Clas­sic Wool Worsted, 2 skeins, 210 yards each

Bulky — Patons Shet­land Chunky, 2 skeins, 148 yards each

Pat­tern:

Instruc­tions are for sport weight (worsted and bulky in parenthesis).

The turn­ing ch does not count as a stitch.

The hats are made with slip stitch in black loop only (BLO), made side­ways with short rows for crown shap­ing, then seamed at the back with slip stitch (or sewing).

Cro­chet loose­ly, oth­er­wise it can be dif­fi­cult to get the hook into the slip stitches.

The hat can be made wider with one or two addi­tion­al short rows, and longer with addi­tion­al stitch­es in the begin­ning chain (makes for a wider brim).

Hooks: 
Sport — 5.5 mm
Worsted — 6.5 mm
Bulky — 10 mm

Row 1 (set­up row): ch 55 (40, 33), sl st in sec­ond ch from hook, sl st in each ch to end.

First set of short rows:

Row 2: ch 1, sl st in each st until there is one st left, skip remain­ing st, turn.

Row 3: ch 1, skip first st, sl st in each st to end. 

Repeat rows 2 and 3 six (four, three) more times.

Next row: ch 1, sl st in each st. At this point the piece will look like this.

Con­tin­ue on and sl st into each end of the short row and the space in between each row — 14 (10, 8) stitch­es across the short rows, then sl st in the remain­ing last stitch from row 2. The piece will now look like this.

Next row*: ch 1, sl st in each st to end.

Sec­ond set of short rows:

Row 1: ch 1, sl st in each st until there are 14 (10, 8) stitch­es left in the row, turn.

Row 2: ch 1, sl st in every st to end.

Row 3: ch 1, sl st in every st, then sl st in the next two st in the row marked with * (the row made before row 1 of the sec­ond set of short rows), turn.

Repeat rows 2 and 3 six (four, three) more times.

Next row: ch 1, sl st in every st to end.

Repeat first and sec­ond sets of short rows four more times. Don’t fas­ten off.

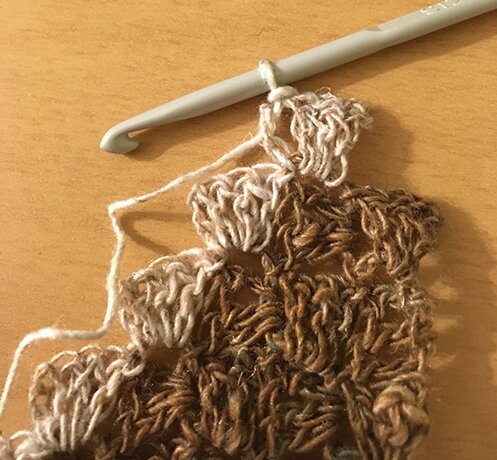
Cro­chet seam togeth­er right side out. Turn inside out. Weave yarn through each stitch in crown open­ing, cinch and tied off. Weave in ends. Turn right side out. Fold up brim. Â 
Hap­py crocheting!


Note: No incen­tive or com­mis­sion was received for this post. Sim­ply thought it was neat that I could find local arti­sans for both the yarn and cus­tom tags, and want to sup­port indie businesses :)


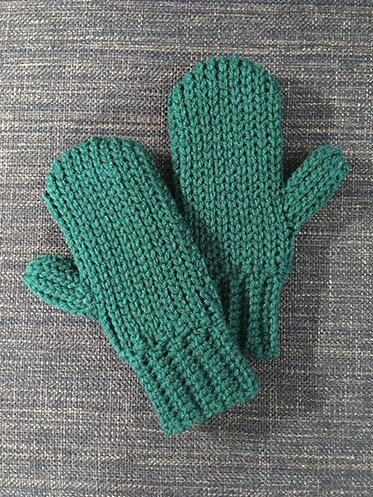
slow: mitts

Real­ly enjoy­ing work­ing with slip stitch after mak­ing the lunar new year bam­boo. I like the slow­er pace of work­ing up the fab­ric with this stitch. And I fig­ured it would be a dense enough stitch to make a warm pair of mittens.

I used:

Worsted weight yarn

5.5 mm hook, and a small­er hook for weav­ing in ends

Tapes­try needle

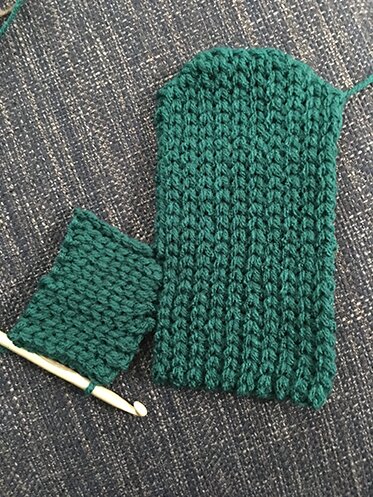
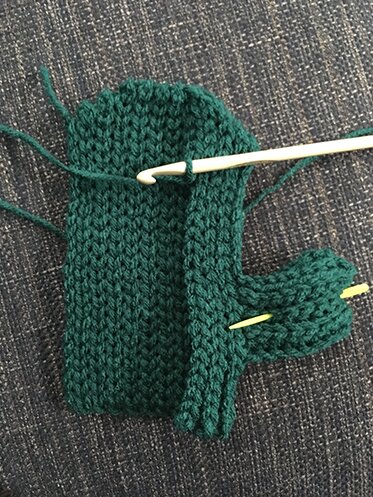
The mit­ten is cro­cheted flat in one piece, fold­ed in half at the thumb, and seamed togeth­er from the tip of the thumb to the cuff edge. The pho­tos that fol­low will help make sense of the construction.

All sl st worked through back loop only (BLO).

Mit­ten mea­sures 9″ long, 4″ across palm, 3″ across wrist, 2″ length of thumb. I have rel­a­tive­ly small hands. The mit­tens can be made larg­er with addi­tion­al ch in the begin­ning and begin­ning ch of thumb, and addi­tion­al rows between rows 7 and 15 

Pat­tern:

Row 1: ch 23, sl st in sec­ond ch from hook, sl st in every ch to end, ch 2 (these two extra ch increase the length by 1 st). 

Row 2: sl st in 2nd ch from hook, sl st in every st BLO (back loop only) to end.

Row 3: ch 1 (does not count as a stitch), sl st in every st to end, ch 2.

Row 4: repeat row 2.

Row 5: repeat row 3.

Row 6: repeat row 2 (25 st altogether).

Row 7–15: ch 1, sl st in ever st BLO to end.  

Row 16: ch 1, sk first st, sl st in next st and every st to end (skip­ping the first st decreas­es 1 st).

Row 17: ch 1, sl st in every st to end.

Row 18: repeat row 16.

Row 19: repeat row 17.

Row 20: repeat row 16.

Row 21: repeat row 17 (22 st altogether). 

Row 22 (thumb begins): ch 1, sl st in the first 12 st, ch 7, sl st in sec­ond ch from hook, sl st in every ch BLO, sl st in next st on the side of mitten.

Thumb row 1: ch 1, sl st in every st on thumb to end (8 st on thumb)

Thumb row 2: ch 1, sl st in every st on thumb, sl st in next st on the side of mitten.

Repeat thumb rows 1 and 2 three more times. 

Con­tin­ue work­ing 10 rows on thumb, with­out attach­ing the end of the row to the side of the mitten.

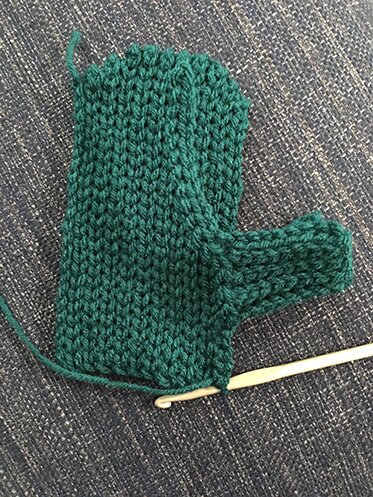
Don’t fas­ten off. ch 13, sl st in sec­ond ch on hook, sl st in every ch, work 5 sl st across the base of the 10 rows of them that are not attached to the body of the mit­ten, work 5 sl st into the remain­ing 5 st in the side of the mit­ten. It will end up look­ing like this with the thumb fold­ed in half.

Repeat rows 2 to 21 of mit­ten. I found that it was eas­i­er to fold the thumb in half and pin it togeth­er as I worked along so I don’t get con­fused about which direc­tion I was going.

Fas­ten off. 

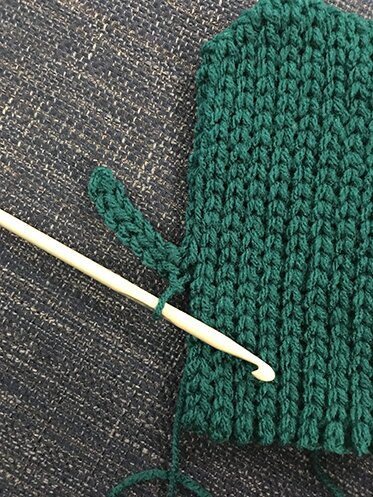
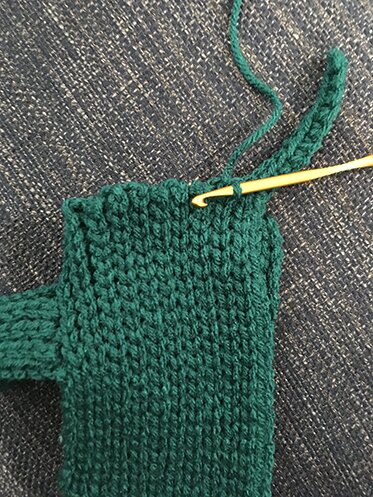
Cuff: Attach yarn to edge of cuff (direct­ly oppo­site of where last row end­ed), ch 11, sc in sec­ond ch from hook to end of ch, sl st in next stitch in the mit­ten that looks like a “v”, sl st in next st that looks like a “v”, sc BLO in every sc to end. The mit­ten here is pic­tured upside down with the first cuff row started. 

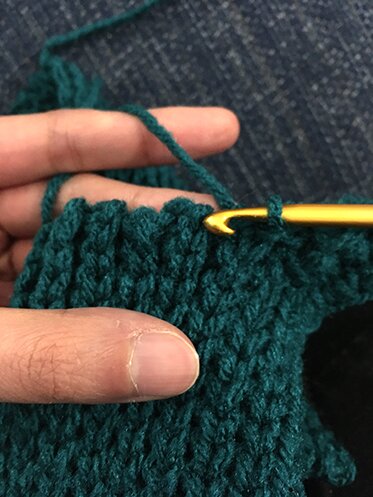
Con­tin­ue across the edge of the cuff. Here is a close up of the hook point­ing at the mid­dle of the stitch that looks like a “v”.

Attach yarn at the top of thumb. Weave yarn through all the stitch­es in top of thumb, cinch and tie off. Con­tin­ue seam­ing down the thumb and around the mit­ten to edge of cuff. Fas­ten off and weave in ends. 

The mit­tens are actu­al­ly fair­ly quick to work up. If you’re in/near Toron­to, con­sid­er join­ing us in the annu­al Warm­ing Toron­to event on Sun­day, Feb­ru­ary 9. We spend an after­noon at at a pub down­town, knit, cro­chet, loom, have a pint, share snacks, chat­ter, and make hats, mitts, scarfs, cowls, etc. for dis­tri­b­u­tion at emer­gency shel­ters over the win­ter months. If one mit­ten is fin­ished at home first, one can def­i­nite­ly fin­ish the pair while hang­ing out for a few hours at the event.  

Stay warm! ❄

renew

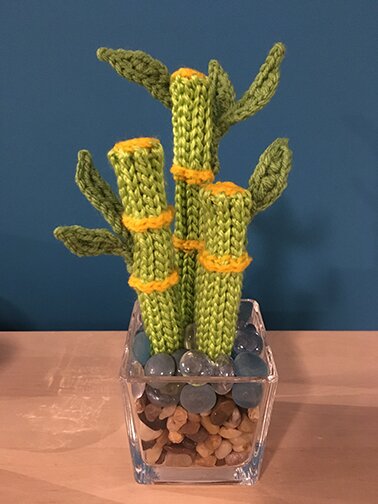
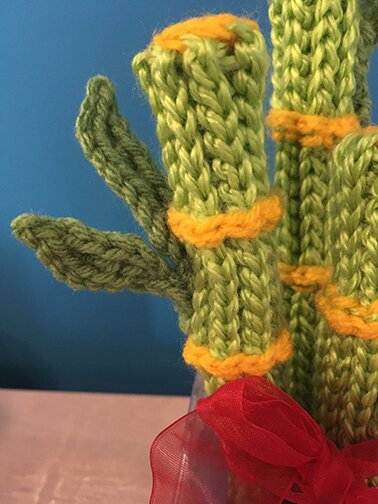
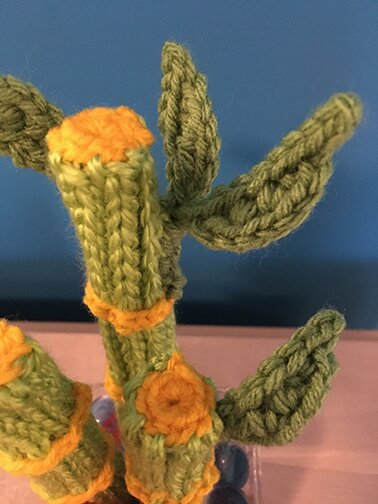
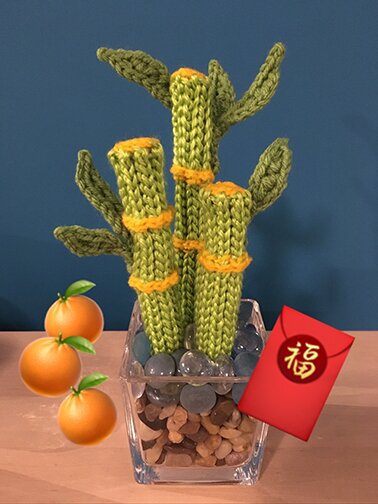
Today is the first day of Chi­nese new year. I made this bam­boo as a gift. Pret­ty hap­py with how it turned out. 

I thought bam­boo gen­er­al­ly sym­bol­izes good luck because it’s sold in every Chi­nese shop that sells plants. But with a quick search on the inter­net I learned that it also rep­re­sents renew­al (because of how quick­ly it grows), flexibility/strength, and longevi­ty — so, resilience, tenaciousness. 

“Tena­cious” is a word that I’d like to be described by. I don’t give up, or per­haps more truth­ful­ly I find it hard giv­ing up on things or peo­ple. Some would say that I’m not very good at let­ting go. Oth­er have said I’m stub­born. I’d like to think that I’m tena­cious. But I guess a way for­ward would be to cul­ti­vate flex­i­bil­i­ty, to renew or reori­ent my approach to how I’m tena­cious­ly con­nect­ing to some things. 

Any­way, I’d also say that the cro­chet slip stitch is a very bam­boo-like stitch, because it makes a firm fab­ric and there­fore tena­cious, it is how­ev­er also very flex­i­ble and stretch­able, almost like a knit­ted rib.

Here I’d like to share a loose­ly formed recipe for mak­ing the bam­boo. It’s kind of like free-formed cro­chet­ing, and how tall the plant is depends on the vase you’re using, but there are some basics to it, in case any­one would like to give it a try.

I used:

Caron Sim­ply Soft for the bam­boo stalk because of its sheen

Patons Astra for the yel­low rings and caps

Bernat Super Val­ue for the leaves

5.5 mm hook for the stalk

3.5 mm hook for the rings and caps

Tapes­try needle

Pop­si­cle sticks

Vase with pebbles

Stalks are made with back loop slip stitch (tuto­r­i­al).
With larg­er hook and lighter green, make a chain of desired length. I start­ed with 25 ch for the tallest, and 21 and 15 for the oth­er two. Then sl st BLO until piece is about 1.5″ wide. With­out fas­ten­ing off, sl st to join the seams togeth­er length­wise, mak­ing a long tube (the sl st seam will be on the out­side; the piece won’t be turned inside out after seam­ing). Fas­ten off. 

Rings are made around the stalks with sur­face slip stitch (tuto­r­i­al).
With small­er hook and yel­low, attach yarn where you want the ring to be at the back seam of the stalk. sl st in every stitch in the rows cross­wise (not just the stitch that appears as a “v”, but also the stitch in between the “v“s, so that the rings would pro­trude a bit). Fas­ten off after every ring made and pull the tails inside the stalk.

Caps are made with mag­ic ring (tuto­r­i­al) with 8 sc inside the ring, sl st to join with first sc, then fas­ten off and leave a long tail for sewing. Attach ring to the top of the stalk. 

Leaves may be a lit­tle tricky to explain… I regret not tak­ing progress pho­tos, very sor­ry. It took quite a bit of exper­i­men­ta­tion but I set­tled on this method and I think the results are quite live­ly look­ing. I hope this makes sense.

With small­er hook and dark­er green, ch 5 to 7 (this is the stem you’re sewing to the stalk, so its length depends on how you want to posi­tion the sprig of leaves on the bam­boo), dc in sec­ond ch from hook, *[ch 1, dc in ch just made] two or three times (depend­ing on how long you want the leaf to be), ch 2, sl st in 2nd ch from hook, sl st even­ly into the dc’s made ear­li­er (rough­ly 2 sl st per dc), sl st into the last ch of the stem*. At this point you can sl st down every ch of the stem then fas­ten off with tail for sewing, or you can make anoth­er leave by sl st down just a cou­ple of ch on the stem, then repeat * to *, and sl st down every ch of the stem, fas­ten off and leave a tail for sewing.

Sew the leaves to the stalks as desired.

Assem­bly:

The bam­boo stalks are sup­port­ed by pop­si­cle sticks on the inside. I used pop­si­cle sticks because it’s the only thing I can find to use at home. The width of it and the thick­ness of the cro­chet fab­ric takes up the inte­ri­or of the stalks so they don’t need more stuff­ing. I’ve had to con­nect a cou­ple of pop­si­cle sticks togeth­er for the taller two stalks by sim­ply over­lap­ping the ends of the sticks and glu­ing them togeth­er with white glue (hot glue would be a bet­ter choice). 

To deter­mine the lengths of pop­si­cle sticks you need, mea­sure how deeply you want the sticks to extend toward the base of the vase. I would want the sticks to actu­al­ly touch the base of the vase to make sure the sticks don’t wob­ble too eas­i­ly. Deter­mine the length of stick that is stick­ing out of the end of the stalk. It would be the same for all the stalks. Then mea­sure how tall each stick will need to be accord­ing to the length of the stalk. 

Pour a lay­er of peb­bles into the vase. I think small­er stone chips at least for the bot­tom lay­er are bet­ter for sta­bil­i­ty. Insert the stalks and arrange as desired, then pour on more peb­bles. I used dif­fer­ent glass ones on top for interest.

I lat­er added a red rib­bon around the stalk for gift-giv­ing that is not pic­tured because it blocked the bam­boo too much. But that also helps with the stability.

I did­n’t have any oth­er new year dec­o­ra­tions but thank­ful­ly there are emojis 😊🎋

Wish­ing every­one good health and hap­pi­ness in the year of the 🐀

settling in…

I don’t think I’ve ever been away for so long, I’m so sor­ry folks! >_<

April was a very chal­leng­ing month. There was a great loss in my fam­i­ly, there were final papers for the school term, and we were mov­ing to a new place. The month felt like a blur, but at the same time each day felt excru­ci­at­ing­ly long, with too many thoughts and too many feel­ings. So have been spend­ing the month of May try­ing to set­tle in and feel­ing the earth beneath my feet again.

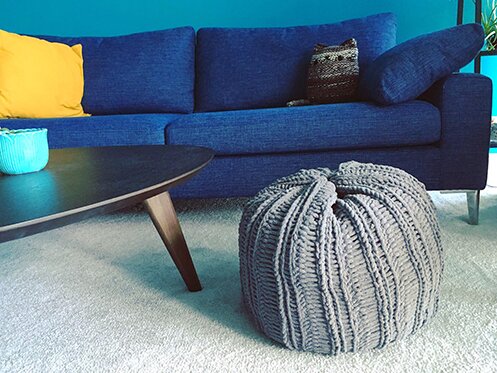
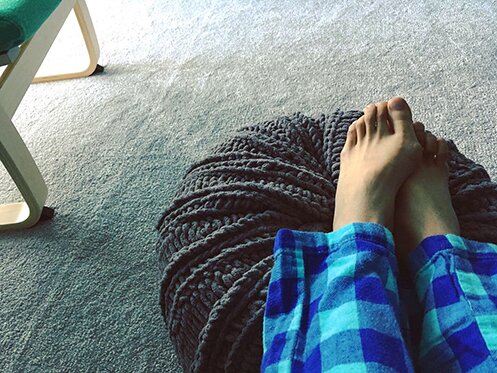
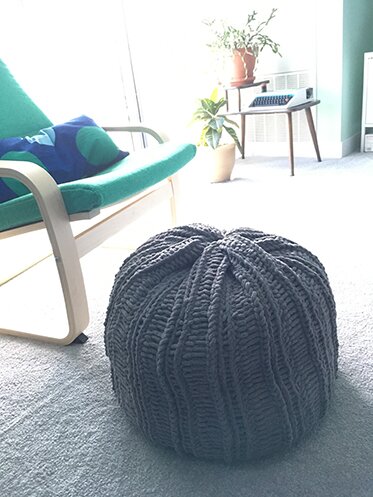
But I thought I’d bring a new thing when I return here. A how-to for a floor pouf!

The pouf is fin­ger-knit­ted and uses exact­ly two skeins of Bernat Blan­ket yarn. It uses the same tech­niques of four fin­ger knit­ting and turn­ing as the ear warm­ers, and the pho­to tuto­r­i­al is here.

The pouf is about 2 feet in diam­e­ter and 1.5 feet tall. I stuffed it with an old dou­ble size duvet. I do have to fluff it up after sit­ting on it, so for a firmer pouf it can prob­a­bly be stuffed a bit more with a queen size duvet or anoth­er blanket.

To make the floor pouf, cast on the first row and knit until piece is about 25″ long, then turn and knit until you have just enough yarn left to sew up the seam (about 50″ of yarn tail). The piece would be about 45″ wide.

Sew the short edges of the rec­tan­gle togeth­er using tapes­try nee­dle, tie off, then turn right side out. Weave the yarn tail through the stitch­es around one open­ing edge, then cinch tight­ly and sew shut. Fas­ten off.

Stuff with duvet. Using a dif­fer­ent colour yarn (I used a length of worsted weight yarn dou­bled up) that’s about 50″ long, weave through the stitch­es around the oth­er open­ing edge, cinch and tie with a remov­able knot. So that the duvet can be tak­en out for washing.

This is the first piece of knit­ted fur­ni­ture I’ve made so I’m quite proud :)

Hope to write again soon. Until then, take good care!

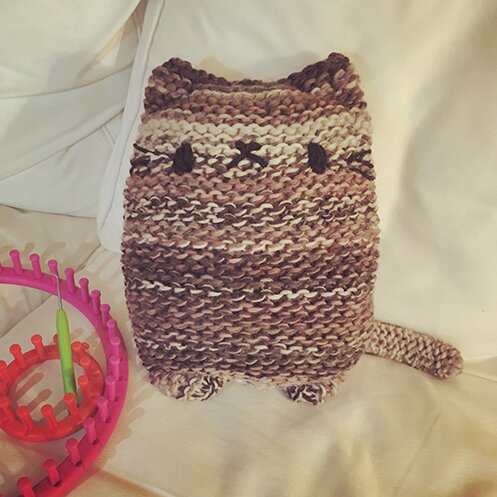
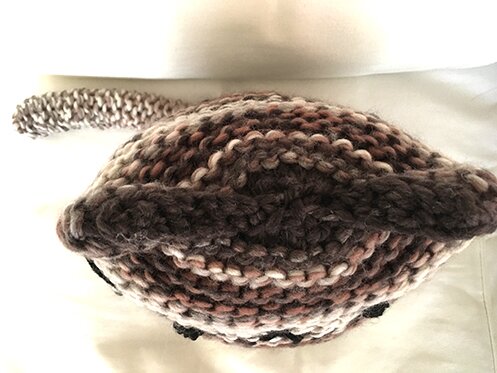
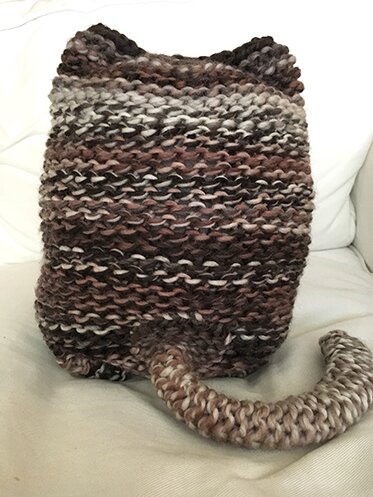
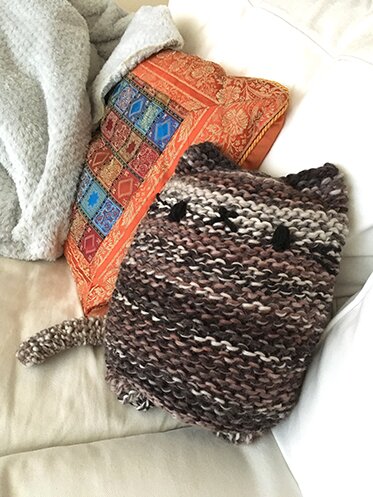
tchotchke the cat pillow

I bought some very chunky, very fluffy wool in Cape Bre­ton a few years ago. It knits up in var­ie­gat­ed stripes and I thought it would make a won­der­ful cat pil­low. And the yarn weight is great for the large gauge of loom knitting. 

I named the cat Tchotchke, because I like the sound of the word :D and because I have a lot of cat tchotchkes.

It’s basi­cal­ly a tube shape with­out any shap­ing, it’s the sewing togeth­er that makes the feet nub­by feet and the ears. It’s a very begin­ner-friend­ly project :)

Reg­u­lar knit­ting: Alter­na­tive­ly, if one isn’t into loom knit­ting, I imag­ine that this cat pil­low can also eas­i­ly be made with a 10 mm cir­cu­lar nee­dle and super chunky yarn. Just cast on 41 stitch­es, then knit one round and purl one round (garter stitch) until it’s 14 inch­es in length, then pro­ceed with the sewing instruc­tions. (I haven’t tried it though, so I don’t know if it might knit up small­er using reg­u­lar nee­dles, and one would there­fore make the cat shorter.)

I used:

41-peg loom, from this Loops & Threads set 

12-peg loom (option­al, just eas­i­er when mak­ing the tail)

Loom knit­ting pick

Super chunky weight yarn about 200 m / 150 g (I sug­gest using the chunki­est fluffi­est yarn you can find so less stuff­ing show through)

Poly­ester stuffing

Tapes­try needle

Black yarn (I used worsted weight dou­bled up)

Body:

With draw­string cast-on (instruc­tion video here), cast on all the pegs of the 41-peg loom using the super chunky yarn.

Knit one row (knit stitch instruc­tion video here, ignore the cast-on part in the beginning).

Purl one row (purl stitch instruc­tion video here, again ignore the cast-on part).

Repeat the pre­vi­ous two rows (thus work­ing the garter stitch) until the piece is about 14 inch­es in length.

Bind off (bind off instruc­tion video here).

Tail:

Cast on 7 pegs on the small­er loom or the same loom. 

Knit one row and purl one row. Repeat these two rows until the piece is 12 inch­es long. 

Leav­ing a very long yarn tail, weave the tail through the stitch­es on the pegs, then remove the stitch­es from the pegs and cinch to gath­er the stitch­es. Fold the tail in half length-wise and sew togeth­er using mat­tress stitch. Stop sewing and tie off 2 inch­es away from the end.

New we sew it togeth­er and make a cat shape!

With the draw­string cast-on on the body, pull on the yarn tail and cinch it close, but not too tight­ly. It will form a sort of curve. Tie off, then sew the open­ing close by sewing through both lay­ers of fab­ric using whip stitch. (pic­ture below)

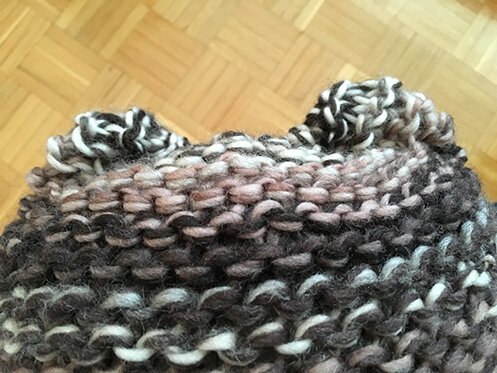
With the oth­er end of the tube (the ears and head), using whip stitch again, and sewing both lay­ers of fab­ric togeth­er, sew from the edge in about 2 inch­es toward the cen­tre. Repeat from the oth­er edge. It will leave an open­ing in the cen­tre of the head. 

Stuff with stuff­ing, but not too firmly.

Weave a piece of yarn around each stitch in the cen­tre open­ing, cinch it tight­ly closed, and tie off secure­ly. (pic­ture below shows what the top of the head looks like after it’s all sewn together.)

With the tail, spread open the end of the tail and sew around its edges while attach­ing it to the body using whip stitch. It will look like this:

Final­ly, sew on eyes, nose/mouth and whiskers with the black yarn. 

A new friend to watch TV and hang out with! :D

Have a good week everyone!

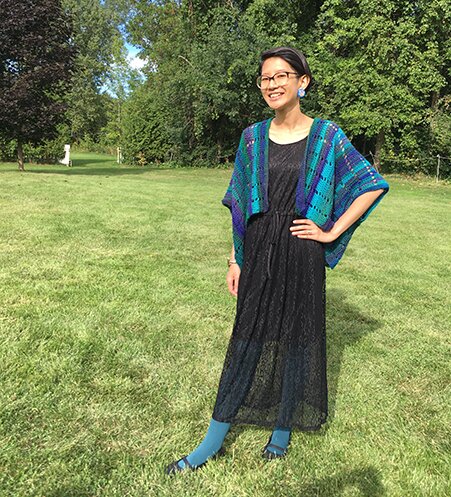
fab kimono

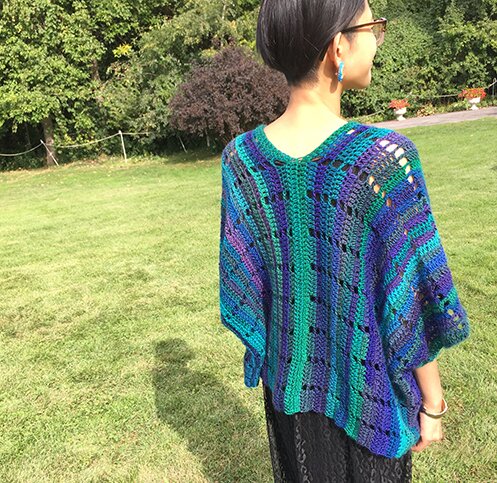
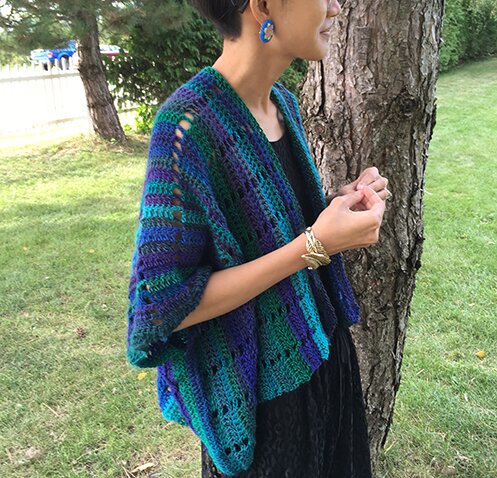
A quick kimono style cardigan/shrug I pulled togeth­er to wear to my cous­in’s wed­ding this week­end :) Can’t come up with a more poet­ic name, but thought it looks pret­ty fab (if I do say so myself), so fab kimono it is :D

I had quite a bit of left­over Red Heart Unfor­get­table after mak­ing a scarf as a gift, so I bought anoth­er skein to make this. It’s cropped length because I was going to wear this long black dress and want­ed some con­trasts in style. But it’s easy to make longer if you’d like.

It’s cro­cheted from side to side, mak­ing both front and back pieces at the same time (so there’s no seam­ing in the mid­dle!). It is then fold­ed in half with just 2 short sides to seam at the end.

With autumn in the air I think this is a good lay­er­ing piece for wear­ing with sum­mer dress, t‑shirt, long sleeve shirt, or even but­toned up col­lared shirt.

Size: 

Length (shoul­der to low­er edge) — 17″

Around — 60″

Gauge:

16 st = 4.5″

I used:

3 skeins of Red Heart Unfor­get­table in Dragonfly

6.5 mm hook

Tapes­try needle

Small­er hook to weave in ends with

Pat­tern:

Left front/back:

Row 1: fdc 126 (see instruc­tion for foun­da­tion dou­ble cro­chet or fdc here)

To increase length, add 16 fdc for every 4.5″.

Row 2: ch 3 (counts as 1 dc), dc in next 5 dc, ch 2, sk 2 dc, *dc in next 6 dc, ch 2, sk 2 dc* repeat from * to * to end, dc in last 6 dc. 

Repeat row 2 until piece mea­sures 15″ (approx. 26 rows).

Next row: dc in every dc and 2 dc in every 2 ch sp. 

Split right front:

Next row: ch 3, dc in next 62 dc, fdc 63 and leave the remain­ing dc from pre­vi­ous row unworked.

Repeat row 2 of left front/back until piece mea­sures 15″ from split. 

Last row: dc in every dc and 2 dc in every 2 ch sp. Fas­ten off.

Assem­bly:

Fold piece in half so that the split is per­pen­dic­u­lar to the fold line. The fold line will be the shoulders. 

Sew side seam togeth­er by attach­ing yarn at the low­er edge, match­ing stitch­es on front and back pieces, sew togeth­er the next 30 dc. Fas­ten off. Repeat on the oth­er side seam. Weave in ends.

Wear and be fabulous!


8‑bit

So ear­li­er in the sum­mer I start­ed writ­ing a num­ber of cro­chet pat­terns that I was hop­ing to com­pile into an e‑book for sale. But the sum­mer is quick­ly going by, and I’ve had more free­lance work than expect­ed (which is a good thing). So then I real­ize I don’t real­is­ti­cal­ly have the capac­i­ty to pat­tern-test, cal­cu­late for dif­fer­ent sizes, etc. in order to make the pat­terns sell-able. So! I’m just going to con­tin­ue in this blog’s tra­di­tion in shar­ing pat­terns for free! :D It’s just that it will require some creative/math work if you’re not mak­ing the exact same size I’m wear­ing. But that also means lots of rooms for cus­tomiza­tion! This is the first of the few pat­terns I was work­ing on :)

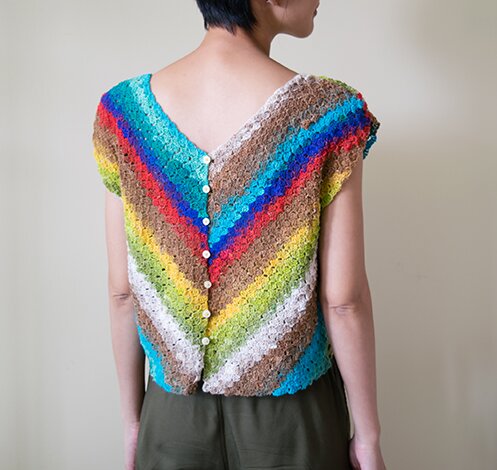
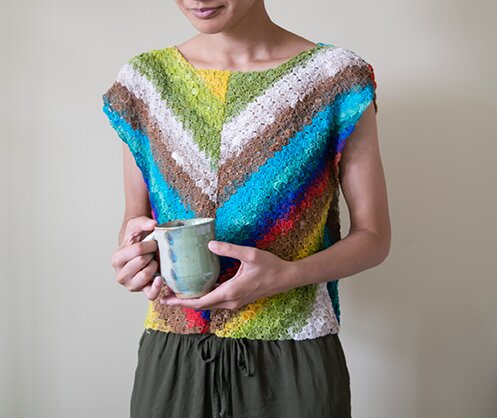
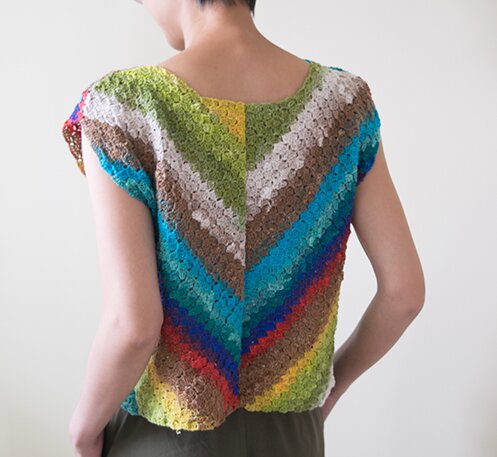
I’ve always want­ed to try using cor­ner-to-cor­ner (c2c) cro­chet to make a top. My first idea was a cozy sweater with a dinosaur on it (I might still do that, we’ll see!), but all these heat waves we’ve been hav­ing are not con­ducive to cozy sweater-mak­ing, so I thought I’d try with a lace weight yarn for a breezy sum­mer top. 

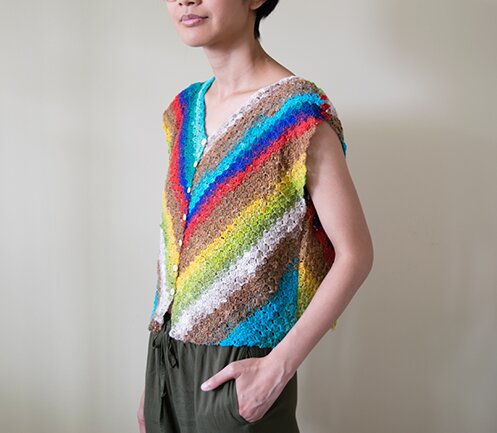
The “tiles” made in c2c cro­chet reminds me of colour­ful pix­els, and Nin­ten­do video games of my child­hood, and sum­mer vaca­tion spent play­ing these games. So I called it “8‑bit”.

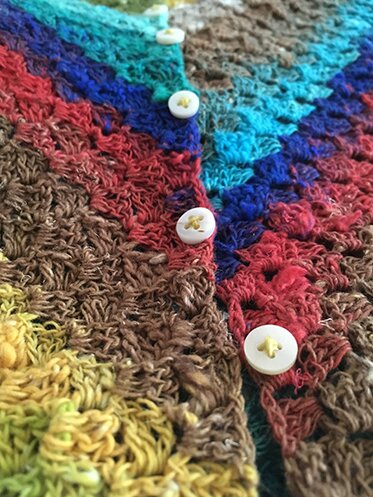
It can be worn both ways, either with the but­tons on the front, or on the back!

But­tons in the front makes it a cardi­gan, which can be paired with a spaghet­ti strap sum­mer dress!

The top is made in 4 pieces then sewn togeth­er. So you can also sew the v‑neck pieces togeth­er and place the but­tons on the round-neck side.

There is also some shoul­der shap­ing so that the cap sleeves will fol­low the shoul­ders rather than stick out. I thought that goes bet­ter with the gen­tle, del­i­cate feel of the lace weight Noro Taiyo.

Size: Bust 36″, arm­hole depth 7″, neck open­ing width 8″, total length 17″

Size is easy to adjust as you go with the c2c cro­chet stitch. There will be tips for adjust­ment through­out in ital­ics.

Gauge: 5x5 “tiles” = 2“x2”

Mate­r­i­al: 

3.5 mm hook, and the small­est hook you have for weav­ing in ends (mine is 1.5 mm)

Lace weight yarn about 1100 yards (I only used a bit of the sec­ond skein of Noro Taiyo Lace, one skein of this is over 900 yards), larg­er sizes will require more yarn

Sev­en 1/2″ buttons

Sewing nee­dle

Cor­ner-to-cor­ner cro­chet: this pat­tern requires famil­iar­i­ty with c2c cro­chet. If you’ve nev­er used this stitch before, no wor­ries! It’s quite easy and I find it rather med­i­ta­tive too. There are tons of very detailed tuto­ri­als out there. I learned from the pho­to tuto­r­i­al by One Dog Woof, take a look and use some scrap yarn to prac­tice, and I’m sure you’ll be ready in no time!

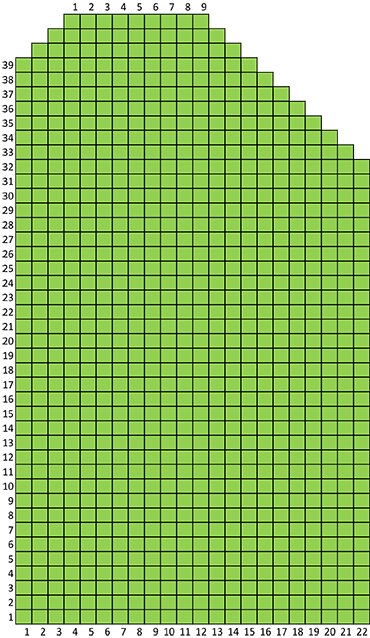
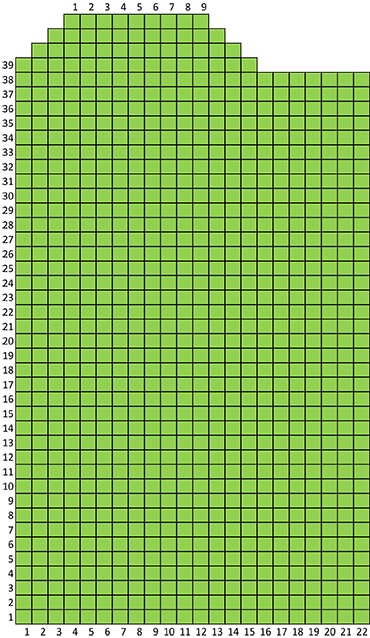
Charts:


Pattern/recipe:

V‑neck piece (make 2):

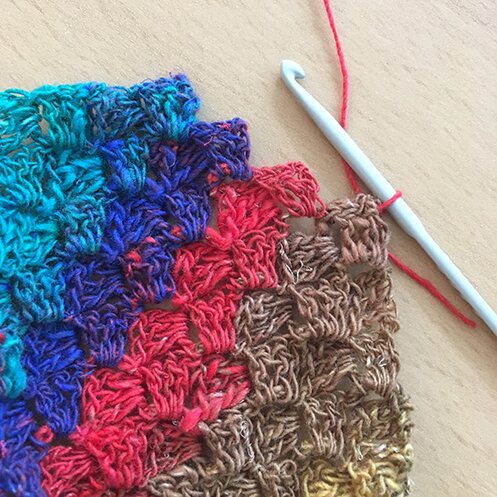
Start from the low­er left cor­ner, tile 1. Con­tin­ue through chart. Chart is read diag­o­nal­ly. Fol­low this excel­lent pho­to tuto­r­i­al by One Dog Woof if you need some help!

When there are 22 tiles on both edges, begin decreas­ing on the right edge by work­ing 1 sl st through each dc just made, and sl st in turn­ing ch, then ch 3, 3 dc in turn­ing ch, and con­tin­u­ing on.

For a larg­er gar­ment, con­tin­ue work­ing more tiles until desired width before decreas­ing. To deter­mine “desired width”, decide on fin­ished bust mea­sure­ment you’d like for the top. Say 40″. Divide it by 4, which is 10″. Then con­tin­ue c2c cro­chet until both edges are 10″ long before decreas­ing on the right edge. Note the num­ber of tiles you have at the bot­tom edge when you reach desired width. You will need to have the same num­ber of tiles on the bot­tom edge of each of the pieces.

Con­tin­ue increas­ing on the left edge but decreas­ing on the right edge until the left edge has 37 tiles. 

For a longer gar­ment, con­tin­ue increas­ing on the left edge until desired length. Note the num­ber of tiles when you reach desired length.

Shape shoul­der:

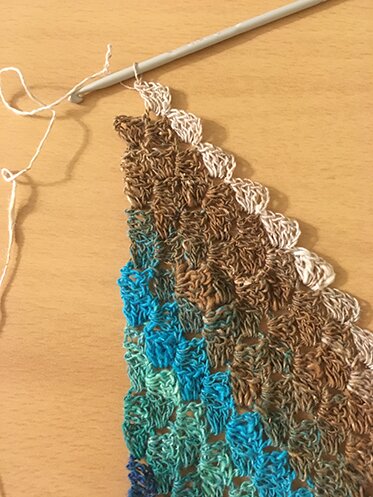
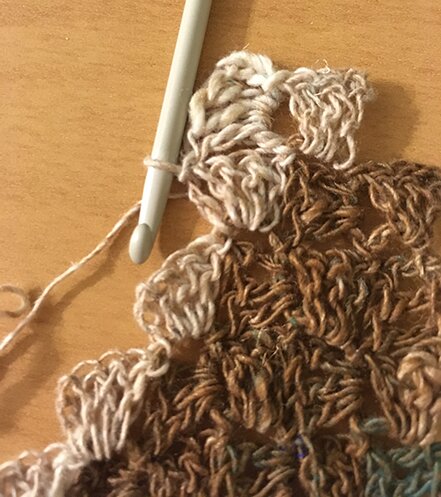
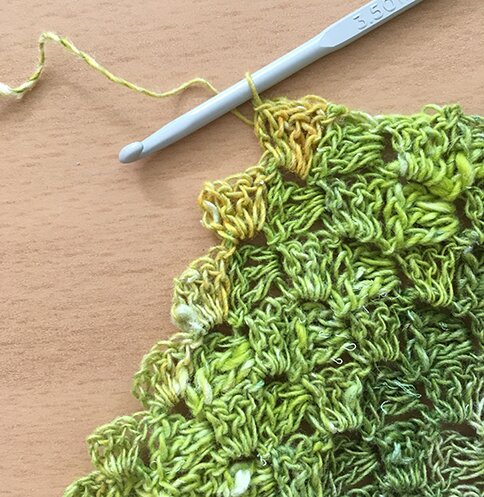
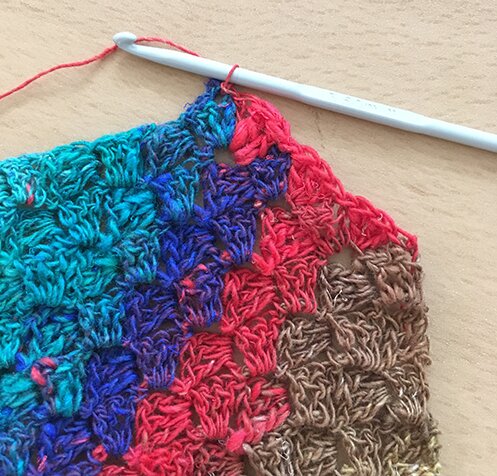
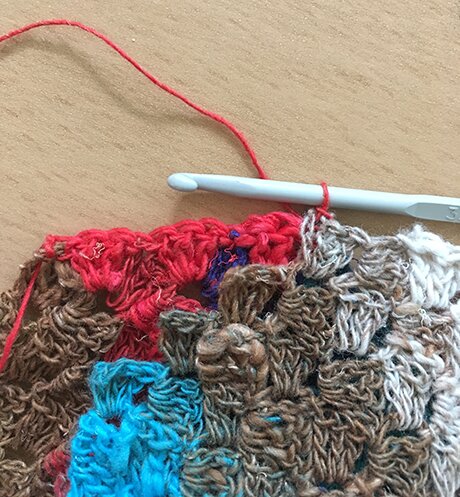
Begin decreas­ing on the left edge after the 37th tile (or desired length). Work one row towards the right edge, then one row towards the left edge. After cro­chet­ing the last tile on the top edge, work anoth­er tile on top of the pre­vi­ous row (I placed an addi­tion­al white tile on top of the brown tile of the pre­vi­ous row).

Then, as usu­al, turn, sl st in next 3 dc, sl st in turn­ing ch.

And con­tin­ue down the row.

Repeat the above steps for shoul­der shap­ing until shoul­der resem­bles the chart. 

(We’re of course not going to leave the shoul­ders jagged! We’ll fill in the cor­ners as we sew them togeth­er later.)

Then, decrease on both the top edge and the right edge until there are 9 tiles at top edge. End with work­ing loop on the top edge, don’t fas­ten off.

If you have increased in the bot­tom edge, increase the same num­ber of tiles at the top edge.

Neck edge:

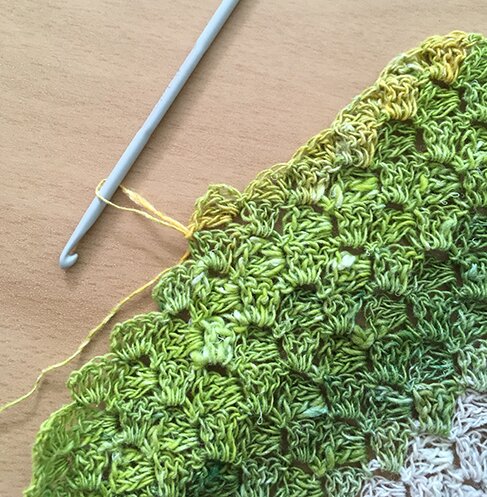
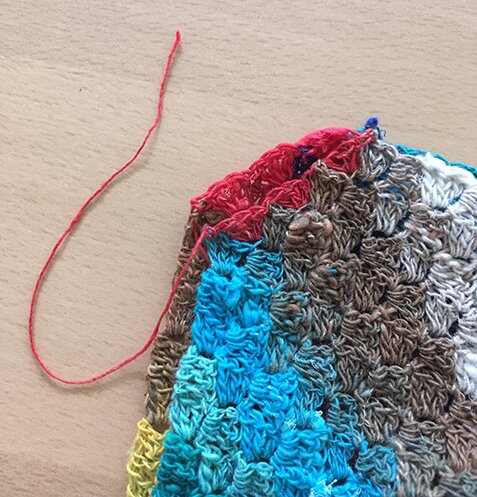
*Work 3 dc in the cor­ner between first two tiles (where the low­er left cor­ner of the tile the work­ing loop is on meets the top right of the next tile), sl st in next turn­ing ch* repeat from * to * until end of row (the neck edge is shown in the next pho­to). Fas­ten off.

Round-neck piece (make 2):

Fol­low pattern/recipe until neck edge. (mak­ing the same increas­es if you’ve made them in the v‑neck pieces.)

*Work 3 dc in the cor­ner between first two tiles, sl st in next turn­ing ch* repeat from * to * 3 more times, ch 3, 3 dc in turn­ing ch.

Con­tin­ue in c2c stitch pat­tern, decreas­ing on both edges until there final tile is made, fas­ten off.

Sew halves together:

Sew togeth­er the cen­tre seams of the two round-neck pieces.

Seam­ing shoulders:

With wrong side fac­ing, attach yarn to low­er edge of shoul­der on one piece.

*Work 3 dc in cor­ner between the first two tiles, sl st in next turn­ing ch* repeat from * to * until end of row, don’t fas­ten off.

With right sides togeth­er, place shoul­der of v‑neck piece to the shoul­der of the round-neck piece just com­plet­ed, match­ing both pieces. With work­ing loop still attached to the round-neck piece, sl st in top of shoul­der of v‑neck piece.

*Work 3 dc in cor­ner between the first two tiles, sl st in next turn­ing ch* repeat from * to * until end of row, leave a long tail for sewing, fas­ten off. 

Sew entire shoul­ders togeth­er (the slopes we just worked on and the top edges). Repeat on the oth­er shoulder.

The rest of assembly:

With wrong sides fac­ing, sew side seams togeth­er. For my top I count­ed 17 tiles down from shoul­der for 7″ in arm­hole depth, then start­ed sewing to the bot­tom edge. If mak­ing a deep­er arm­hole, mea­sure the desired depth and count the num­ber of tiles with­in the measurement.

But­tons:

Sew but­tons on one edge where the turn­ing ch on the edge will form nat­ur­al but­ton holes, which is every 4th tile.

Weave in all the ends with a tiny hook, and we’re done! :D

Leave a com­ment if you have any ques­tions or need clar­i­fi­ca­tions! Hap­py crocheting!


loom-knit-along: join-as-you-go mitered square blanket – part 5

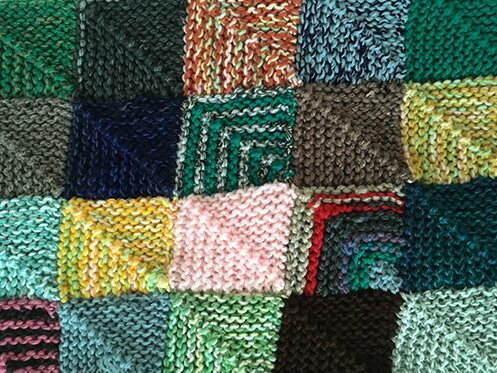
Now that we’ve got­ten the hang of mak­ing mitered square, you might get a bit bored of mak­ing sol­id colour squares. You can make striped ones! And use up small­er balls of scraps! Here’s what I do…

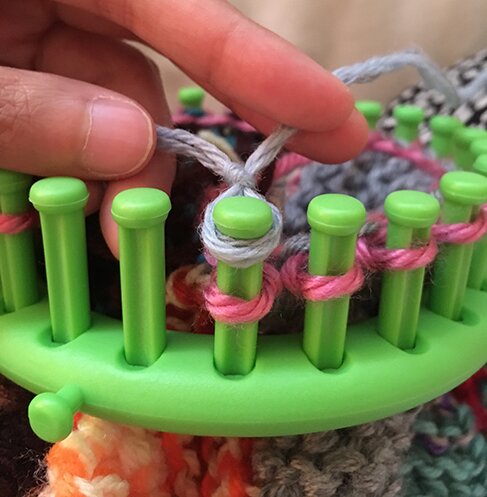
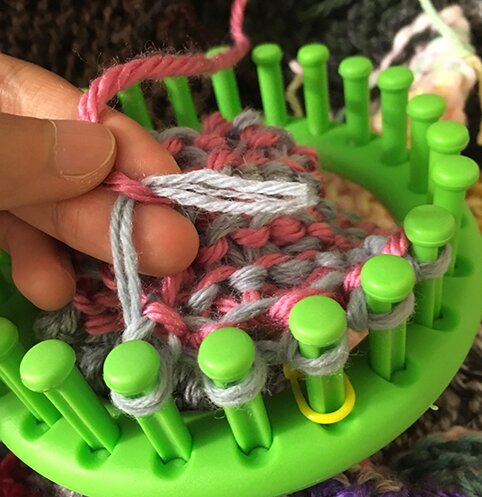
After cast­ing on, purl­ing one row, decreas­ing one stitch on either side of the cen­tre peg, and mov­ing each stitch over, intro­duce the new colour by mak­ing a slip knot with the new yarn and plac­ing it on the peg with the first stitch of the row.

Knit over the old yarn (pink), then con­tin­ue e‑wrapping with the new yarn (blue). Purl one row with the new yarn. Then switch back to the pink yarn.

Lay the work­ing yarn of the pre­vi­ous row on top of the new yarn before mak­ing the first e‑wrap to car­ry the yarn with you as you go. (in this case we’re bring­ing back the pink yarn and about to make an e‑wrap on the first peg, notice the blue yarn is on top of the pink so it gets wrapped into the stitch.)

When you have 5 stitch­es left after a purl row, cut the cur­rent yarn, and tie off.

Do the decrease around the cen­tre peg and move the stitch­es over as usu­al, and com­plete the square.

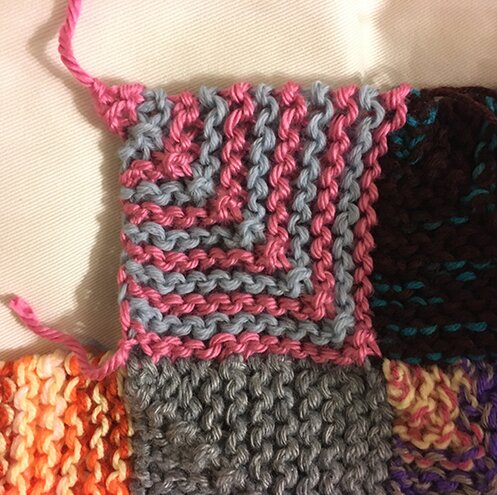
Here’s the stripy square!

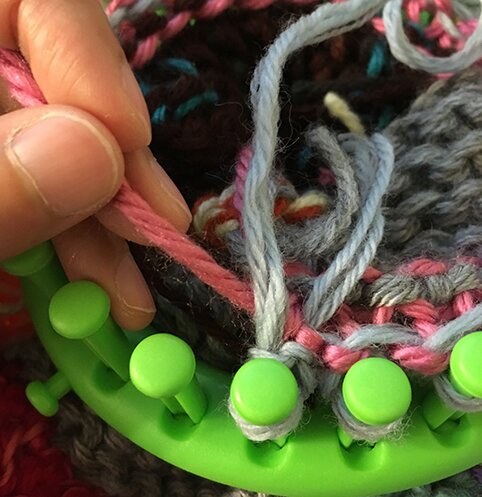
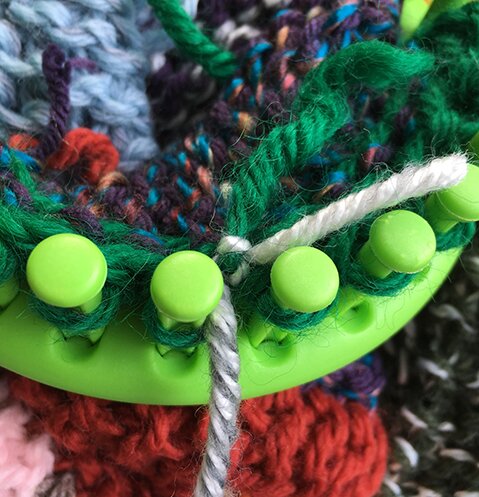
You can also make scrap­py squares that use up every last bits of yarn. I knit till I have about 2 inch­es left, and tie on a new yarn very close to the peg (I learned this from watch­ing videos of loom knit­ting plush toys by the Loom Muse — more on that in anoth­er post!)

In the pho­to below the new yarn is the grey one and the one that ran out is green.

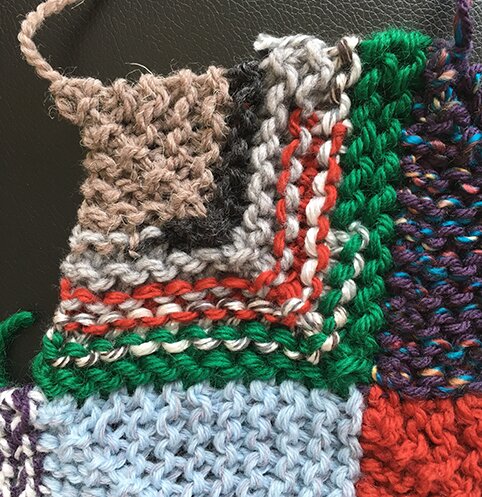
The result­ing scrap­py square looks like this :)

Yes, lots of ends to weave in on these squares but I like the look of them :)

I hope you’ve enjoyed this series of how-to for mak­ing a mitered square blan­ket! Hap­py knitting!


Posts in this series:

How to make the first square

How to join the sub­se­quent squares in the first row

How to join the first square in every row

How to join all the oth­er squares

How to make striped squares


loom-knit-along: join-as-you-go mitered square blanket – part 4

Hel­lo! We’re back with the last step in loom knit­ting the mitered square blan­ket, which is to join all the oth­er squares in the blan­ket after the first row and after the first square of any row. This is how the major­i­ty of the squares will be joined!

As always, we ori­ent the loom to the blan­ket (or in the case of this demon­stra­tion, a dish cloth). The square we joined in the last post is the blue square.

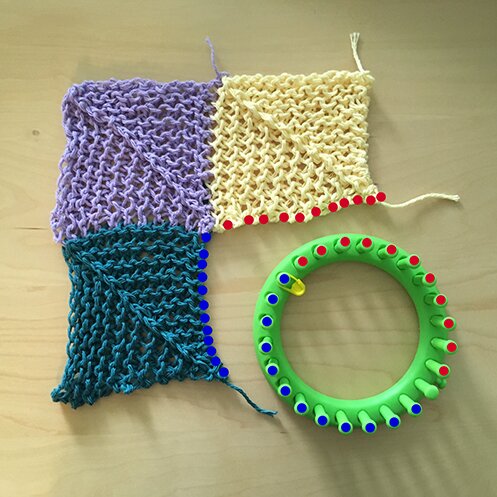
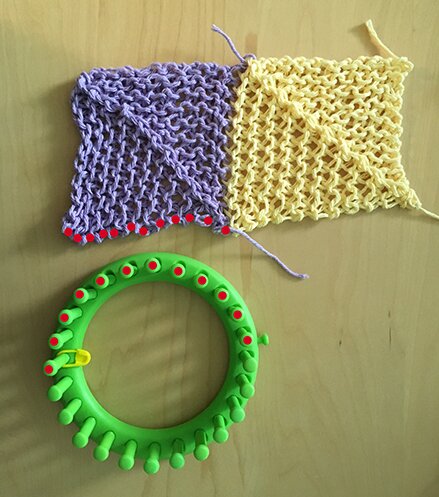
The loops marked with the blue dots on the blue square will go on the pegs parked with the blue dots, and the loops marked with the red dots on the yel­low square will go on the pegs with the red dots. 

We would begin with plac­ing the loops on the yel­low square on the pegs, start­ing from the edge towards the cen­tre, and start­ing the first peg that is right beside the side knob. We place the last loop on the yel­low square on the peg before the marked cen­tre peg, then place the first loop of the blue square on the marked peg, and the rest of the loops of the blue square onto the pegs until the sec­ond last peg of the loom — 23 stitch­es altogether. 

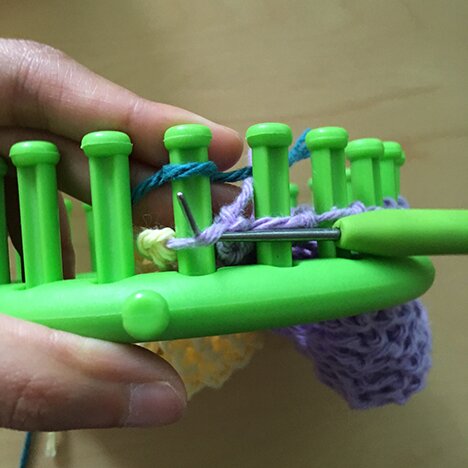
Here’s a clos­er look at the loops that are placed on the pegs. Note that the loops that are picked up are the hor­i­zon­tal strands in between purl bumps.

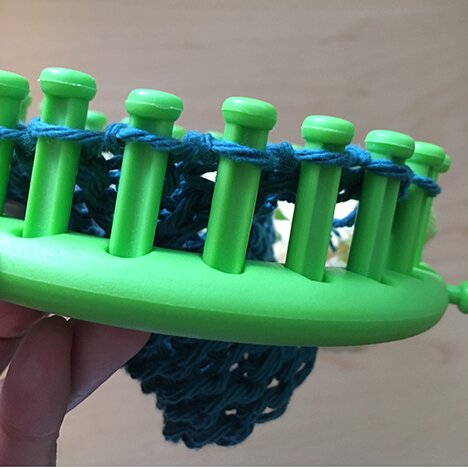
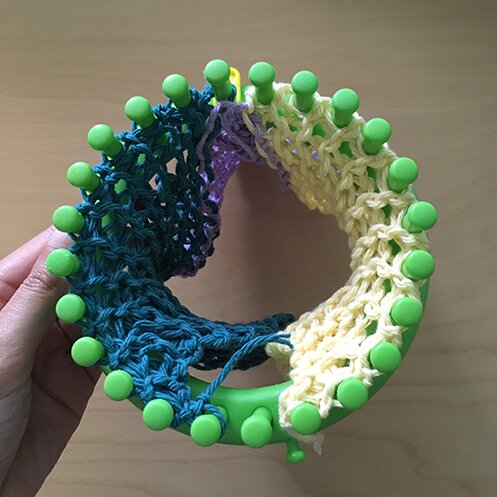
And here’s how it looks on the loom when both yel­low and blue squares are attached, with the right side of the square touch­ing the inside of the loom.

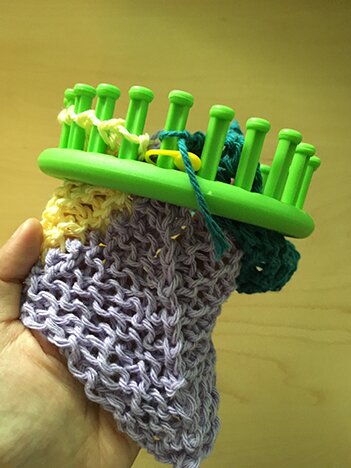
When you’re actu­al­ly knit­ting with the blan­ket on your lap, it would be ori­ent­ed like this. I would start putting on the loops from the black/grey/beige square, which is the square from the pre­vi­ous row, and then put on the loops from the purple/mixed colour square, which is the square made just before the cur­rent one.

Now we’re ready to knit the new square as we usu­al­ly do. We start with adjust­ing a slip knot on the first peg (the one right beside the side knob), knit off the loop below, then e‑wrap and knit off each stitch.

Instruc­tion for the rest of the square is past­ed below, but if you need more help there are pho­tos in the first post.

Row 1: Purl (here’s a video of purl­ing) to the marked peg, e‑wrap knit the marked peg, purl to end. (Note in the pic­ture that the last peg of the loom is emp­ty — we only use 23 pegs of the loom.) Beware not to make the stitch­es too tight.

Row 2: Move the loop on the peg to the left of the marked peg onto the marked peg. Move the loop on the peg to the right of the marked peg onto the marked peg. Now the marked peg has 3 loops on it. (Always move the loop on the left first, then the one on the right, so it looks consistent.) 

Move the loop on the peg to the left of the now emp­ty peg onto the emp­ty peg. Keep mov­ing each loop to the emp­ty peg to the right until you reach the begin­ning of the row.

E‑wrap and knit off each peg until you reach the marked peg. E‑wrap the marked peg, knit off all three bot­tom loops on the peg (I pre­fer knit­ting them off one at a time, it’s easier).

You will now have an emp­ty peg to the right of the marked peg. Move the loop on the peg to the right of the emp­ty peg onto the emp­ty peg, e‑wrap the peg and knit off. Then keep mov­ing each loop to the emp­ty peg to the left and e‑wrap and knit off until you reach the end of row. I find it eas­i­er to do this with the loom sit­ting flat on a surface.

Repeat rows 1 and 2 until you have 3 stitch­es left. Purl the 3 stitch­es. Place the stitch on the left and stitch on the right onto the mid­dle peg, e‑wrap, then knit off all 3 bot­tom loops. Fas­ten off.

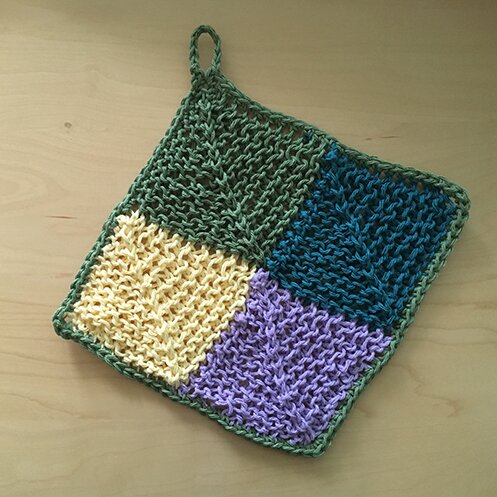
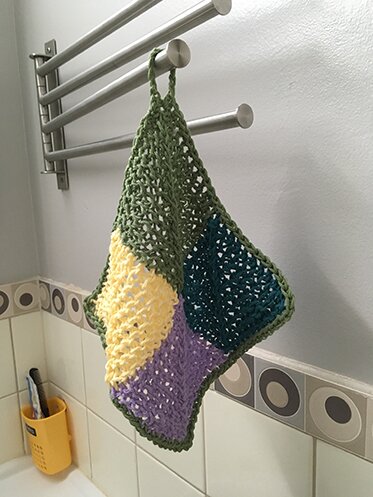
Here’s how my mitered square dish cloth looks like! :D I cro­cheted a bor­der and loop at the top with a 6.5mm hook, basi­cal­ly 1 sin­gle cro­chet in each stitch around, and 3 sc in each corner.

Next time we’ll have our last post of the series on how to make striped squares, or essen­tial­ly how I change colours to use up every last bit of those scraps.

You might ask, isn’t there a mil­lion ends to weave in at the end? Yes, so I don’t wait till the end. Usu­al­ly I weave in the ends after mak­ing one or two squares. Leav­ing ALL the ends to weave in after 10x15 squares would dri­ve me mad :S (I plan on mak­ing the blan­ket 10 squares wide and 15 squares tall)

Till next time, hap­py knitting! 


Posts in this series:

How to make the first square

How to join the sub­se­quent squares in the first row

How to join the first square in every row

How to join all the oth­er squares

How to make striped squares

loom-knit-along: join-as-you-go mitered square blanket – part 3

Hel­lo friends! We’re back again with our mitered square blan­ket! Today we’re going to join the first square on the sec­ond row, and the method for join­ing is the same for the first square in every row. 

Let’s first ori­ent our­selves. For the first square in every row, we will always be join­ing under the first square in the pre­vi­ous row. In our case, it’s the pur­ple square (in the last post we joined the yel­low square). 

We will place the loops on the bot­tom edge of the pur­ple square (as indi­cat­ed by the red dots) onto the pegs on the loom that are marked by the red dot, start­ing at the first peg (the one that’s beside the side knob) and end­ing at the peg marked with a stitch mark­er, or the one just before it. So you will put on 11 or 12 loops, it does­n’t make a difference.

To place the loops on the square onto the pegs, find the hor­i­zon­tal strands between the purl bumps, and place the strands onto the pegs.

When actu­al­ly joining/knitting the square, you would posi­tion it like this, with the right side of the square you’re join­ing to fac­ing the inside of the loop, and pick­ing up the loops on the side this way. (And yes that was a won­der­ful day knit­ting in the sun sit­ting on the grass in a park! :D)

Once the loops are placed onto the peg, make a slip knot with the new yarn (in this demon­stra­tion it’s the blue yarn), place it on the first peg, and knit over with the loop on the peg.

E‑wrap the next peg, then knit over. Repeat until there are no loops on the next pegs. Then, e‑wrap the next loop twice and knit off the bot­tom loop (in this demon­stra­tion it is the marked peg, but it can also be the peg after the marked peg if you have placed a loop from the pre­vi­ous square on the marked peg, it does­n’t real­ly make a dif­fer­ence), there­by cast­ing on a stitch.

Con­tin­ue cast­ing on until the sec­ond last peg on the loom — that will be the last stitch, 23 stitch­es altogether.

You’re now ready to con­tin­ue mak­ing the square as usu­al. Instruc­tions are past­ed below for con­ve­nience’s sake but if you need more help there are pho­tos in the first post.

Row 1: Purl (here’s a video of purl­ing) to the marked peg, e‑wrap knit the marked peg, purl to end. (Note in the pic­ture that the last peg of the loom is emp­ty — we only use 23 pegs of the loom.) Beware not to make the stitch­es too tight.

Row 2: Move the loop on the peg to the left of the marked peg onto the marked peg. Move the loop on the peg to the right of the marked peg onto the marked peg. Now the marked peg has 3 loops on it. (Always move the loop on the left first, then the one on the right, so it looks consistent.) 

Move the loop on the peg to the left of the now emp­ty peg onto the emp­ty peg. Keep mov­ing each loop to the emp­ty peg to the right until you reach the begin­ning of the row.

E‑wrap and knit off each peg until you reach the marked peg. E‑wrap the marked peg, knit off all three bot­tom loops on the peg (I pre­fer knit­ting them off one at a time, it’s easier).

You will now have an emp­ty peg to the right of the marked peg. Move the loop on the peg to the right of the emp­ty peg onto the emp­ty peg, e‑wrap the peg and knit off. Then keep mov­ing each loop to the emp­ty peg to the left and e‑wrap and knit off until you reach the end of row. I find it eas­i­er to do this with the loom sit­ting flat on a surface.

Repeat rows 1 and 2 until you have 3 stitch­es left. Purl the 3 stitch­es. Place the stitch on the left and stitch on the right onto the mid­dle peg, e‑wrap, then knit off all 3 bot­tom loops. Fas­ten off.

Now we have the first square of the row joined! Next time we’ll join the next square, which is how we make the major­i­ty of the squares in the blanket.

Be sure to leave a com­ment on the post if you have any ques­tion! You can send me an email too but oth­er read­ers may also find your ques­tions help­ful so don’t be shy :)

Hap­py weekend!


Posts in this series:

How to make the first square

How to join the sub­se­quent squares in the first row

How to join the first square in every row

How to join all the oth­er squares

How to make striped squares