Favourite things of the week!

Hel­lo… I have been buried in research and writ­ing this week (lit­er­al­ly, come check out my desk space), so I haven’t had time to craft… at all… ugh… feel­ing so dull and sad… :”(

But here are a few things that I’m keep­ing in mind once I have more time to make things! :D Craft­ing always makes me hap­py, even just the thought of it!

Check out this Fil­i­gree cardi­gan from Stitch Nation Yarn! Just spot­ted it on Rav­el­ry today! This is def­i­nite­ly my next cro­chet project once I find yarn (and time)! Hmmm… what colour should I make it in?

And this pearl clus­ter pen­dant would cre­ate quite a pret­ty roman­tic feel with the fil­i­gree cardi­gan, you think? I saw this quite a while ago on Ruf­fles and Stuff.

Speak­ing of roman­tic feel, what about a plate of French mac­arons to com­plete the look? (Not to be con­fused with mac­a­roons. Although a cro­cheted mac­a­roon would prob­a­bly look pret­ty inter­est­ing too) Well, these are def­i­nite­ly more cute than roman­tic. One look at them on Cre­ate! and I’m con­vinced that I need one in my plush family.

And what about mac­arons deliv­ered in these hand­made news­pa­per bags from What About Orange? They’re bril­liant! I love craft ideas that use com­mon mate­ri­als around the house (an exam­ple of craft that uses odd uncom­mon mate­ri­als is the rub­ber fish print­ing project from Martha Stew­art Liv­ing. They’re def­i­nite­ly fas­ci­nat­ing, but where on earth do you get life-like rub­ber fish forms? Any­way, I digress). Def­i­nite­ly an idea to keep on file for birth­days and Christ­mas! Per­haps I’ll make them in dif­fer­ent lan­guages! :D

AAAAAND final­ly, a ques­tion for you: which ani­ma­tion char­ac­ter is known for deliv­er­ing small gifts?

… hmm…

Give up?

You mean, you don’t know?

You don’t know Totoro?

This is actu­al­ly a Totoro desk­top from Sim­ple Desk­tops. Mike just dis­cov­ered the web­site and was excit­ed to find Totoro in the line­up of sim­ple but awe­some-look­ing desk­tops! I espe­cial­ly like desk­tops with lots of blank space, because I have lots of “unused desk­top icons” (that’s what my com­put­er calls them when it peri­od­i­cal­ly sends me a pop-up note telling me to remove some of them). They’re not unused, just not used very fre­quent­ly. I like hav­ing fold­ers acces­si­ble. Any­way, I digress again… ugh… my brain is fried…

Any­way, here’s Totoro giv­ing Sat­su­ki and Mei a leaf par­cel of acorns in his movie My Neigh­bor Totoro :D

Wish­ing you a love­ly week­end and I hope you enjoy the small gifts of the everyday!

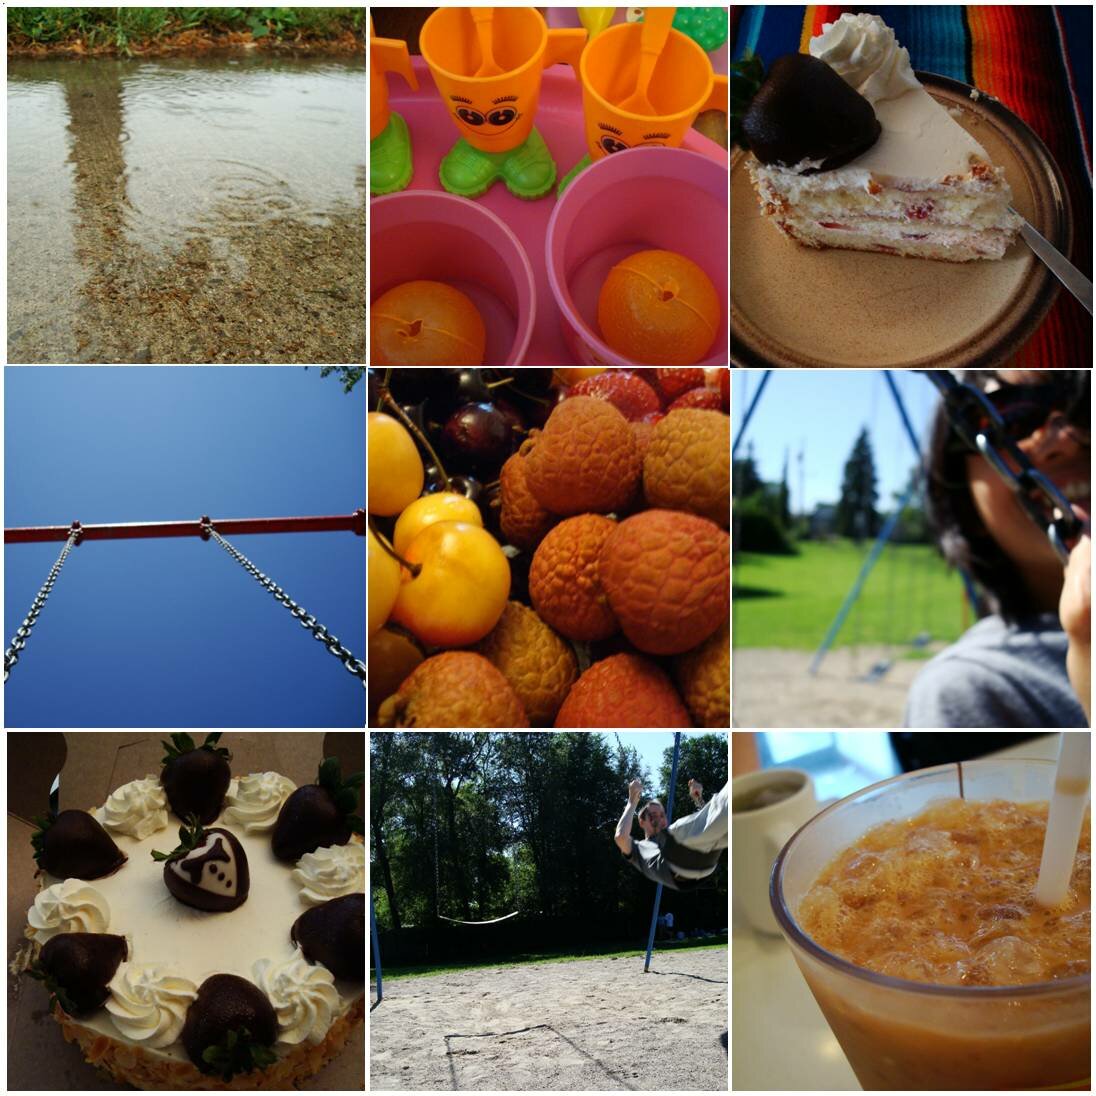
Weekend montage

1. rainy Sat­ur­day, 2. young cousins play­ing restau­rant, 3. hur­ray! hand­made straw­ber­ry short­cake! :D

4. The nicest kind of day, with blue sky and cool breeze, 5. lychee and yel­low cher­ries at fam­i­ly gath­er­ing, 6. cel­e­brat­ing the absence of mug­gy weather

7. tuxe­do straw­ber­ry (before short­cake was divid­ed and devoured), 8. weeeee… 9. HK style milk tea, with fan­cy shaved ice! :D

Wish­ing you a won­der­ful week ahead!

Three!

Cel­e­brat­ing our third anniver­sary today (yay!), I thought I would share some of the crafty moments of our wedding…

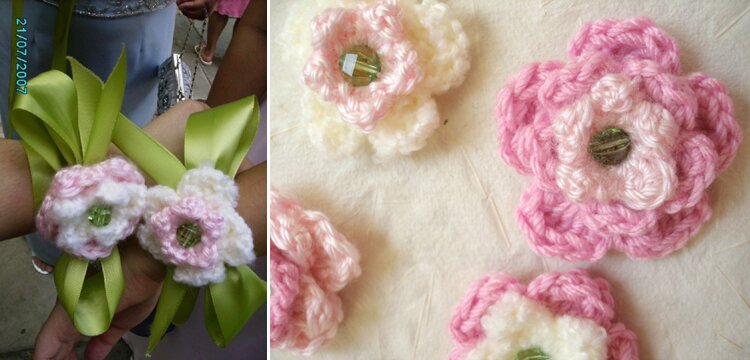
Cro­cheted cor­sages! On the left is a pic­ture my mom took, show­ing how they were worn with lime green rib­bons (note the date stamp :D).

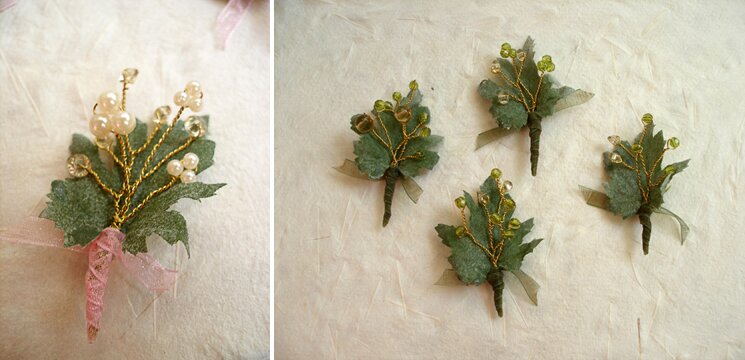
And the bead-and-wire bou­ton­nieres with fab­ric leaves… I got the idea from an issue of Martha Stew­art Wed­ding. I was look­ing to link the arti­cle on her web­site, in case any­one wants to use it, but I can’t seem to find it any­where. I believe Mike still has his bou­ton­niere, which is the one on the left with the pearls (I wore a pearl necklace).

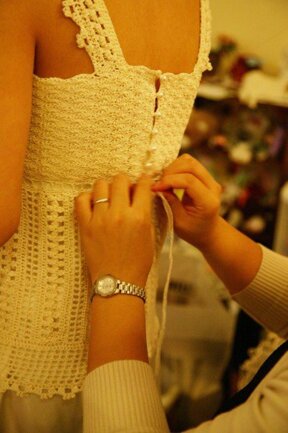
The biggest craft project in the wed­ding was the top part of the dress. Don’t get me start­ed on all the ordeals my mom and I went through try­ing to find a top that fits! (The skirt was no prob­lem though, just need­ed to be short­ened. I got it from The Bride’s Project, an orga­ni­za­tion I would high­ly rec­om­mend to any bride-to-be!) So even­tu­al­ly I just gave up and cro­cheted it, with a cream-colour cot­ton thread. It has pearl but­tons on the back, and a sheer rib­bon weaved around and tied at the back. I fol­lowed a pat­tern from an issue of Cro­chet Today, but again, I can’t seem to find it on the web­site anymore…

Every­day I feel so very blessed to be mar­ried to the most won­der­ful, cre­ative, patient, sup­port­ive, and kind­heart­ed man. Look­ing for­ward to many many more years togeth­er! :D

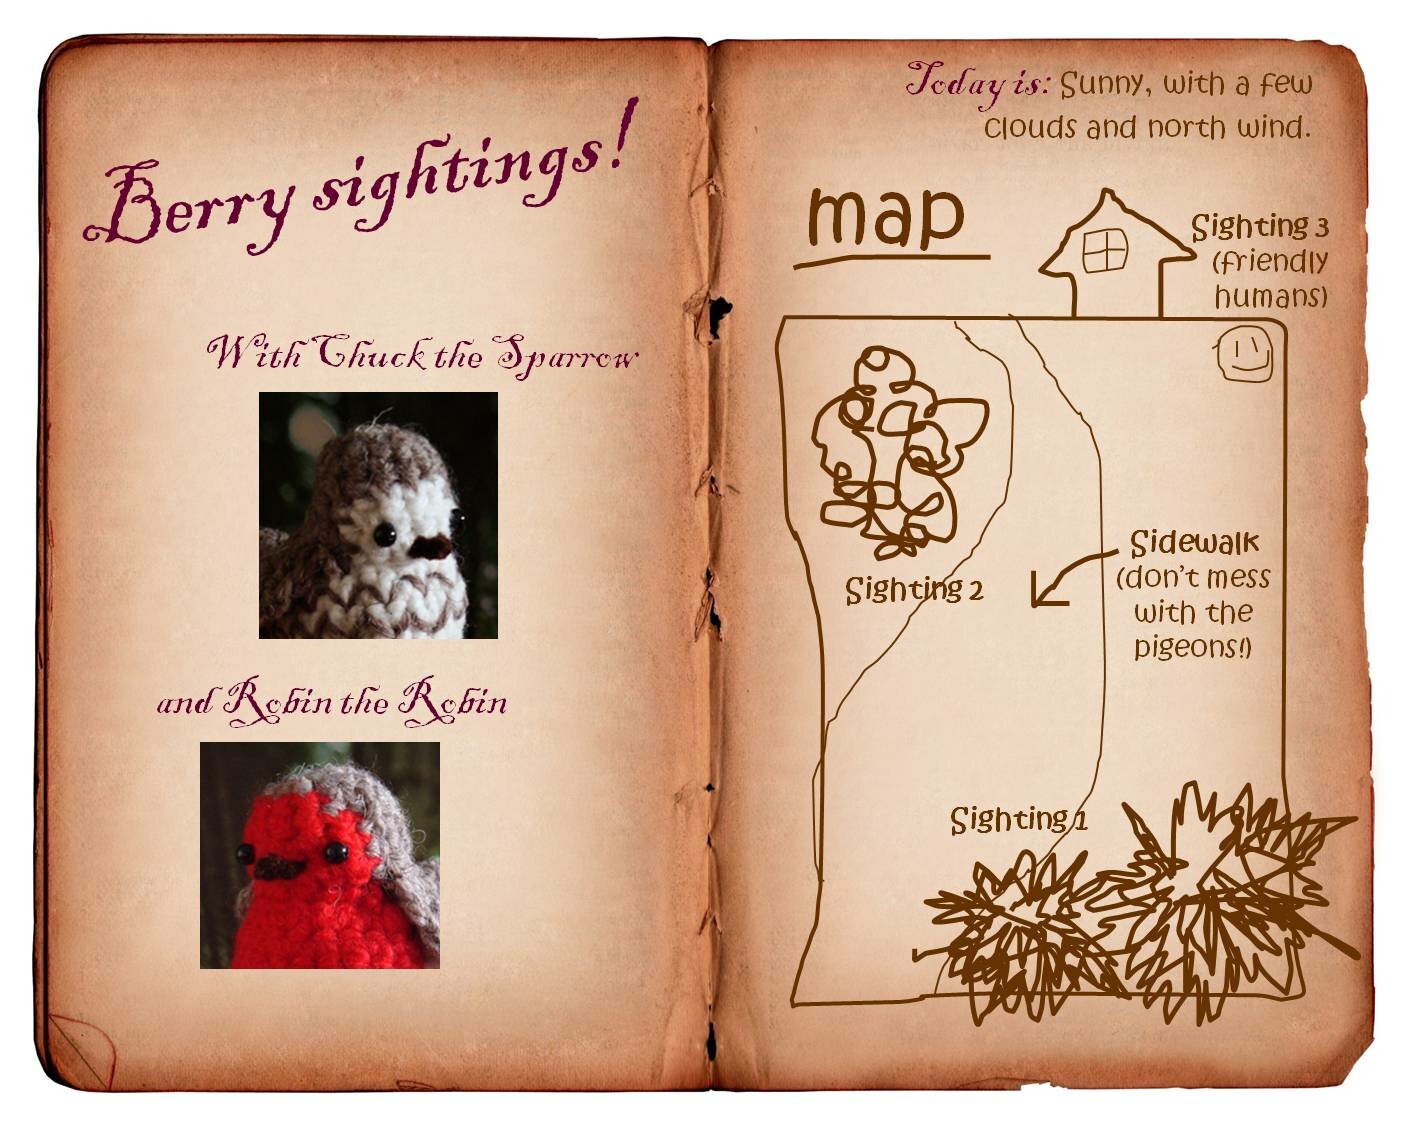
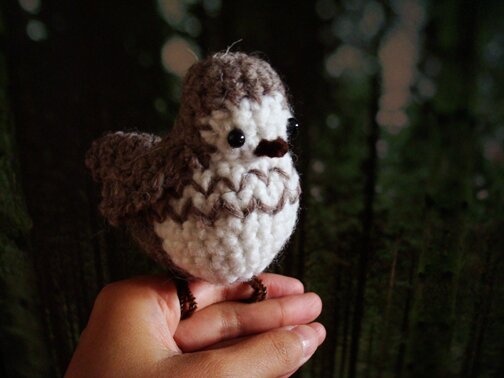
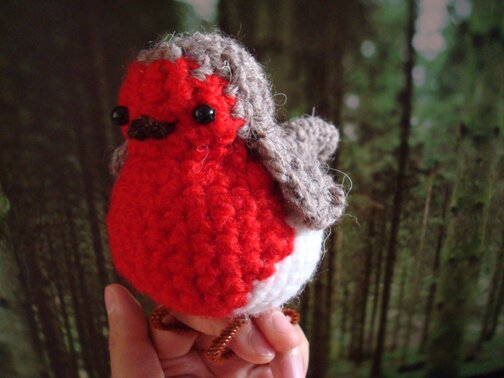
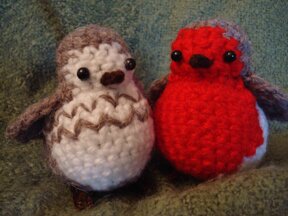
Chuck and Robin

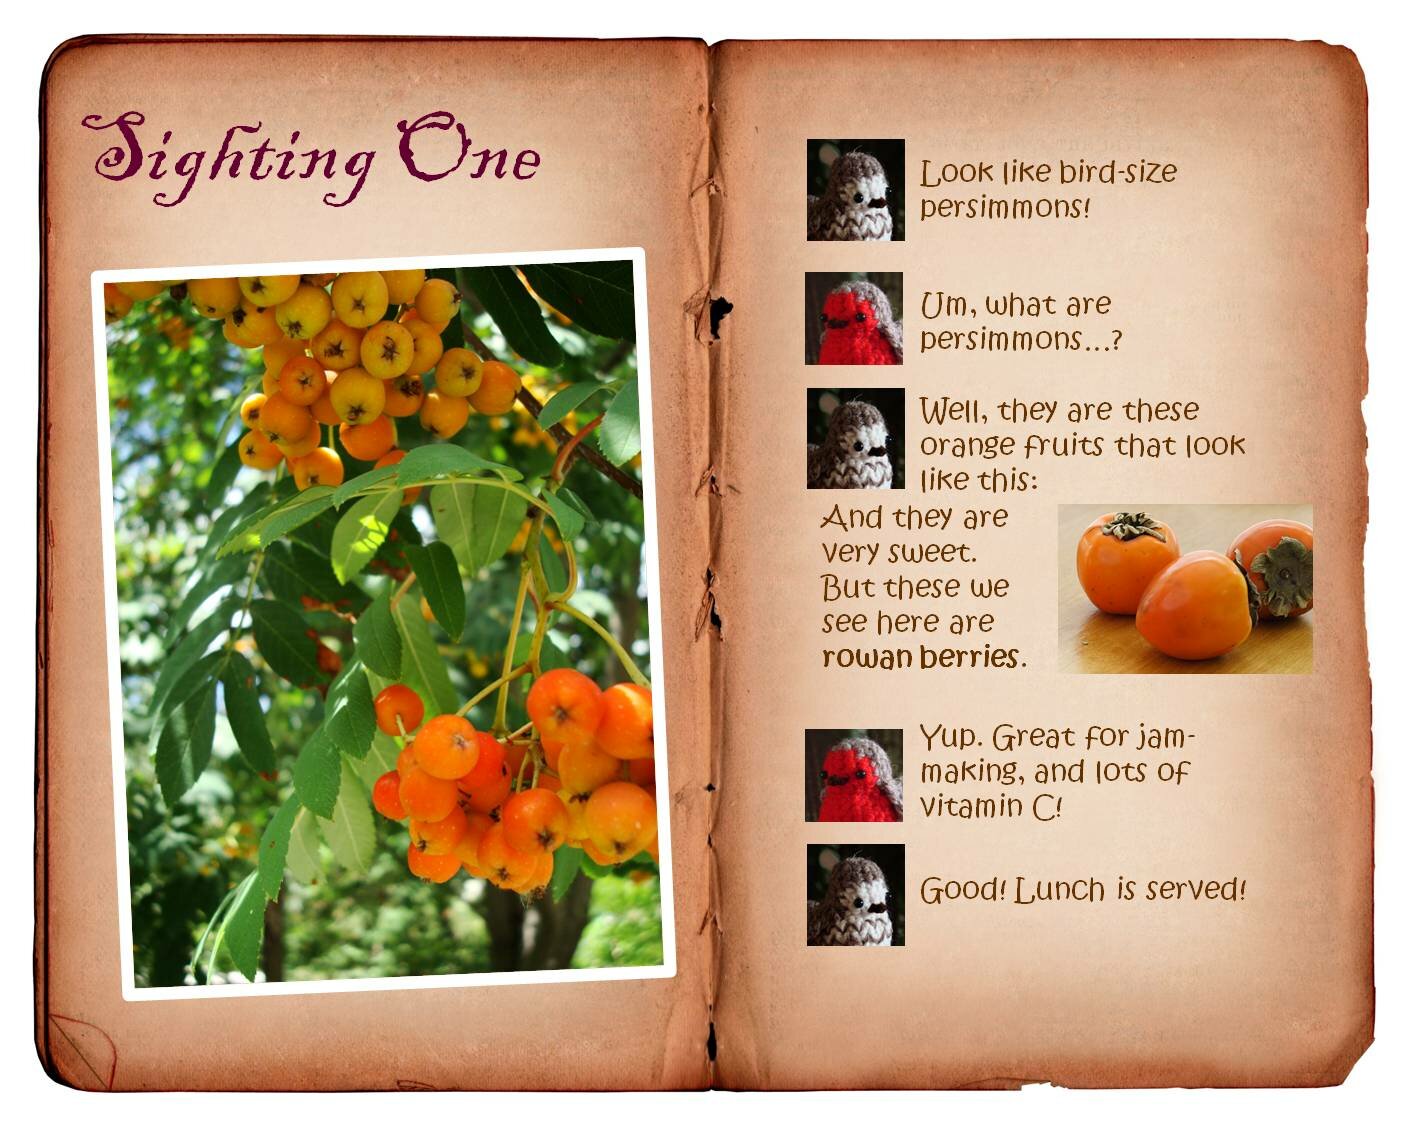
Meet Chuck. He’s a sparrow.

He’s called Chuck because of the pat­tern on his chest, you see.

And now, let me intro­duce Robin.

Robin is a very friend­ly robin.

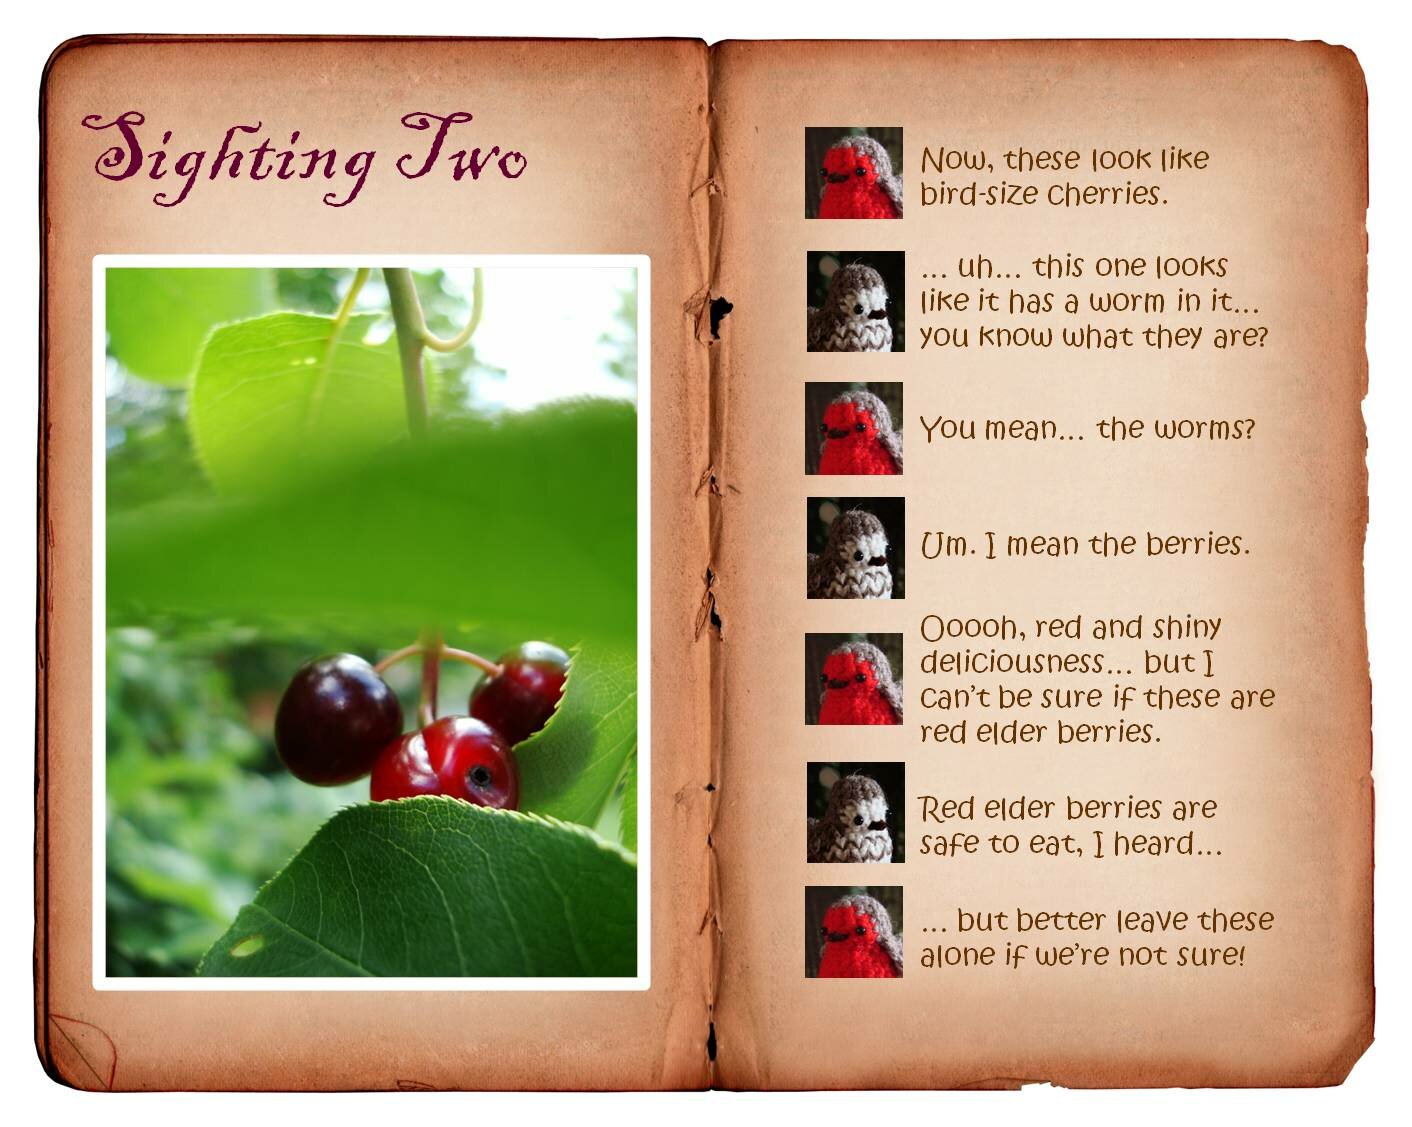
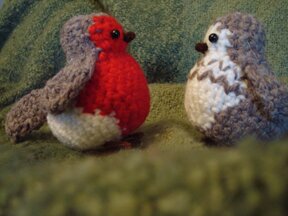
One day, Chuck and Robin ran into each oth­er on their evening walk. (Here’s a wor­m’s eye view of their encounter…)

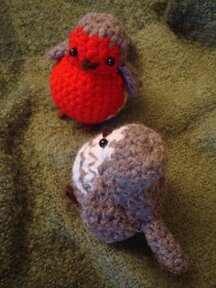
And they got into a long con­ver­sa­tion about the best berry bush­es in the neigh­bour­hood. (Here’s a bird’s eye view of their conversation…)

They dis­cov­ered that they have so much in com­mon, they became BBF! (Best Bird Friends)

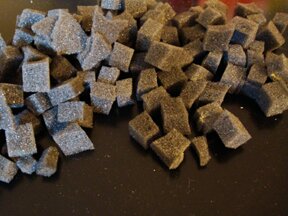
One LKF (Lit­tle known fact) about Chuck and Robin, is that they’re stuffed with this syn­thet­ic sponge mate­r­i­al that I har­vest­ed from the pack­ag­ing for a watch. The sponge mate­r­i­al was made into a box shape orig­i­nal­ly, which I cut into bits.

I’m try­ing to avoid buy­ing Poly­ester stuff­ing as much as pos­si­ble, as I real­ize that there are lots of things around the house that can poten­tial­ly be used as stuff­ing. I’ve been using the cot­ton balls that my par­ents used to sell in their con­ve­nient store over 10 years ago. What else could you use 10+ year-old cot­ton balls in an unsealed plas­tic bag for? They’re the per­fect size for my small fridge mag­nets. And also the t‑shirts that are too old and rat­ty for donat­ing. I also plan to shred those and stuff plush­es with them.

Last but not least, I made Chuck and Robin fol­low­ing this pat­tern on Roman Sock. Check out all the cute crit­ters on the blog! Espe­cial­ly the Ulti­mate Squir­rel. I’d love to make an Ulti­mate Squir­rel one day…

Have a hap­py Tuesday!
The making of a notebook

This post is ded­i­cat­ed to a dear friend of mine. She likes to write things down. Wher­ev­er she goes, when­ev­er she comes across inter­est­ing tid­bits of infor­ma­tion or things that inspire her or a book title that seems intrigu­ing, she would write it down. In book­stores, in the park, on the street, she takes notes, and she takes in all the love­li­ness that life has to offer. And so that inspired me to make a handy palm-sized notebook!

But before I go into the process of mak­ing it, I must say that I did­n’t come up with this idea entire­ly on my own. Besides being inspired by my friend, I’ve also got­ten this book-mak­ing idea from Flipflops and Apple­sauce. I mere­ly built on the idea to cre­ate a note­book with more pages.

Any­how, that’s how I did it:

I used lined 3‑hole paper because that’s all I have at home, I sup­pose it would look more neat with plain lined paper, or plain unlined paper… but I did­n’t mind hav­ing holes in my note­book :P
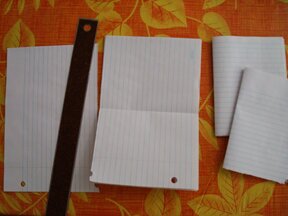
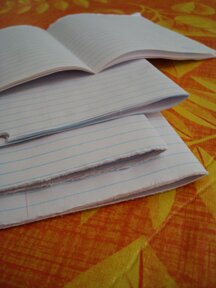
I took about 15 pieces of lined paper, divide into two stacks, and tore each stack in half. I then end­ed up with 4 stacks of 1/2 sheet paper, and I fold­ed each stack in half, as pictured.

So then I end­ed up with 4 sections.

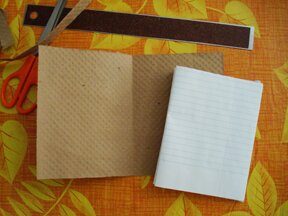
Then I took a thick­er paper and tore it to size to fit the pages, for a book cov­er. Of course, one could also mea­sure and cut the paper to size, but I pre­fer eye-balling, tear­ing with the ruler, and imper­fec­tions :) I think this paper was used to wrap ceram­ic wares when I bought them from a store.

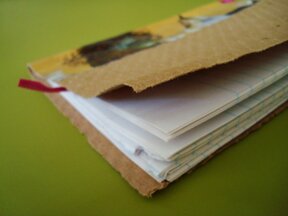
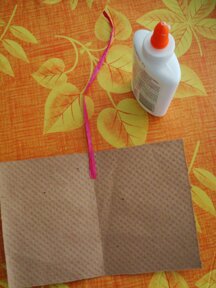
I want­ed to have a built-in rib­bon book­mark, so before I sta­pled every­thing togeth­er, I attached a bit of pink raf­fia to the top edge of the book cov­er with some white glue.

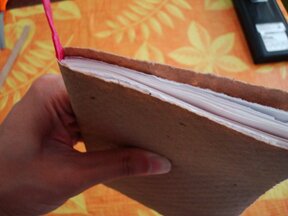
After the glue is dried, I wrapped the cov­er around all 4 sec­tions, with the book­mark stick­ing out at the top…

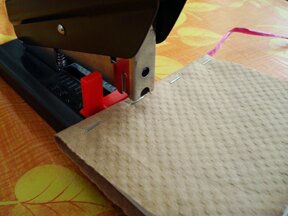
… and sta­pled the whole thing togeth­er. Mike hap­pens to have a heavy-duty sta­pler from his school days, which is real­ly handy for this project. But with a reg­u­lar sta­pler one could also sta­ple from the front of the cov­er, then sta­ple from the back, and repeat, alter­nat­ing sides with each sta­ple, and sta­ple very close­ly togeth­er down the fold side of the book. That should hold all the pages together.

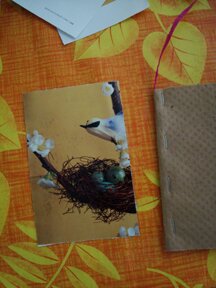
Now this is the fun part — choos­ing a pret­ty paper to wrap around the spine! I like choos­ing from mag­a­zines because I can find lots of inter­est­ing and mean­ing­ful pic­tures that way. But I’ve also used origa­mi paper. I imag­ine gift wrap­ping paper would be nice too! I tore the image to size — width does­n’t real­ly mat­ter but the height needs to be the same as the book’s height.

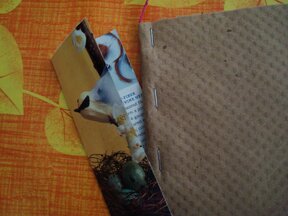
I fold­ed the image in half length­wise to cre­ate a crease, and then opened it up to apply glue (I used spray adhe­sive so the cov­er does­n’t buck­le), and then wrapped it around the book’s spine.

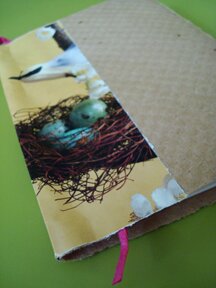
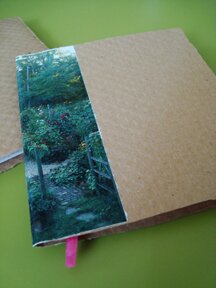
And here we have it, a notebook!

With lots of pages to write in!

And I also made a gar­den-themed one…

… and an art jour­nal with dif­fer­ent kinds of paper in it! Will have to write about that art jour­nal someday…

I think it def­i­nite­ly beats buy­ing a $10 note­book at the bookstore!

Have a love­ly weekend!

Adventures in resin

Hel­lo there! Last week I went to the resin work­shop at Wise Daugh­ters Craft Mar­ket and it was total­ly fun! I car­ried home all these spark­ly pieces and felt so rich :)

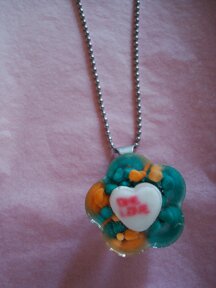
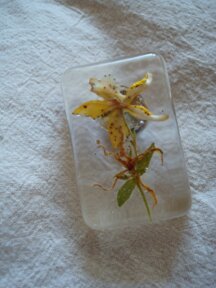
It is true that one could embed almost every­thing in resin. The flower pen­dant has those Nerds can­dy in it and also a valen­tine candy.

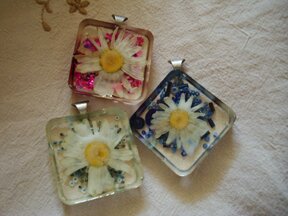
And these were the flow­ers I picked and pressed over Cana­da day weekend!

The instruc­tor said to cov­er the flow­ers with Podge first before pour­ing resin over them, but I think I lath­ered on the Podge too lib­er­al­ly and they did­n’t have enough time to dry before being for­ev­er sealed… so you can see blobs of Podge on the petals. I still have hope that it’s going to turn clear over time… just need to wait patiently…

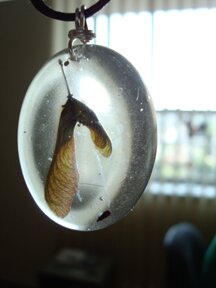
But I was real­ly thank­ful that the maple key one turned out per­fect­ly :D I could­n’t attach a neck­lace back­ing on it because it’s clear, and I don’t have small enough drill bits, so I used an awl to poke a hole through the resin and made a loop with wire.

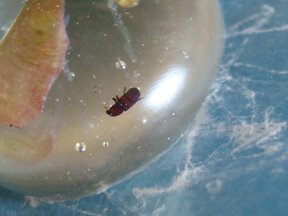
And it came with a BUG!!

The poor fel­low prob­a­bly fell in before the resin was set… Now for­ev­er immortalized.

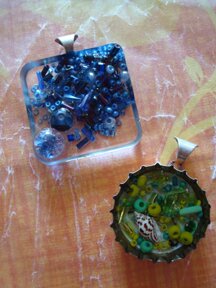
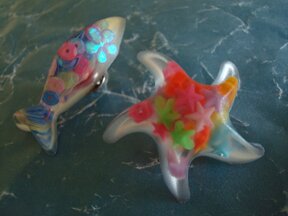
Here are more fun ones… like a fish and a star fish…

… and one made with a bot­tle cap!

I actu­al­ly did­n’t make the one on the top left… It was a left­over back­ground piece that the instruc­tor made for us ahead of time. She asked if any­one want­ed it at the end and I thought it would make a nice art­sy-look­ing pendant.

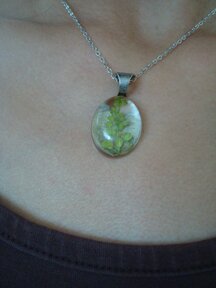
Oooh, and last but not least, one that has a small bit of ground-cov­er­ing type plant in it, and I was wear­ing it on the weekend.

It was tons and tons of fun and I’m so hap­py to final­ly get to use resin! Now I have to fig­ure out where to get more of that stuff…

Hap­py Tuesday!
Weekend montage

1. Bright and sun­ny after thun­der­storm, walk­ing through park on the way home.

2. Spain’s the win­ner! Splash­ing cel­e­bra­tion in the midst of Out­door Art Expo.
3. And we walked by some echinaceas…

4. Churchill and seag­ull… :S

5. And we stopped to smell the lavenders.

6. We had a bar­beque this after­noon with lots of left­over food! Tired of more hot dogs, we made it all into soup! Cut-up sausages plus rem­nants of the veg­etable tray, and even red onion rings and toma­to slices that did­n’t get used for ham­burg­ers! And I added mac­a­roni. It’s actu­al­ly quite good! The smok­i­ness from the bar­be­qued sausages made the soup inter­est­ing… and it made me feel very blessed to have food in abun­dance and fam­i­ly and friends to share it with.

Wish­ing you a great week ahead!

Finally, the Yeti!

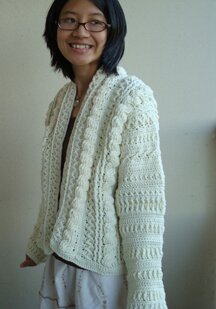
I’ve fin­ished the Yeti for sev­er­al weeks now (“the Yeti” is the name of the jack­et that I was cro­chet­ing, fol­low­ing the Copen­hagen Jack­et pat­tern. More about the Yeti sto­ry here), but the weath­er has just been been far too warm for me to want to take pho­tos wear­ing it. But the humid­i­ty has final­ly gone down today and so did the tem­per­a­ture! And I could final­ly bear to wear it for a cou­ple of min­utes… and so here’s a pic­ture of it, finished!

I think this is the longest I’ve ever spent on a project, it’s tak­en me close to a month! But I’m rather hap­py with it. I think I will like it even bet­ter in the fall, when the weath­er gets cool. It’s a bit stiff because of the vin­tage acrylic yarn I was using, but hope­ful­ly it gets a bit soft­er when  I wear it more.

And here’s a pic­ture of it when I fin­ished it sev­er­al weeks ago, imper­son­at­ing a Yeti.

Um. Any­way. Hope you’re hav­ing a great week­end! :D