favourite things friday

Here are my fab­u­lous finds this week — I hope you enjoy them too!


Got a stray sock? Or a sock with holes in the heel? Make some baby socks! Now I just have to find a baby to wear them… Sim­ply genius idea from Made by Joel.


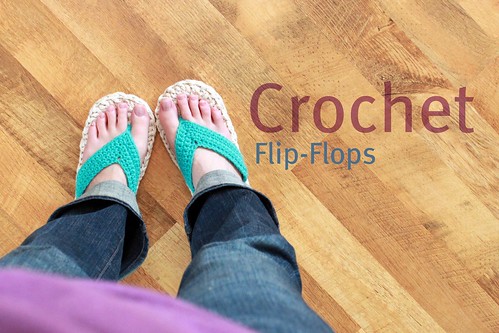
It is absolute­ly worth the mon­ey to buy this pat­tern, if you and your fam­i­ly like to wear flip flops — it comes in size 3–10, good for both indoors and out­doors! Makes fan­tas­tic gifts for birth­days in the sum­mer, I think! Pat­tern for sale at EASY.


More crepe paper awe­some­ness! The tuto­r­i­al calls for crepe paper in sheets, but I won­der if stream­ers would work. Hmm. Crepe paper flower tuto­r­i­al from How About Orange.


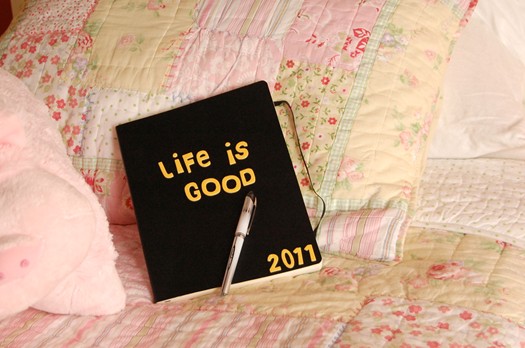
I love this idea from Make and Takes to encour­age opti­mism in the fam­i­ly. One per­son writes in a jour­nal 3 things that made him/her hap­py that day, then put the jour­nal on some­one else’s bed to write the next day. I sup­pose one could also write about things that one is thank­ful for, to treat the grass-is-always-green­er-on-the-oth­er-side syn­drome. Or write about things that give us hope, in times of change and chal­lenge. It’s fun to do when there are sev­er­al of peo­ple (espe­cial­ly kids) in the house­hold. But I can also see it being a great jour­nal­ing prac­tice. Don’t have a jour­nal handy? Make one with scrap paper! :D


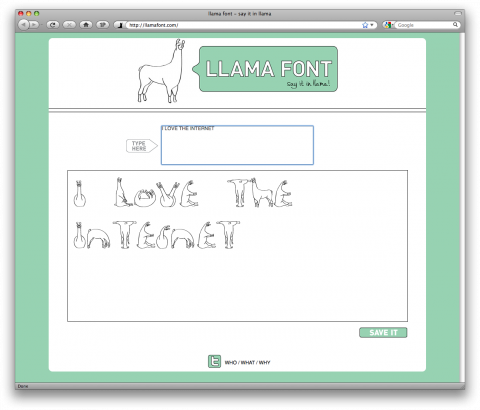
But when it’s hard to express in words, try say­ing it in lla­ma. Because lla­ma makes every­thing bet­ter. Just watch. Not con­vinced? Read these exam­ples. Now go ahead, say it in lla­ma, save, and share. (via Swiss­miss)


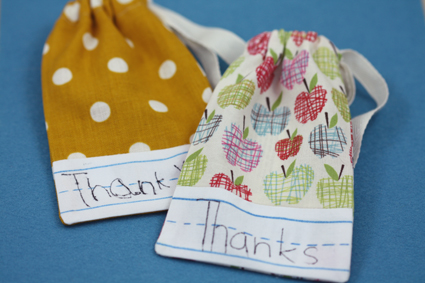
On the oth­er hand, if you have some­thing real­ly nice to say to some­one, this cute dic­ta­tion pouch would do a fab­u­lous good job. Tuto­r­i­al by The Long Thread.


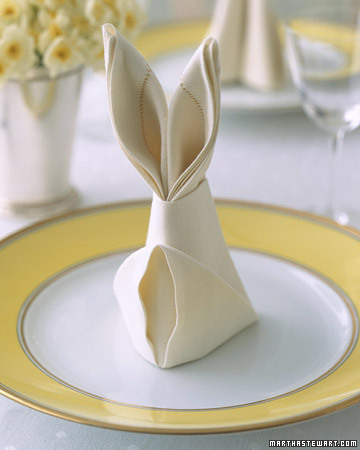
Per­fect for week­end brunch! Bun­ny fold for nap­kins, instruc­tion on the Martha Stew­art web­site.


Also made with a rec­tan­gu­lar piece of fab­ric — a sim­ple, breezy sum­mer blouse. Free pat­tern on Gros­grain.


This is just bril­liant! A the­atre made of a match­box, and char­ac­ters made of rocks! Not only that, but the rocks are moved by mag­nets on a pop­si­cle stick, and the scenes are replace­able (even has a piece of rib­bon at the bot­tom for easy removal). Such an awe­some idea, gen­er­ous­ly shared on Coloured But­tons.


I have been want­i­ng some air plants for a while… I think they’re just fas­ci­nat­ing. And I think these ter­rar­i­ums are just the per­fect way to dis­play an air plant. How-to on Ruf­fled.


What’s bet­ter than an extra whip green tea lat­te? (or any hot drink of your choice — GTL is just my favourite) An extra whip green tea lat­te with a colour­ful knit­ted cup sleeve! These are by far the most elab­o­rate cof­fee sleeves I’ve seen. Pat­tern by Ohdessa Knits.


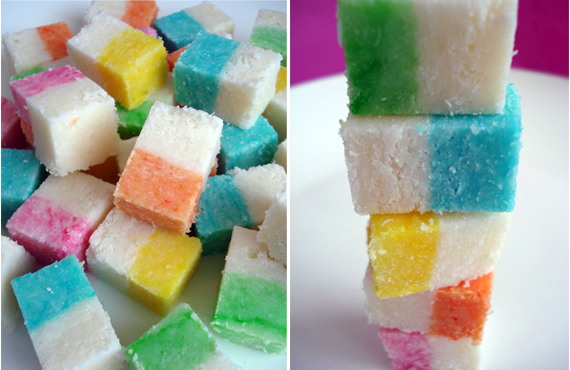
Coconut ice! These look so deli­cious, and are sur­pris­ing­ly sim­ple to make! Though the orig­i­nal recipe calls for dessi­cat­ed coconut, I’m guess­ing reg­u­lar shred­ded coconut would do (I will test it out and report back — stay tuned!). (via Mini-Eco)


I’m not a fan of olive, but these would be a hit at any par­ty for sure! How-to on The Hair­pin.

Hap­py craft­ing! :D


another rainy day at the print shop


Print shop à la mud­pie, that is. It’s an exper­i­ment. And it’s per­fect­ly accept­able to print in flan­nel pants.

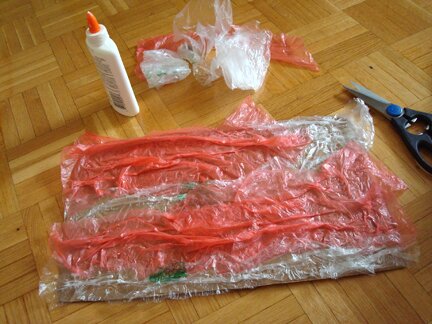
Unlike the Macken­zie’s print shop, there are no machines here. No press. Just me, some cut-up plas­tic bags, some torn up Sty­ro­foam trays (washed and san­i­tized), some card­boards, and the trusty PVA glue.


I was hop­ing to make a back­ground for the plarn bet­ta fish, and what would be bet­ter than mak­ing it with plas­tic bags? :D I’ve print­ed with bags before, at school, on a press. Actu­al­ly, print­ing with found mate­ri­als (i.e. things that peo­ple con­sid­er trash, like plas­tic bags, bread tags, and pop tabs) was my favourite thing to do in print­mak­ing class.

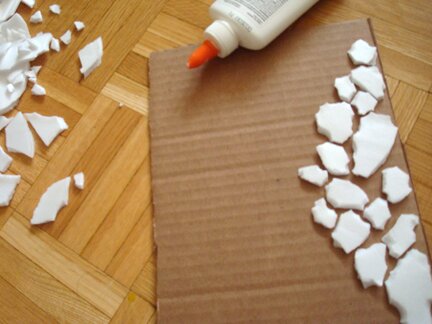
I don’t have any of that equip­ment at home, but I do have a plan. I start­ed by cut­ting up the bags and glu­ing them onto a piece of card­board. That’s plate #1.

For plate #2, I tore up Sty­ro­foam trays (again, washed and san­i­tized) and glued them onto anoth­er piece of card­board, to resem­ble riv­er stones.


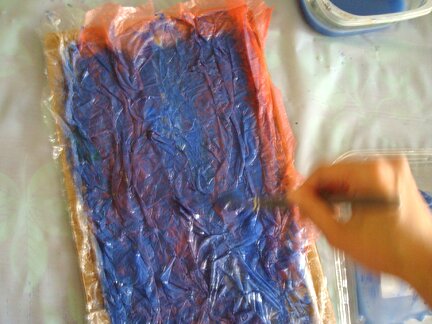
I don’t have block print­ing ink, but I thought acrylic would be fine. I brushed it on so it can get into all the crevices.


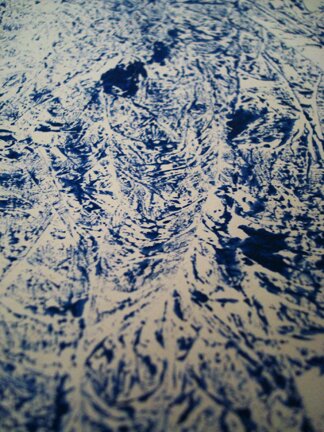
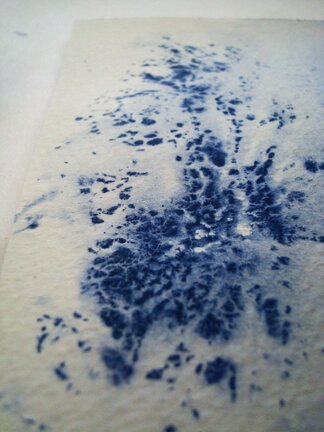
I always like the test prints on newsprint the best. The feath­ery details were mes­mer­iz­ing, like frost.

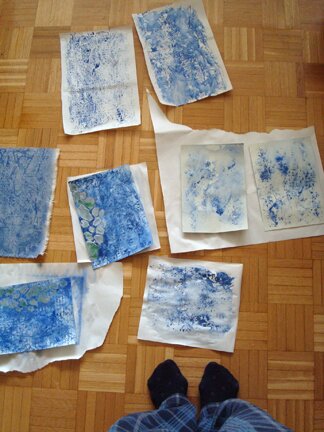
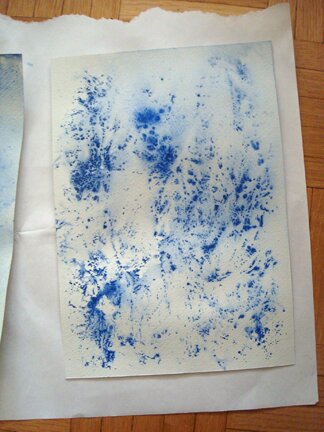
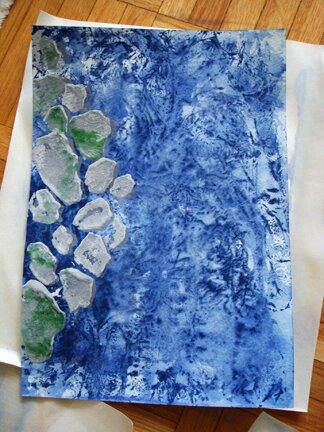
How­ev­er, this makes too busy of a back­ground for the del­i­cate plarn fish. So I sprayed water on it to dis­perse the paint a bit before it dries. But then I got car­ried away and it got too wet. So rather than patient­ly wait for it to dry, I laid anoth­er piece of paper on it, hop­ing that if it does­n’t make a half-inter­est­ing print, it would at least soak up the watery mess. Kind of like a ghost print, and out came this…

Isn’t that so love­ly? Well, at least I think so. Has a kind of smoky qual­i­ty to it. Reminds me of aquatint

The lay­ered prints did­n’t come out so great. But I did sal­vage this one after rework­ing it sev­er­al times.

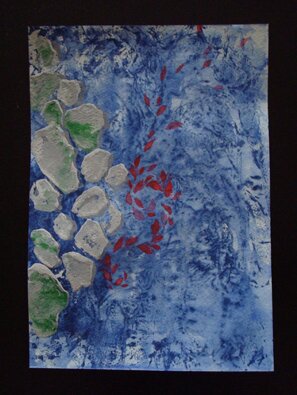
I’m not in love with it. I thought it need­ed some red. So when it was all dried I added some watercolour…

Like leaves car­ried by the cur­rent or a school of fish. Still not lik­ing it too much, to be hon­est, but I think it’s look­ing a bit better.

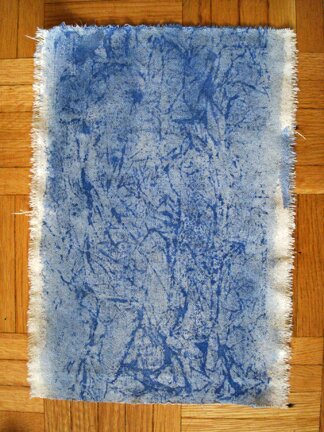
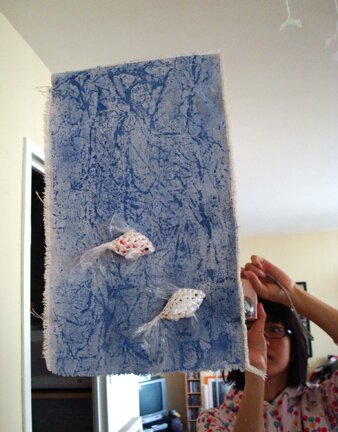
I end­ed up print­ing the back­ground for the fish on a piece of canvas.


I trimmed it a bit, pinned on the fish (so I can move them to a new back­ground if I ever want to), and hot glued a strip of card­board on the back so it can stick on the mir­ror (because one large wall in our apart­ment is a mir­ror, and we’ve run out of reg­u­lar wall space).


Ta-da!

I hope they’re hap­py in their new habitat.

A cou­ple of things I learned from print­ing with recy­cled materials:

1) Must invest in block print­ing ink! I keep putting it off, but acrylic is real­ly too run­ny for printing.

2) Sty­ro­foam does not stick to white glue! The pieces kept falling off when I rolled paint on it. Next time I’ll use the glue gun.


Will def­i­nite­ly try doing this again. Thank you so much for stop­ping by!

quest for the perfect slouch hat

The weath­er is get­ting a bit too warm for my thick, cro­cheted-with-two-strands-of-yarn-held-togeth­er hat. Even my cro­cheted slouch hat feels like a bit of an overkill. Per­haps it’s best to leave cro­cheted head­gear for the win­ter. So I just stopped wear­ing hats when­ev­er I go out.

But one grey, sun­less day, after stand­ing in a windy play­ground for half an hour, and real­iz­ing that there are still 20 more min­utes to go before the end of my recess duty, I wished I were one of the kids run­ny around and around the sand­box. Yes, I may look sil­ly, but at least I’d be warm. Or, bet­ter yet, I wish I had a hat. Then I’d look warm and styl­ish. Plus, they say we lose heat through the top of our heads (but appar­ent­ly that’s a myth).

Los­ing heat or not, a lighter hat is need­ed for the rainy, grey, spring sea­son (OK, I’ll be hon­est. I just like hats). Then one day, we were at a tea shop and I saw a guy work­ing behind the counter wear­ing a green hat, like a reg­u­lar toque, with just a bit of slouch to make it look styl­ish. I loved the sim­plic­i­ty of it. That was the per­fect hat.

And if I see some­thing I like, I’ve got to make it.

There was a prob­lem, how­ev­er: I don’t know how to knit in rounds with dou­ble-point­ed nee­dles. Plus, I only have one pair of nee­dles for each size, which means that I don’t have enough nee­dles to knit in rounds.

No prob­lem, I will knit the pat­tern flat, then seam it togeth­er. It’s not going to look as good but I’m OK with a bit of flaw.

So I first tried this pat­tern from Sarah Bear Crafts via Rav­el­ry. It looks like it has the tiny bit of slouch that I want­ed and seemed sim­ple enough.

I’m not very famil­iar with knit­ting, and so it was­n’t until row 4 or 5 that I real­ized when one knits in rounds, there are no purl rows. But I was knit­ting back and front, so I tried to fig­ure out what to do on the purl rows with the rib­bing pat­tern. And I was­n’t good enough in knit­ting to fig­ure that out, so after cast­ing on and rip­ping out 3 or 4 times I had to aban­don the project and miss out on a great hat :(

So then I found the Rikke hat pat­tern on Hap­py Knits, also via Rav­el­ry. Entire hat is made of garter stitch. I can han­dle garter stitch. It does­n’t look very slouchy in the pic­ture, so I was real­ly sur­prised when I tried it on…

If I had knit­ted it in white, I would look like a Smurf. And that would­n’t be half bad, would­n’t it? But I just can’t see myself wear­ing that to work. I don’t think it was the pat­tern’s fault. Per­haps I have a small­er than aver­age head. Per­haps it was the yarn sub­sti­tu­tion and my faulty cal­cu­la­tion. Even though I decreased the num­ber of stitch­es all around it was still too big.

So! I took it apart and tried again with a lighter yarn. I also made it 2.5 inch­es short­er than the pat­tern. And it worked out just the way I want­ed :D (Isn’t it a great feel­ing when that hap­pens with knit­ting? I guess it’s such a big deal for me because I’m not very good at check­ing gauge. And unlike cro­chet­ing, one can’t take the stitch­es off the nee­dle and try it on along the way.)

Here it is from the side…


And here it is from the front :D

Yes, I’m just that hap­py about a new hat :P

(The truth is that I’ve tak­en way too many pic­tures of myself, try­ing to frame it prop­er­ly while keep­ing a straight face, and in the one before this for some rea­son I looked shocked and scared and mad alto­geth­er. I looked so ridicu­lous it was hilar­i­ous. So this is more about me laugh­ing at myself. Makes a pret­ty can­did shot though!)

And let me show you a close up of this yarn, with the dif­fer­ent colours in it. I believe it’s DK or sport weight. It was giv­en to me with­out a label.


I wore it out today. It’s very light and does­n’t give me hat hair. It’s per­fect for spring :D

Cheers!

Easter dough fun!

Busy hands at my mom’s “dough fun” booth for the kids! It was part of her Chris­t­ian com­mu­ni­ty out­reach group’s East­er pro­gram at a Chi­nese mall, along with oth­er game booths, the telling of the East­er sto­ry, free blood pres­sure mea­sur­ing (a big hit with the seniors), dance and choir per­for­mances, and Chi­nese opera singing.

The night before we made 8 batch­es of dough in total, each the size of a smal­l can­taloupe. My mom cooked some batch­es using this recipe, while Mike and I made some using the uncooked recipe.

And from this fren­zy of dough-mak­ing I learned that:

1. Nev­er wrap cooked dough in plas­tic wrap! Just put them in an air tight con­tain­er, and only do that after it’s cooled. Of course, I found that out the hard way. 4 batch­es of cooked dough turned into paste the next day. Utter­ly form­less, sticky, mushy paste. It took 2 full bags of rice flour (because the Chi­nese gro­cery store near the mall did­n’t sell all pur­pose flour) and 2 hours of knead­ing one fist­ful of dough at a time to undo the damage.

2. Always add less water than called for ini­tial­ly. Espe­cial­ly with recipes that also call for oil and food colour­ing. I found that any extra liq­uid would make the dough too wet and sticky. One could always add more water if the dough seems dry and flaky.

Though not with­out stress, the day was fun! I made some sam­ples before the kids arrived. Like this cater­pil­lar here, with red bean eyes. (As a last-minute solu­tion for “what if the kids make ani­mals and they want to add some eyes?” my mom brought in some red beans from her pantry.)

With those huge eyes it kind of reminds me of the giant cater­pil­lar in Miyaza­k­i’s Val­ley of the Wind.

The vol­un­teers and the moth­ers of the kids who stopped by also made some real­ly nice roses!

Dough flower is actu­al­ly a kind of tra­di­tion­al Chi­nese hand­i­craft, using wheat flour or rice flour and sug­ar, and are served as desserts. And then there’s a mod­ern craft tech­nique for mak­ing flow­ers and minia­tures using a spe­cial kind of syn­thet­ic clay. It’s called clay flower in Eng­lish but its direct trans­la­tion from Chi­nese is “flour flower” (pun­ny!), which makes me think that the syn­thet­ic clay craft is a direc­t dece­den­t of the tra­di­tion­al dough flower craft. It appears to be quite pop­u­lar in Chi­nese com­mu­ni­ty, with lots of class­es being offered at community/cultural cen­tres, and the vol­un­teers and moth­ers were chat­ting about the “flour flower” tech­nique while mak­ing ros­es at the booth.

And so lots of kids want­ed to make flow­ers. One of the girls was mak­ing a bou­quet with dif­fer­ent flow­ers, and request­ed calla lilies, so I tried to make some. Just a tooth­pick wrapped in a bit of yel­low dough at the top, and then wrapped in a thin, cir­cu­lar piece of dough. Of course, our salt dough flow­ers seemed pret­ty crude com­pared to the tra­di­tion­al dough flow­ers and the mod­ern “flour flower”, but it was fun nonethe­less :D

I also made a bird. Only as a sam­ple in the begin­ning, but I liked it a lot, so I fin­ished it with a coat of var­nish and hot-glued a pin on the back.

I love its tooth­pick legs! :D It’s found a home in the type case when it’s not pinned to my shirt.
Have a fan­tas­tic start to the week, everyone!


favourite things friday

Spring has gone miss­ing in our neighour­hood. There was a bliz­zard on Mon­day, the tem­per­a­ture con­tin­ues to stay below 10°c, and the wind is bit­ter. But that won’t damp­en my crafty spir­it! Here’s a whole slew of cheer­ful spring projects (and oth­er cool things too!) for all to enjoy :D


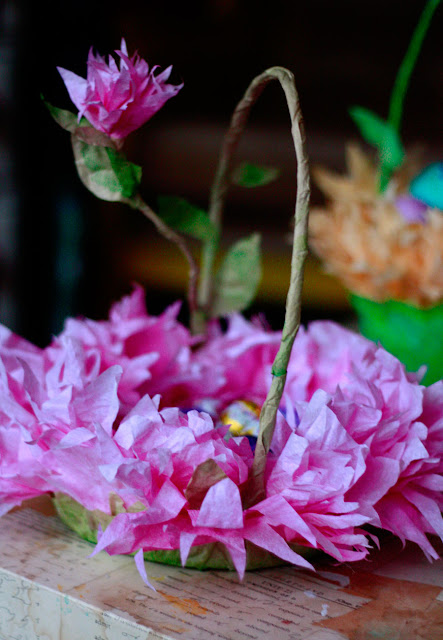
Absolute­ly stun­ning flower bas­kets. More stun­ning is the fact that these are made of the hum­ble, dis­pos­able cof­fee fil­ters! Would­n’t they make gor­geous cen­ter pieces or dec­o­ra­tions at a wed­ding, hold­ing small cook­ies or can­dy or favours? How-to on Aunt Peach­es.


I love the one with fern pattern. Botan­i­cal wall decor tuto­r­i­al by David Stark on Design Sponge.


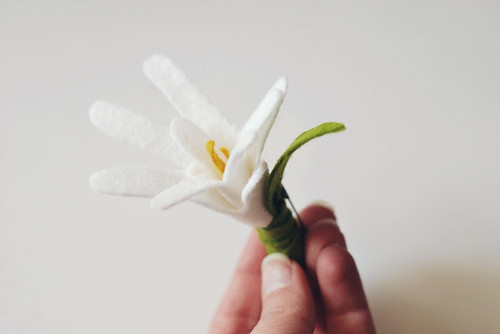
This is bril­liant — a lily brooch made of chil­dren’s hand­print! Per­fect Moth­er’s Day present col­lab­o­ra­tion for nieces, nephews and a crafty aunt :D How-to on Wild Olive.
 

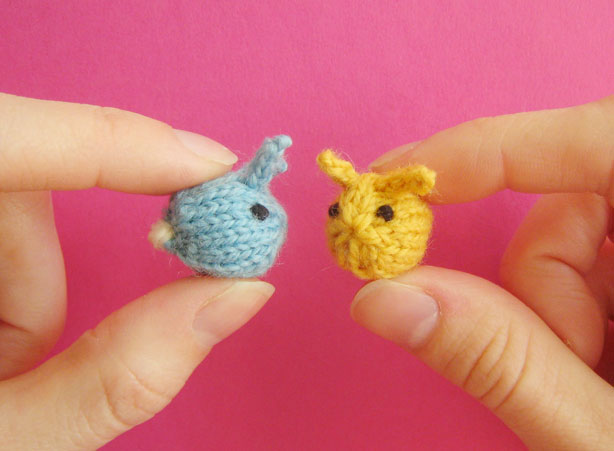
A free pat­tern from Mochi Mochi! Tiny bun­nies are per­fect for car­ry­ing around in one’s pock­et :D
 

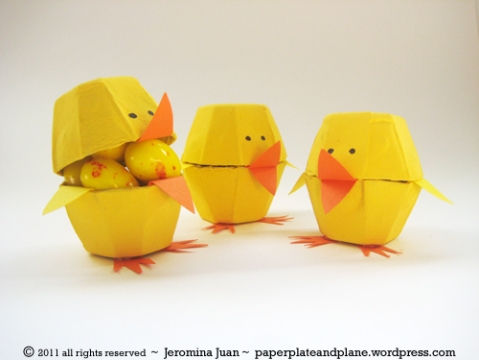
I love that these chicks are made of egg car­tons. So very adorable, AND they can hold can­dy inside! They’d make great par­ty favours any time of the year. From Paper, Plate, and Plane.


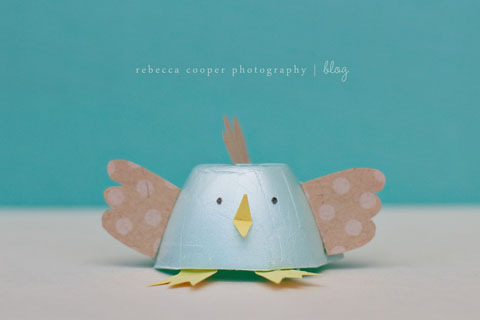
More egg car­ton chicks, and bun­ny too! This time with the Sty­ro­foam vari­ety, no paint­ing required. I think they would also make real­ly cute chub­by bird orna­ments :D From Sim­ple as That.


So we make plen­ty of things with egg car­tons, what about the eggs? Meyamo has a tuto­r­i­al on how to make fruit and veg­etable based paint for dec­o­rat­ing eggs. It’s fas­ci­nat­ing, and edi­ble! (scroll down to see tutorial)


I have a pile of notes, reminders, receipts, coupons and oth­er ran­dom pieces of paper strewn all over my desk at the moment, and I’ve been look­ing for a mag­net­ic mes­sage board for a long time, this might be the per­fect thing! Have to keep an eye out for met­al serv­ing trays next time I’m at the thrift store. Tuto­r­i­al on Sparkle Pow­er.


This caught my atten­tion because my mom recent­ly gave me a large bag of cro­cheted doilies. Though the doilies I have are real­ly small. But I might be able to com­bine a few to make one sleeve. How-to by Jes­si­ca Wil­son on Craftzine.


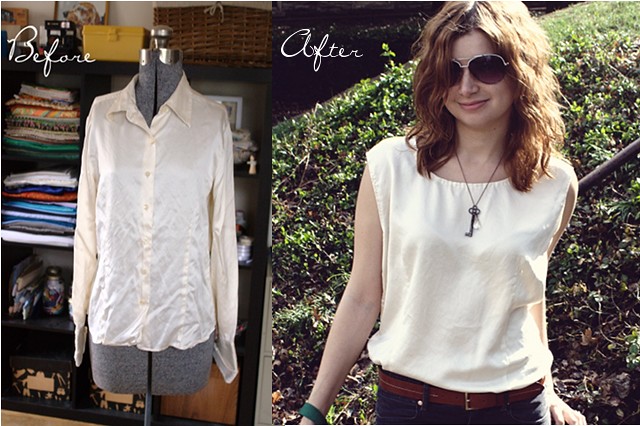
Not try­ing to get ahead of myself — spring is bare­ly here — but would­n’t this be so per­fect for those scorch­ing hot sun­ny days? I just love the sim­plic­i­ty of it. Silk shirt refash­ion on One Pearl But­ton.


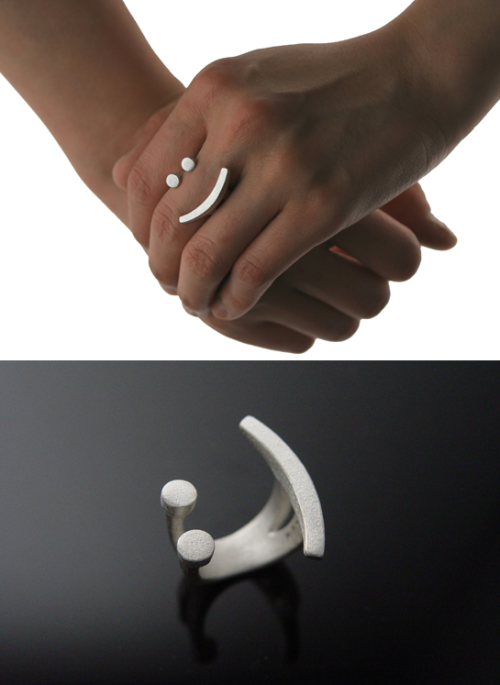
This made me smile. I mean phys­i­cal­ly. But I can type it out too :) Signs jew­lery by Chao and Eero. (Via Inspire Me Now)


And final­ly, I end with this, from Shan­na Mur­ray, a decal for sale to sup­port Japan, with a quote by Moth­er Teresa.


And today, being Good Fri­day, I’m reflect­ing on the great love that is the root of Easter.

Peace, love, and warm wish­es to you and yours. Hap­py Easter!


toppers!

Yay for cus­tom orders! :D


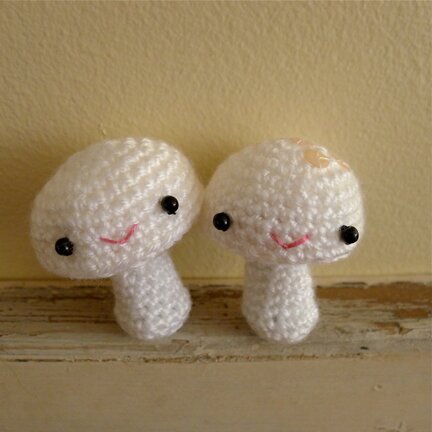
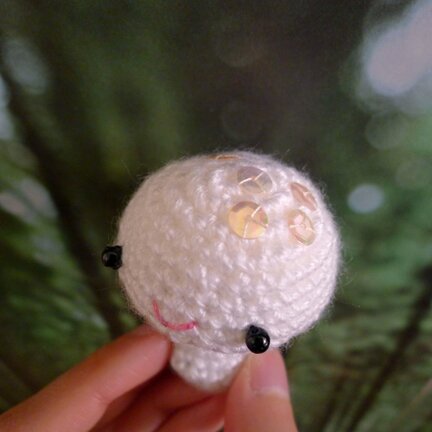
You may have noticed that my mush­room friends have appeared on the Etsy badge over on the right side­bar- they’re a cus­tom order for a very cre­ative bride-to-be :D And they’re going to be cake top­pers, along with oth­er cre­ations that the bride is going to make! I can’t wait to see what the fin­ished cake top­per (and the cake!) looks like :D

They may look plushy, but they’re actu­al­ly pret­ty hardcore.

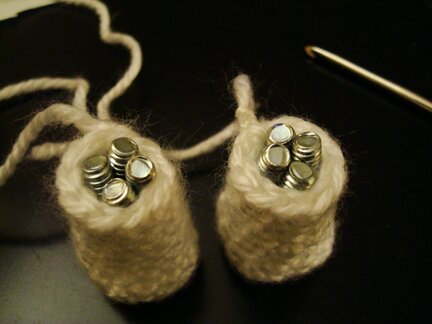
Well, that’s what a mush­room’s got­ta do when it’s going to be on its feet (foot?) all day! Yes, inside the mush­room stems are screws, and wash­ers at the bot­tom, so that they could stand on their own with­out tip­ping over.

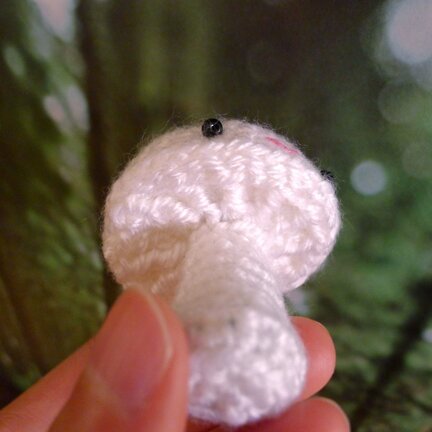
I also added gills…


And one mush­room has spark­ly sequins atop its head…


I love cus­tom orders. I love hear­ing the sto­ries behind the orders and I feel so hon­oured that my plush friends can be part of the sto­ry. And I’m just so excit­ed that the snow mush­rooms are going to be a part of a wed­ding! The orig­i­nal snow mush­rooms appear on snow days to spread hol­i­day cheers. I’ve asked these spe­cial top­per mush­rooms to spread wed­ding cheers and well wish­es at the recep­tion; I think they will do a good job :D

If you have some­thing in mind that I may be able to make for you, feel free to vis­it my shop or con­tact me, I’d love to chat!

Have a love­ly Wednesday!

go Plarny!


I spy… with my lit­tle eyes… some­thing white, with orange spots… and a long tail… and fins…

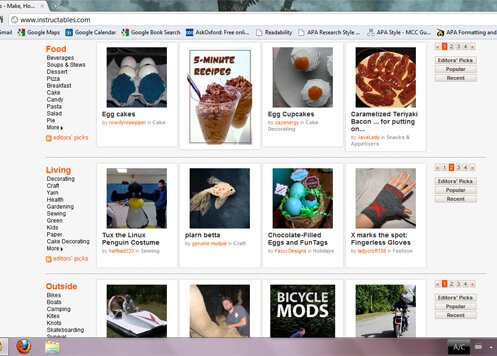
It’s my plarn bet­ta! On Instructa­bles’ home­page! :D Well, sort of. One has to go to page 2 of edi­tor’s pick in the “Liv­ing” sec­tion. But yes! Plarny is on the front page! :D

I wrote an Instructable for the plarn bet­ta main­ly because I felt bad about not con­tribut­ing any­thing since I signed up to enter the Crit­ter Con­test (for which I entered Marshie the Mon­ster­mal­low). That was about a year ago.

So I thought plarn bet­ta would be a pret­ty easy and quick Instructable to write (it’s pret­ty much the same as the blog post). Did not expect peo­ple to like it so much. It’s real­ly a rather sim­ple idea. You can vis­it Plarny on Instructa­bles here. And if you’re a “pro” mem­ber you can even down­load all the steps in one handy PDF!

Thank you for stop­ping by! And thank you so much for all your com­ments and shar­ing of cre­ative ideas for the plarn bet­ta! They real­ly made my day :D and giv­en me some ideas for what to make with plarn next… hmm.

Hap­py Tues­day everyone!

rainy day at the print shop

We vis­it­ed the Macken­zie House on the week­end. Nes­tled between office build­ings, right around the cor­ner from the busiest inter­sec­tion and shop­ping mall and flash­ing bill­boards is this small muse­um, for­mer home of the first may­or of Toron­to. Enter­ing the his­toric home is like trav­el­ling back through time and walk­ing into a com­plete­ly dif­fer­ent world — one of the things I find so incred­i­ble about the city.

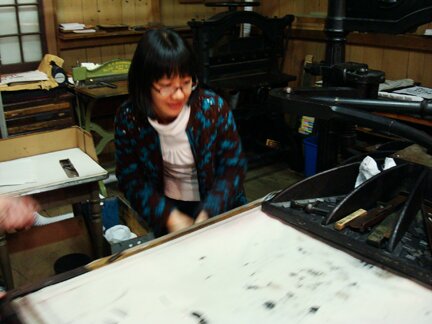
We want­ed to vis­it the home of William Lyon Macken­zie main­ly because of the muse­um’s peri­od print shop, with Mike’s pas­sion being typog­ra­phy, and mine being print­mak­ing (though, unlike Mike, who’s expert at typog­ra­phy, my print­mak­ing skills are mediocre at best. But that does­n’t stop me from lov­ing it!). There’s a print shop in the muse­um because Macken­zie, besides being the first may­or of the city and leader of the 1837 Upper Cana­da Rebel­lion, was also a news­pa­per editor.

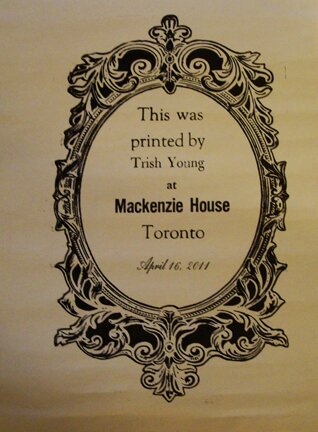
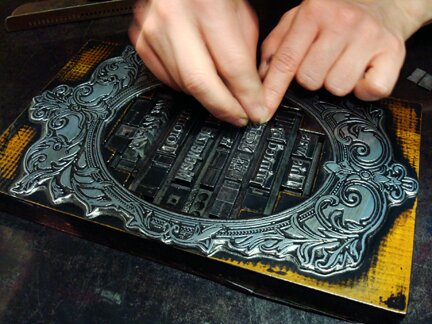
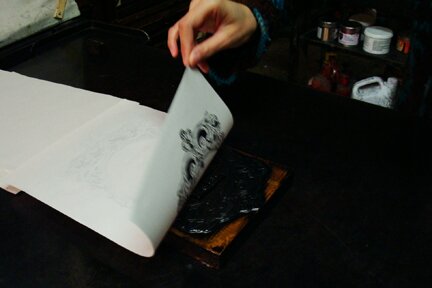
We had the chance to print our names on the beau­ti­ful 1845 print­ing press, which was in excel­lent con­di­tion and amaz­ing­ly easy to oper­ate. The muse­um staff who was demon­strat­ing the print­ing helped us set our names into the plate. She said this plate could have been used as a book cov­er in its time.


The smell of lith­o­g­ra­phy ink… sigh.


Moment of truth!


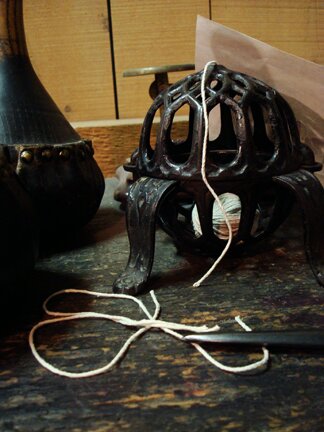
There was this love­ly cast iron cage-like con­tain­er hold­ing a ball of cot­ton twine. I think I can real­ly use one of these with my balls of yarn at home.


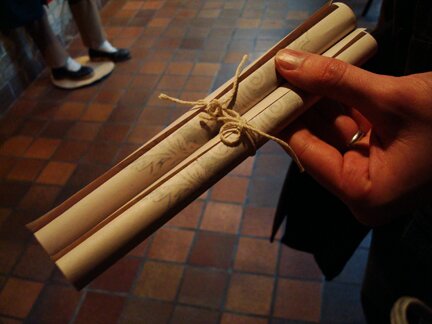
Our prints were lat­er giv­en to us rolled and tied up with string. That made my day.


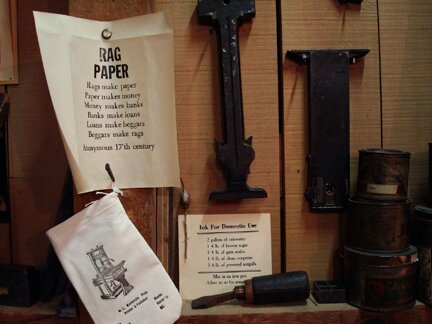
This quote made me smile.


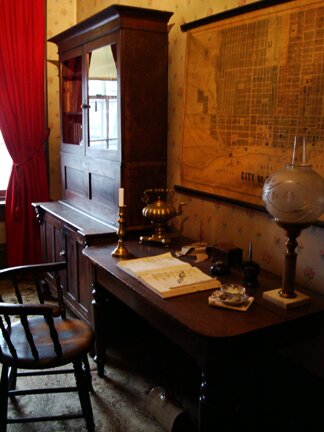
Macken­zie’s office, where he wrote the arti­cles for his news­pa­per, I imag­ine. And look! A map of the city. Leg­end has it that the Macken­zie house is haunt­ed by Macken­zie him­self, and he was heard work­ing at his print­ing press, and flush­ing toilets.


So, I was curi­ous, and a quick Google search yield­ed an inter­est­ing arti­cle about the Macken­zie House Leg­end, in which a long-time employ­ee revealed that (dun dun dun!) “in about 1960 the house had very low atten­dance. It wasn’t until the house was in dire finan­cial straits that the sto­ries of the ghosts first start­ed.” Anoth­er vol­un­teer chuck­led, “Peo­ple said they could hear ghosts using the print­ing press—but it’s a com­plete­ly silent machine. And flush­ing toi­lets? The Macken­zies didn’t have a toi­let. How would they know how to use one?”

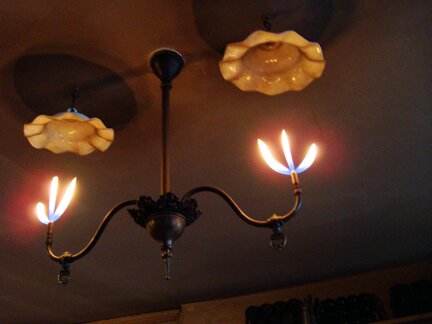
Any­way. I’m not one to eas­i­ly believe in ghost sto­ries, but I do like to look at old things and imag­ine how peo­ple used these things in the past and what their lives were like. I guess that’s why I was par­tic­u­lar­ly drawn to the kitchen, where the fam­i­ly spent most of their time. And I won­der why we don’t have beau­ti­ful gas lamp like this anymore.


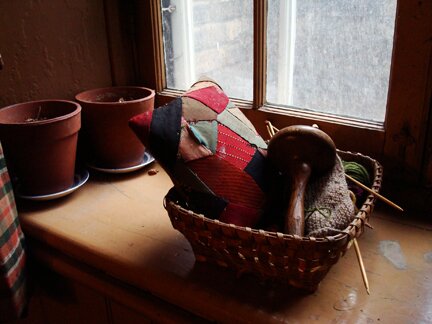
Found a bit of knit­ting on the win­dowsill :D


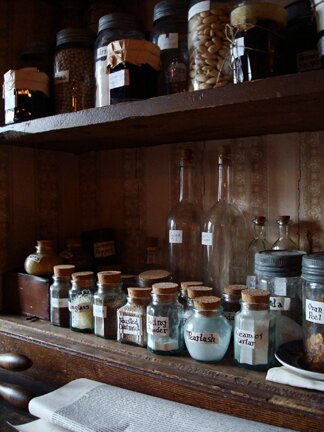
This is, in the tour guide’s words, a “full Vic­to­ri­an pantry”.


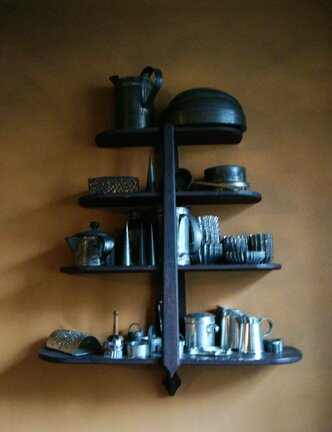
I real­ly like this shelf.


I like vis­it­ing small muse­ums like this one. It only takes sev­er­al hours to see, so I can still have the rest of the day to catch up on house­work or meet up with friends or what­ev­er. And unlike the large nation­al muse­ums the small ones are usu­al­ly not very busy, but are real­ly well-staffed with knowl­edge­able and enthu­si­as­tic tour guides and vol­un­teers. I’d love to be a muse­um vol­un­teer, so that I can dress up in peri­od cloth­ing. But I don’t think that I would be very con­vinc­ing, because a) I know near­ly noth­ing about Cana­di­an his­to­ry, and b) I’m Asian, I doubt that I’d look very con­vinc­ing as a pio­neer in Cana­da. Any­way, we do plan on vis­it­ing more of the local muse­ums when­ev­er we have the chance this spring and summer.

“Would­n’t it start to get expen­sive?” you might ask. Well, yes, most muse­ums in the city charge a fee, and they do add up. But if one lives in Toron­to, one could actu­al­ly get free muse­um pass­es with a Toron­to Pub­lic Library card. A lot of peo­ple I talked to did­n’t know about this, so I thought I would men­tion it here. One pass cov­ers up to two adults and four chil­dren! Def­i­nite­ly a great idea for a fam­i­ly day trip! Anoth­er rea­son to love the library! :D

Thank you for stop­ping by! Have a ter­rif­ic Monday!